XBAP is a very smart way to deploy full .NET Framework WPF applications in the browser. With .NET 3.5 and 4.0, that means MS Internet Explorer and Firefox. Of course, TX Spell .NET for WPF and the dictionaries can be deployed as part of an XBAP application as well. The following tutorial shows how to accomplish this task.
-
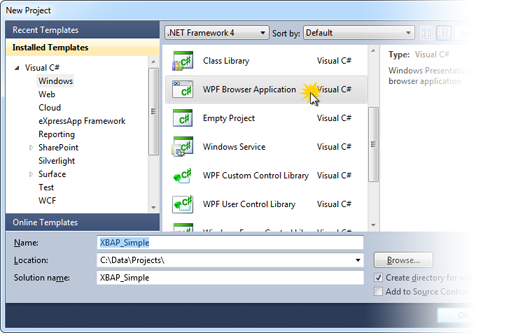
Start Visual Studio 2010 and create a new WPF Browser Application.
-
Build a TX Text Control based application by following this tutorial from the
TX Spell .NET for WPF documentation:Tutorial: Starting with Microsoft Visual Studio 2010 and TX Text Control
Ensure to add the TXSpellChecker component to the Page.Resources instead of the Window.Resources. An XBAP Browser Application has Pages and not Windows.
<Page.Resources>
  <spell:TXSpellChecker x:Key="txSpellChecker1"></spell:TXSpellChecker>
</Page.Resources>
Given that you created a running application with TX Text Control .NET for WPF and TX Spell .NET for WPF, follow these steps to finalize your XBAP deployable application.
-
Create a new folder by selecting the project in the Solution Explorer and choosing New Folder from the Project main menu. Name that new folder "Dictionaries".
-
Select this folder in the Solution Explorer and choose Add Existing Item... from the Project main menu. In the opened dialog, navigate to the Dictionaries folder of the TX Spell .NET for WPF installation path. The default path is:
C:\Program Files\Text Control GmbH\TX Spell 2.0 .NET for WPF\Assembly\Dictionaries
Select the dictionary files you want to deploy and confirm with Add.
-
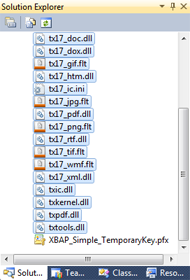
Select Add Existing Item... from the Project main menu. In the opened dialog, navigate to the TX Text Control installation folder, select all files from the Assembly\bin subfolder and confirm with Add. The default installation folder of TX Text Control can be found here:
C:\Program Files\Text Control GmbH\TX Text Control 17.0.NET for WPF\
-
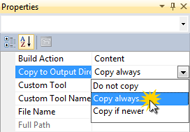
Select all newly added files (including the dictionaries) in the Solution Explorer and set the Build Action property to Content and the Copy to Output Directory to Copy always.
-
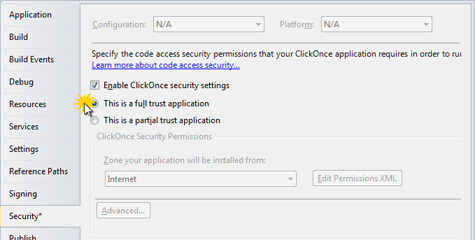
Now, open the Project Properties... by selecting the project in the Solution Explorer and clicking the appropriate menu item in the Project main menu. On the Security tab page, select "This is a full trust application".
-
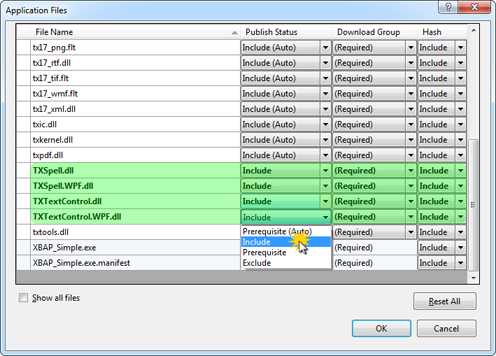
Open the Publish tab page and click on the Application Files button. Set the Publish Status of the TXSpell.dll, TXSpell.WPF.dll, TXTextControl.dll and TXTextControl.WPF.dll to Include and confirm with OK.
-
As the last step, select Publish [Projectname] from the Build main menu, follow the steps in the Publish Wizard and confirm with Publish.

