Prerequisites
There are two ways to evaluate the TX Text Control Document Viewer. You can either host your own backend by downloading the trial version of TX Text Control .NET Server for ASP.NET, or by creating a trial access token to use a hosted backend, valid for 30 days:
- Download Trial Version
Setup download and installation required.- Create Trial Access Token
No download and local installation required.
Creating your First Angular Application
This tutorial shows how to create your first Angular application using the TX Text Control document viewer.
Prerequisites
-
Create your free trial access token here:
-
Install Node.js® and npm, if not done before.
-
Open a Command Prompt and install the Angular CLI globally by typing in the following command:
npm install -g @angular/cli
This tutorial uses Visual Studio Code that can be downloaded for free.
Creating the Angular Project
-
Open a Command Prompt and create a new project and default app by typing in the following command:
ng new my-viewer-app
Follow the questions in the command prompt by answering them with "y" to add Angular routing and Enter to confirm CSS as your preferred stylesheet format.
-
Change into the created folder by typing in the following command:
cd my-viewer-app -
Install the TX Text Control document viewer package by typing in the following command:
ng add @txtextcontrol/tx-ng-document-viewer
Supported Angular Versions
Are you getting an error similar to this?
ERESOLVE unable to resolve dependency tree
You have two options here:
-
Please check the supported Angular versions of tx-ng-document-editor and downgrade Angular and the global Angular CLI version to a version that will satisfy the requirement.
-
Force the installation of the package. Read more about that here:
Document Editor and Viewer with Newer Versions of Angular CLI
-
-
Open this folder in Visual Studio Code by typing in the following command:
code . -
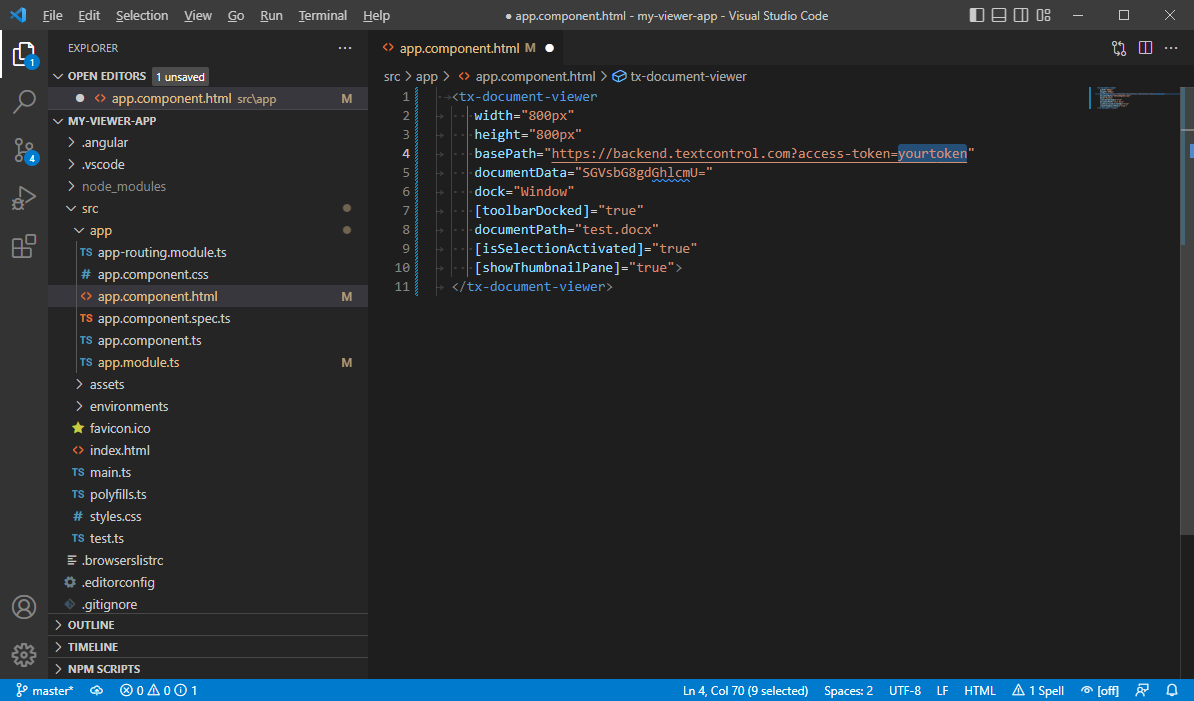
In Visual Studio Code, open the file src -> app -> app.component.html, add replace the complete content with the following code, replace yourtoken with your given Trial Access Token and save it:
This file contains bidirectional Unicode text that may be interpreted or compiled differently than what appears below. To review, open the file in an editor that reveals hidden Unicode characters. Learn more about bidirectional Unicode characters<tx-document-viewer width="800px" height="800px" basePath="https://backend.textcontrol.com?access-token=yourtoken" documentData="SGVsbG8gdGhlcmU=" dock="Window" [toolbarDocked]="true" documentPath="test.docx" [isSelectionActivated]="true" [showThumbnailPane]="true"> </tx-document-viewer> Backend Server
In the code above, a hosted demo backend server is used specified through the basePath property. If you are hosting your own required backend server, replace the URL with your backend endpoint.

-
Back in the command prompt, start the Angular application by typing in the following command:
ng serve --open
Next Steps
This quick start tutorial helped you to create your first Angular application using the TX Text Control Document Viewer. The following articles explain further steps that help to integrate the document viewer into your own infrastructure.
Signing Documents with the Angular DocumentViewer
The TX Text Control DocumentViewer for Angular can be used to request signatures for an electronic document signing process. This tutorial shows how to request a signature.
Building a ASP.NET Core Backend
TX Text Control for Angular requires a backend for the document editor and viewer. This step-by-step walkthrough shows how to create the ASP.NET Core backend.
JavaScript API Reference
In order to program the Angular Document Viewer, a JavaScript API is available. This API is compatible to all supported platforms including ASP.NET MVC, WebForms and Node.js.
Article Collection
To find more articles, samples and tutorials, please visit the Getting Started section.

