.NET Core 3.0 will be launched at .NET Conf, September 23-25th and the current version Preview 9 is the last preview before the final release. We tested our latest versions against this new framework and this article explains how to use TX Text Control .NET Server for ASP.NET in an ASP.NET Core 3 Web Application.
In order to create a .NET Core 3 application, you will need to download the .NET Core 3.0 SDK:
Visual Studio 2019 doesn't provide .NET Core 3.0 as a selectable target. Visual Studio 2019 Preview is required to create .NET Core 3.0 applications:
Visual Studio 2019 Preview Release Notes
Why Is .NET 3.0 Supported and Not .NET 2.1?
Word processing is a complex task and requires some high-performance modules which are written in C++. Finally, the .NET Core 3.0 runtime added support for IJW C++/CLI on Windows that makes .NET Core 3.0 a usable target for TX Text Control applications running on Windows.
Additionally, the official package System.Drawing.Common from Microsoft provides access to GDI+ graphics functionality which is required in TX Text Control applications.
Creating the Application
The following tutorial shows how to create an ASP.NET Core 3 Web Application that can be deployed to Windows machines.
-
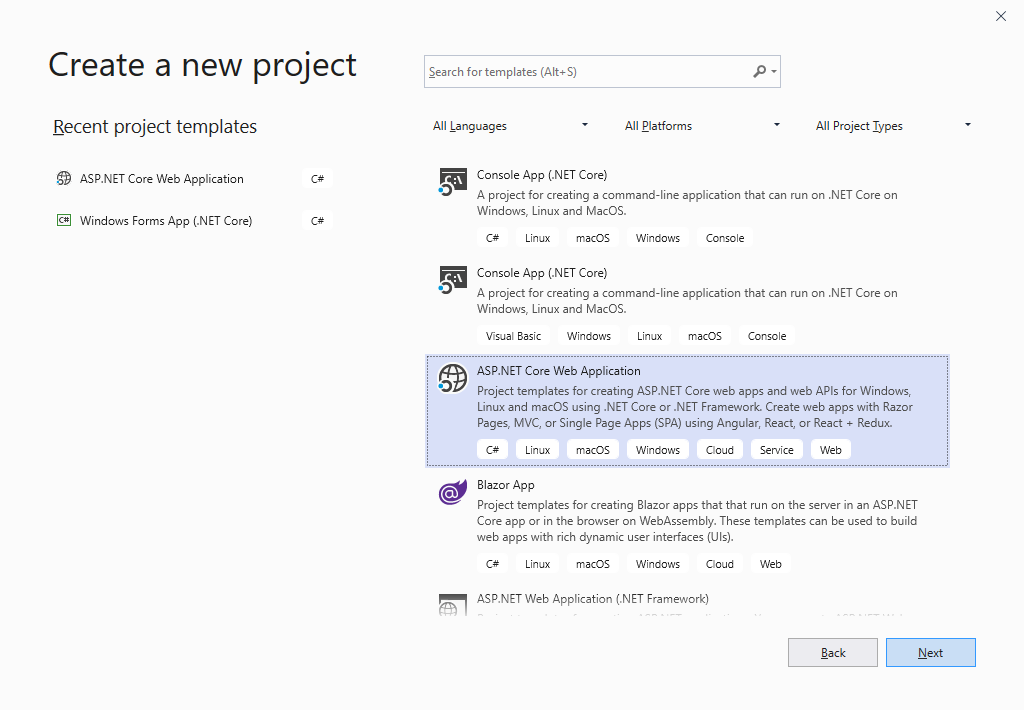
In Visual Studio 2019 Preview, create a new project and select ASP.NET Core Web Application as the project template.

-
Select a project name, location and solution name in the next dialog and confirm with Create.
-
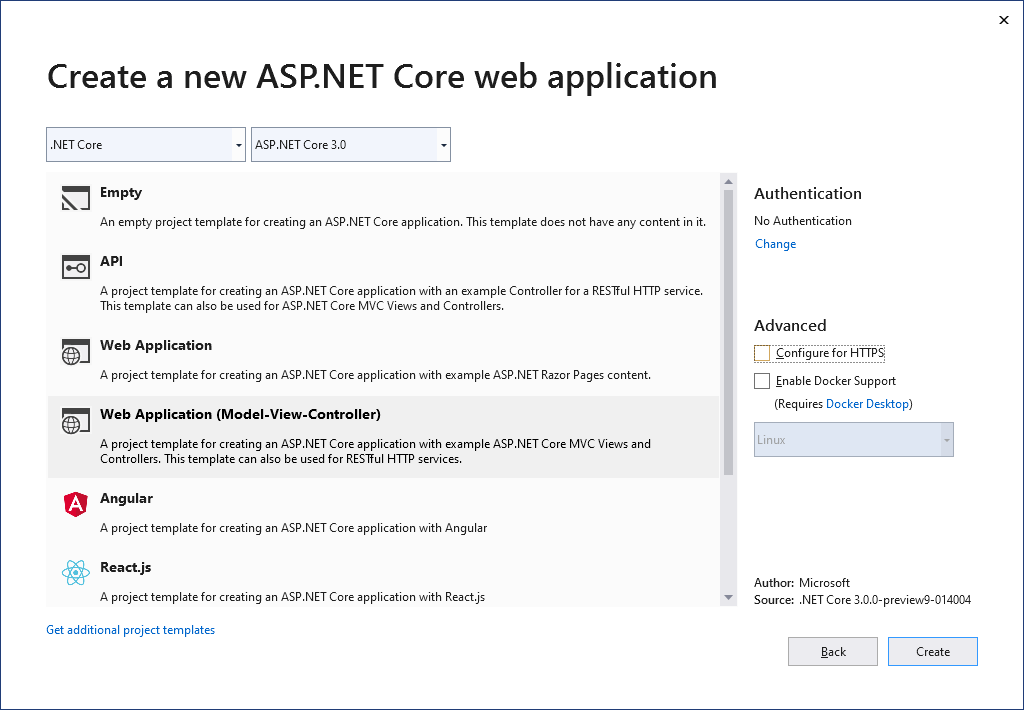
In the last dialog, select .NET Core and ASP.NET Core 3.0 as the project target, select Web Application (Model-View-Controller) as the template and confirm with Create.

-
Open the Package Manager Console by choosing Package Manager Console from the Tools -> NuGet Package Manager main menu and type in the following command to install the System.Drawing.Common package:
PM> Install-Package System.Drawing.Common
-
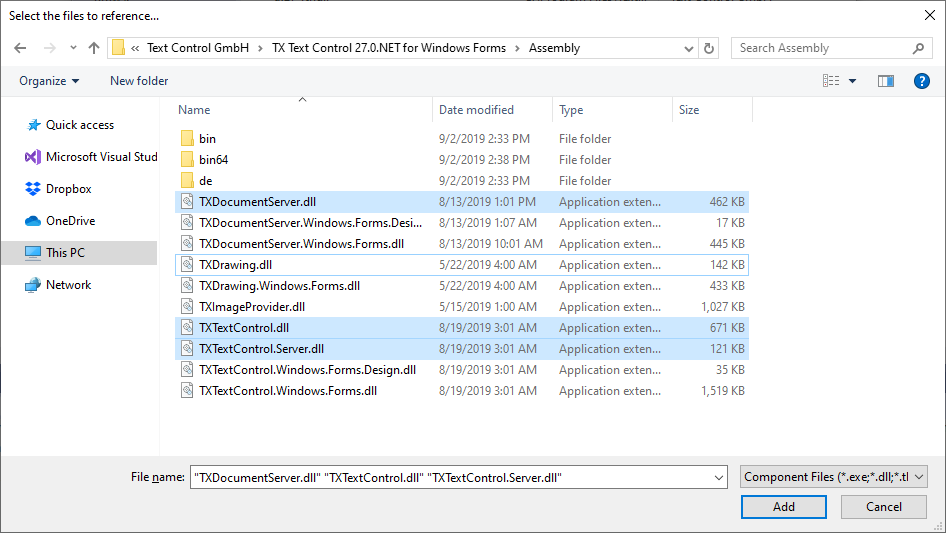
While the project is selected in the Solution Explorer, choose Project -> Add Reference... to open the Reference Manager. In the opened dialog, select Browse... to select the required TX Text Control assemblies. Navigate to the installation folder of TX Text Control and select the following assemblies from the Assembly folder:
- TXDocumentServer.dll
- TXTextControl.dll
- TXTextControl.Server.dll

Repeat this step with the following assemblies from the Assembly/bin64 folder:
- txic.dll
- txkernel.dll
- txtools.dll
After selecting these assemblies, close the Reference Manager by confirming with OK.
-
While the project is selected in the Solution Explorer, choose Project -> Add Existing Item.... Browse to the TX Text Control installation folder and select the following files from the Assembly/bin64:
- tx27_xml.dll
- tx27_css.dll
- tx27_doc.dll
- tx27_dox.dll
- tx27_htm.dll
- tx27_pdf.dll
- tx27_rtf.dll
- tx27_xlx.dll
-
Select the files from step 6 in the Solution Explorer and set the Copy to Output Directory to Copy always.
-
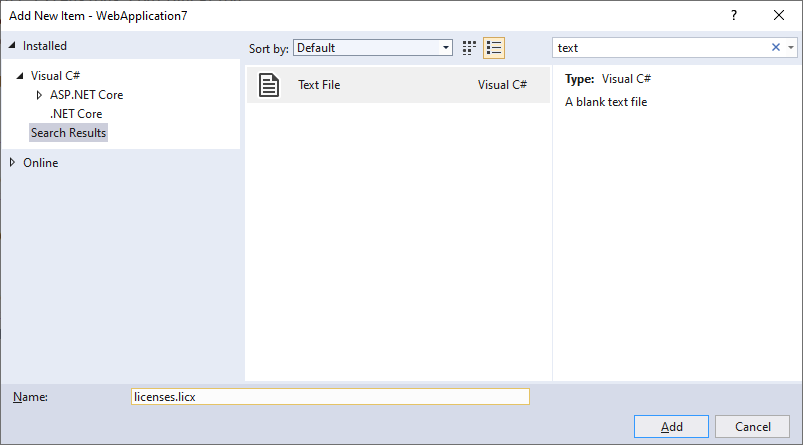
While the project is selected in the Solution Explorer, choose Project -> Add New Item.... Select Text File, name the file licenses.licx and close the dialog by clicking Add.

Open the newly added file and add the following content:
This file contains bidirectional Unicode text that may be interpreted or compiled differently than what appears below. To review, open the file in an editor that reveals hidden Unicode characters. Learn more about bidirectional Unicode charactersTXTextControl.ServerTextControl, TXTextControl.Server, Culture=neutral, PublicKeyToken=6b83fe9a75cfb638 Set the Build Action property to Embedded Resource.
In case, you are getting compile errors (MSB6003 The specified task executable "lc.exe" could not be run.), please refer to this article:
Now, you can use ServerTextControl and MailMerge in your .NET Core 3 Web Application:
| public IActionResult Index() | |
| { | |
| using (TXTextControl.ServerTextControl tx = new TXTextControl.ServerTextControl()) | |
| { | |
| tx.Create(); | |
| // ... | |
| } | |
| return View(); | |
| } |


