Sneak Peek 31.0
This article, part of a series, describes upcoming features that will be part of the next version of TX Text Control. A release date is not known yet and will be announced separately.
TX Text Control .NET Server for ASP.NET provides all required components to request electronic signatures from users. This article describes a complete typical workflow including document preparation, signature acquisition and the digital signing of the resulting document.
Preparing the Document
The TX Text Control document editor - available for ASP.NET (Core), Windows Forms and WPF - can be used to prepare a document to request signatures. The TXTextControl.SignatureField class represents a signature field in a document. It is a frame object with additional data such as the SignerData (address, contact info, name, reason, title) and a name property that is used by the document viewer for the signature acquisition.
-
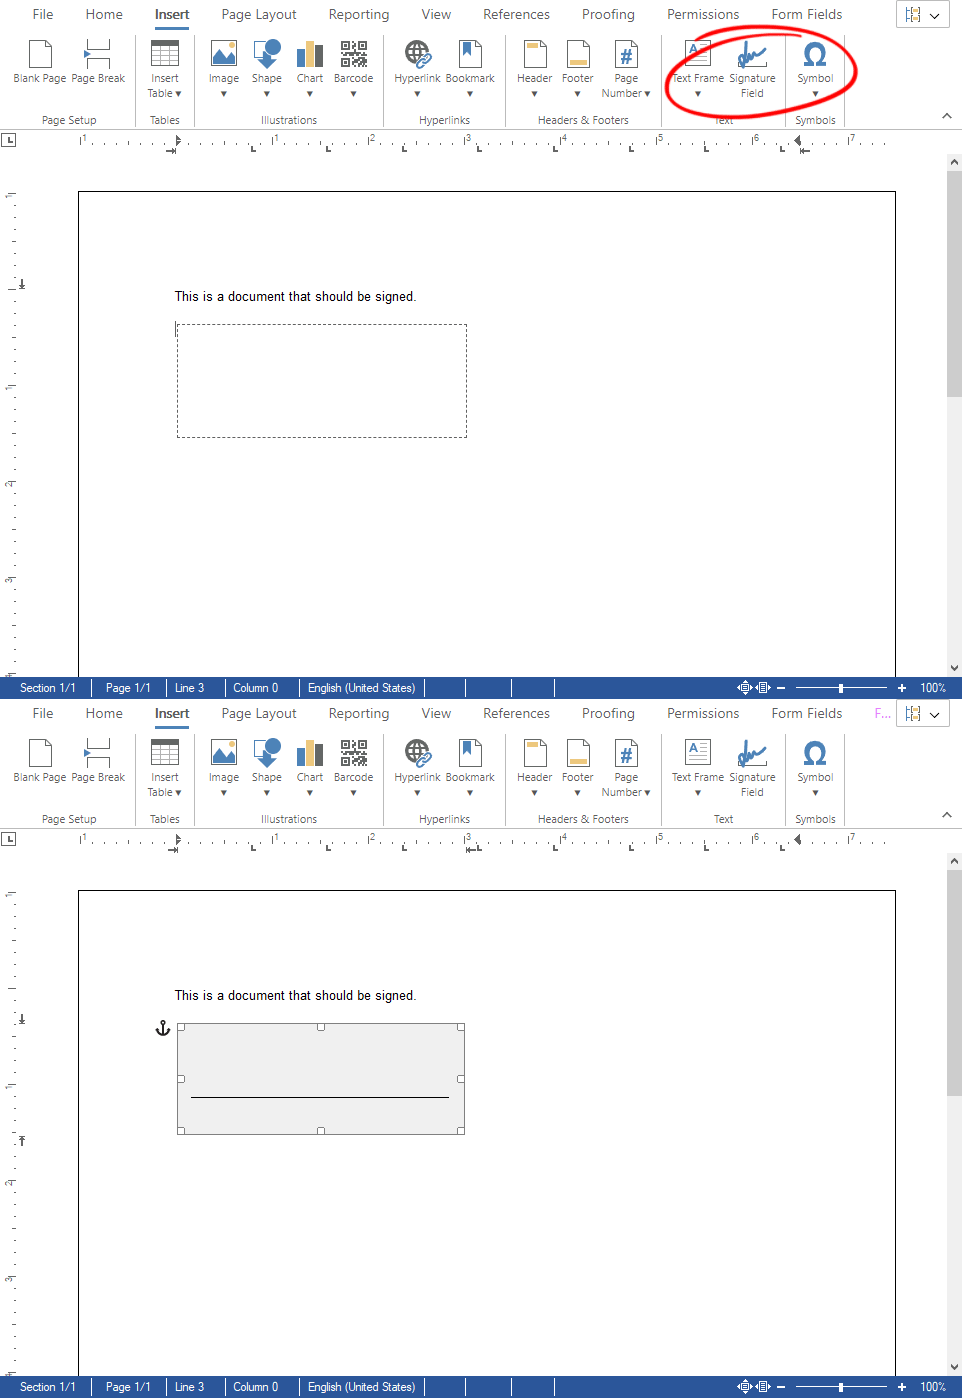
To insert a new signature field, use the Signature Field button in the Insert ribbon tab.

-
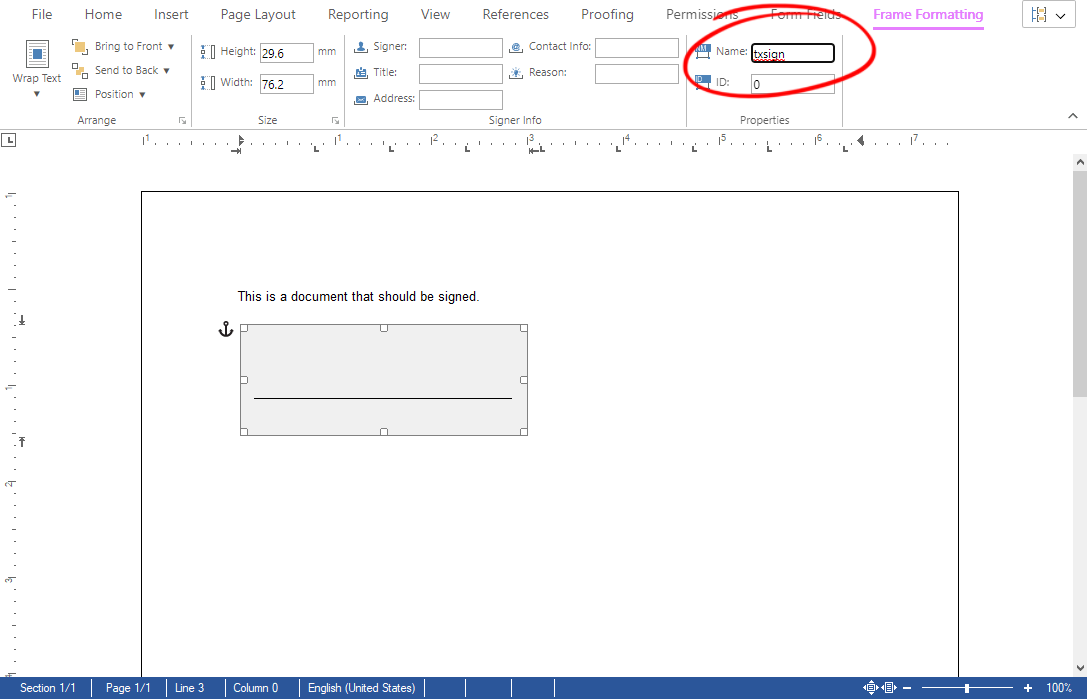
Select the signature field and open the Frame Formatting contextual ribbon tab. Find the Name input field and type in a name for the signature field. For this sample workflow, type in the name txsign.

-
Insert a second signature field into the document and name this field txsign_init.
-
Save this document using the internal TX Text Control format (StreamType.InternalUnicodeFormat) and name this document signature.tx.
Deploying the Document
To deploy the document, the TX Text Control document viewer can be used.
Getting Started
This article describes the workflow using the different components.
Refer to the documentation or the Getting Started tutorials to learn how to setup an application using the document viewer.
-
Create an ASP.NET (Core) application that uses the document viewer and use the following settings in the MVC Html helper:
This file contains bidirectional Unicode text that may be interpreted or compiled differently than what appears below. To review, open the file in an editor that reveals hidden Unicode characters. Learn more about bidirectional Unicode characters@Html.TXTextControl().DocumentViewer(settings => { settings.DocumentPath = Server.MapPath("~/App_Data/signature.tx"); settings.Dock = DocumentViewerSettings.DockStyle.Fill; settings.IsSelectionActivated = false; settings.ShowThumbnailPane = true; settings.SignatureSettings = new SignatureSettings() { ShowSignatureBar = true, OwnerName = "Paul Paulsen", SignerName = "Tim Typer", SignerInitials = "TT", UniqueId = uniqueID, RedirectUrlAfterSignature = this.Url.Action("SignDocument", "Signature", null, Request.Url.Scheme, null), SignatureBoxes = new SignatureBox[] { new SignatureBox("txsign") { SigningRequired = true, Style = SignatureBox.SignatureBoxStyle.Signature }, new SignatureBox("txsign_init") { SigningRequired = true, Style = SignatureBox.SignatureBoxStyle.Initials }} }; }).Render() The following table lists the used SignatureSettings in the above MVC Html helper code.
Setting Value description ShowSignatureBar Specifies whether to show the blue signature bar on opening the document. OwnerName The name of the signature requester that is displayed in the signature bar. SignerName The name of the signer that is displayed in the "Setup your Signature" dialog. SignerInitials The initials of the signer that is displayed in the "Setup your Signature" dialog. UniqueId A unique ID that is included in the graphical representation of the electronic signature. RedirectUrlAfterSignature An Url that provides an endpoint to accept the signed document and signature data. SignatureBoxes An array of SignatureBoxes to define which signature fields should be used based on the given name. Additionally, the style of the signature box can be provided. -
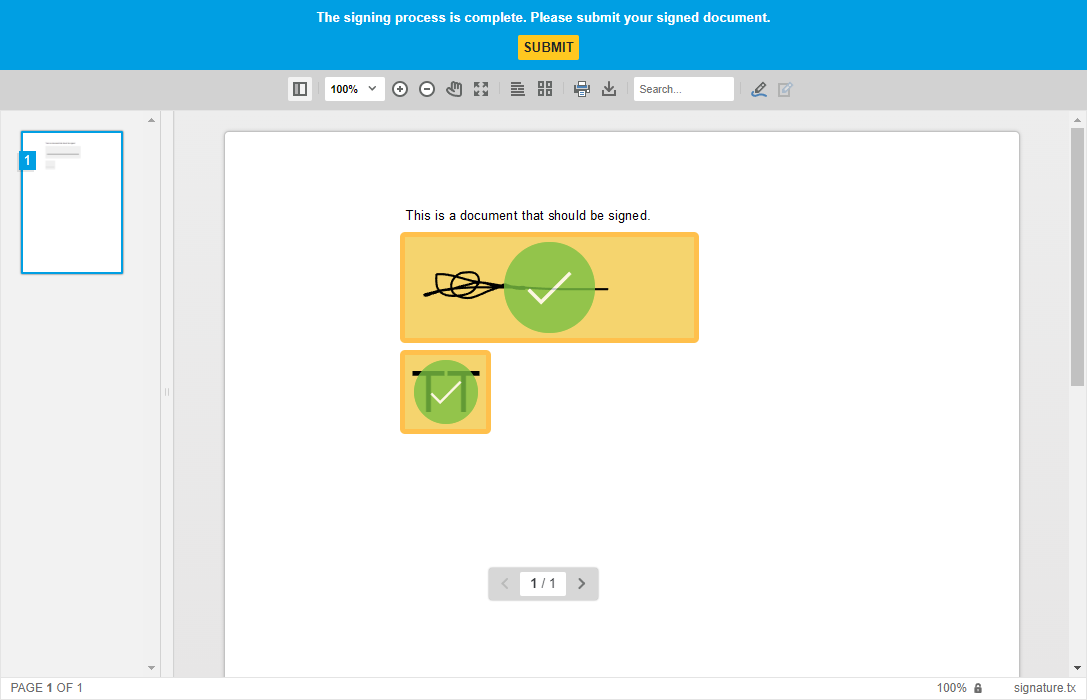
After starting your application, you can setup a signature and sign the signature fields. Pay attention to the second field that has been created as an Initials field using the given SignatureBoxes array in the SignatureSettings.

Processing and Signing the Document
The document viewer is forwarding an electronically signed document to the given endpoint (provided by the RedirectUrlAfterSignature property in the SignatureSettings). All signature images are merged into the selected signed signature fields (using the SignatureBoxes array in the SignatureSettings). This document is forwarded to the given endpoint including a complete SignatureData object that holds the document, the signature images and additional data such as completed form fields.
| public class SignatureData { | |
| public SignatureDocument SignedDocument { get; set; } | |
| public string DocumentName { get; set; } | |
| public string SignatureImage { get; set; } | |
| public string Name { get; set; } | |
| public string Initials { get; set; } | |
| public double InitialsWidth { get; set; } | |
| public string UniqueId { get; set; } | |
| public string SignatureBoxName { get; set; } | |
| public SignatureBox[] SignatureBoxes { get; set; } | |
| public string DocumentData { get; set; } | |
| public object CustomSignatureData { get; set; } | |
| public List<CompletedFormField> FormFields { get; set; } = new List<CompletedFormField>(); | |
| public string RedirectUrl { get; set; } | |
| public bool CustomSigning { get; set; } | |
| } |
In case, you only need an electronically signed document, you don't have to implement the following step. The returned document already contains all merged signature images. But if you want to assign a digital signature to the signature fields, the following controller method must be implemented.
-
Create an HttpPost endpoint that handles the signature document.
This file contains bidirectional Unicode text that may be interpreted or compiled differently than what appears below. To review, open the file in an editor that reveals hidden Unicode characters. Learn more about bidirectional Unicode characters[HttpPost] public string SignDocument() { // read the payload Stream inputStream = Request.InputStream; inputStream.Position = 0; StreamReader str = new StreamReader(inputStream); string sBuf = str.ReadToEndAsync().Result; // retrieve the signature data from the payload TXTextControl.Web.MVC.DocumentViewer.Models.SignatureData data = JsonConvert.DeserializeObject <TXTextControl.Web.MVC.DocumentViewer.Models.SignatureData>(sBuf); byte[] bPDF; // create temporary ServerTextControl using (TXTextControl.ServerTextControl tx = new TXTextControl.ServerTextControl()) { tx.Create(); // load the document tx.Load(Convert.FromBase64String(data.SignedDocument.Document), TXTextControl.BinaryStreamType.InternalUnicodeFormat); // create a certificate X509Certificate2 cert = new X509Certificate2( Server.MapPath("~/App_Data/textcontrolself.pfx"), "123"); // assign the certificate to the signature fields TXTextControl.SaveSettings saveSettings = new TXTextControl.SaveSettings() { CreatorApplication = "TX Text Control Sample Application", SignatureFields = new DigitalSignature[] { new TXTextControl.DigitalSignature(cert, null, "txsign"), new TXTextControl.DigitalSignature(cert, null, "txsign_init")} }; // save the document as PDF tx.Save(out bPDF, TXTextControl.BinaryStreamType.AdobePDFA, saveSettings); } // return as Base64 encoded string return Convert.ToBase64String(bPDF); }
In line 24, the signed document is loaded into an instance of Server
╰ TXTextControl Namespace
╰ ServerTextControl Class
The ServerTextControl class implements a component that provide high-level text processing features for server-based applications. . An X509Certificate2 is created from a PFX file that is then assigned to the signature fields txsign and txsign_init. Eventually, the document is exported and returned as a PDF/A document. At this point, you can store the document server-side, return it to the client or whatever is required in your specific workflow.
Checking the Signatures
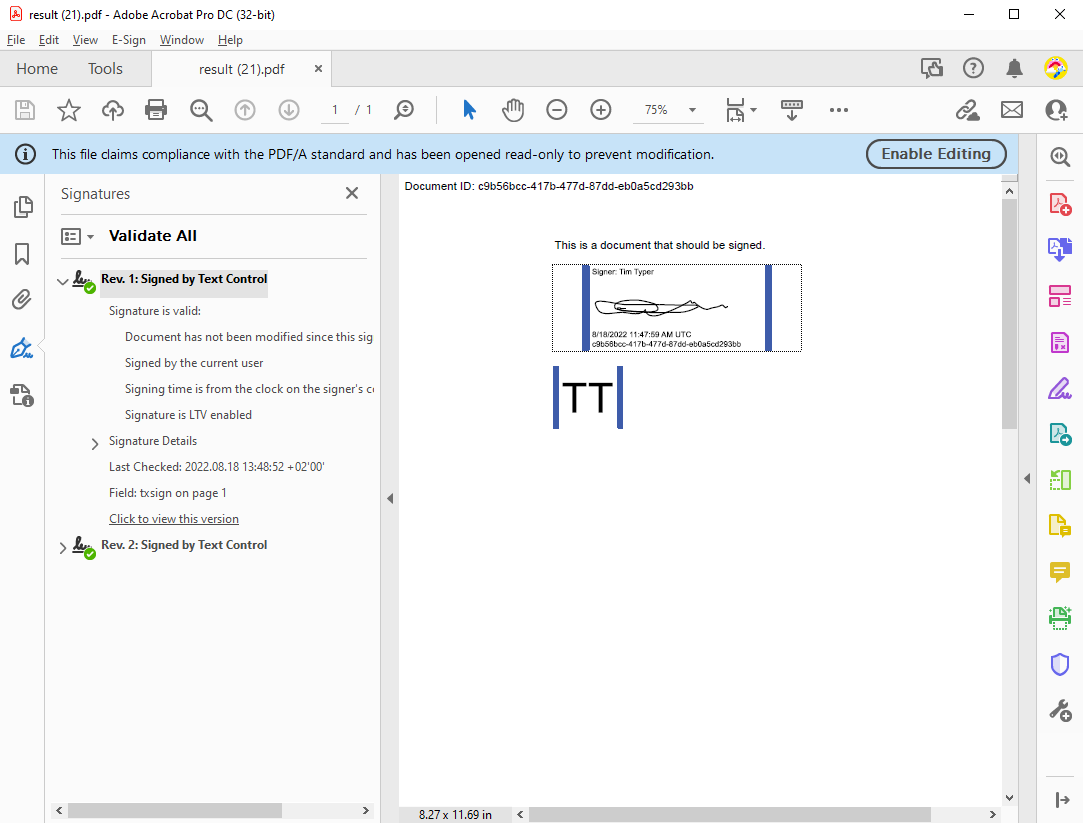
When opening the resulting document in Adobe Acrobat Reader, you can see the visual representations of the signature fields and the signature details in the Signatures sidebar:


