Software workflow automation allows an ongoing and continuous monitoring throughout the development, code review, branch management and deployment of software projects. GitHub Actions provide automation workflows controlled directly in your GitHub repositories.
Similar to other CI/CD build servers, there are additional steps required to compile applications that use TX Text Control. This article explains how to setup an ASP.NET Core Web Application that can be compiled within GitHub Actions.
Creating the Application
Make sure that you downloaded the latest version of Visual Studio 2022 that comes with the .NET 6 SDK.
-
In Visual Studio 2022, create a new project by choosing Create a new project.
-
Select ASP.NET Core Web App (Model-View-Controller) as the project template and confirm with Next.
-
Choose a name for your project and confirm with Next.
-
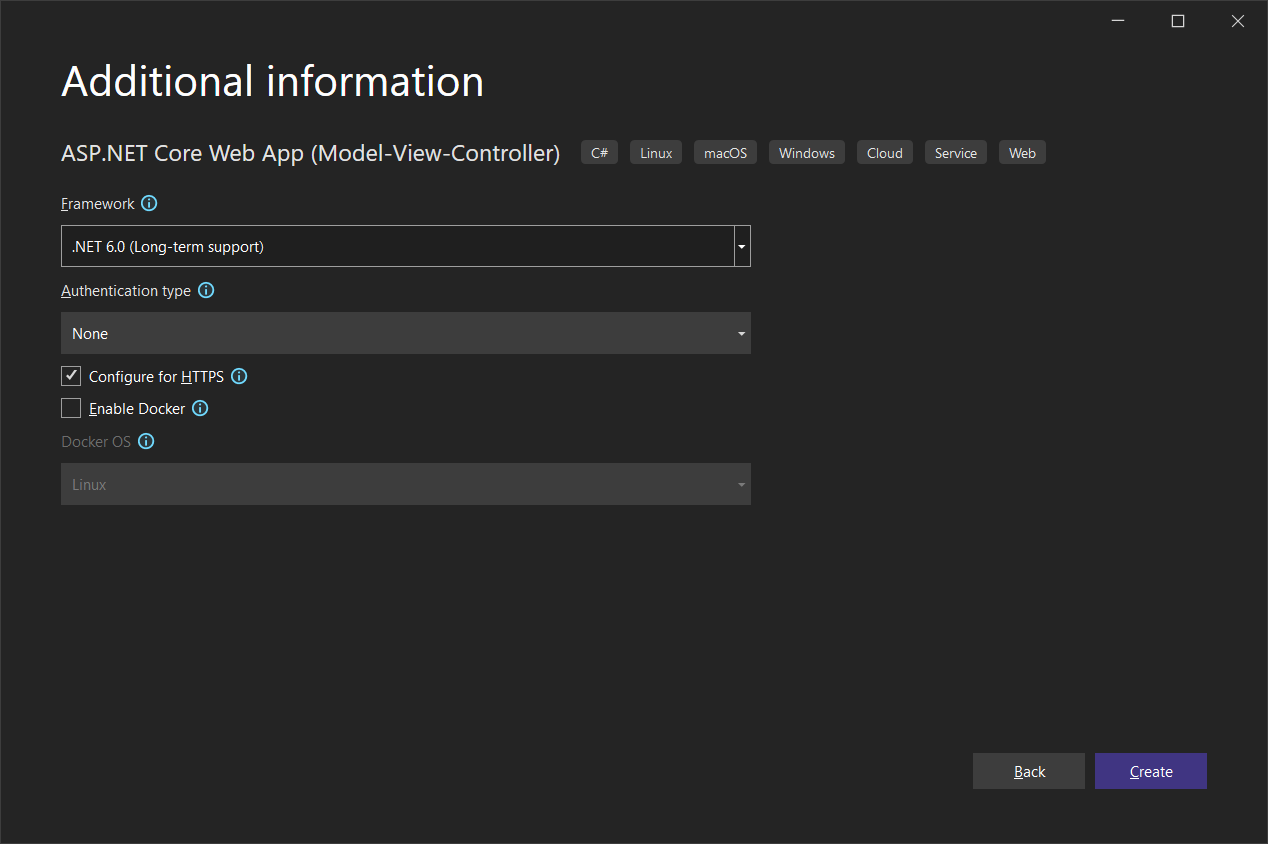
In the next dialog, choose .NET 6 (Long-term support) as the Framework and confirm with Create.
Adding TX Text Control References
-
While the project is selected in the Solution Explorer, choose Project -> Add Project Reference... to open the Reference Manager. In the opened dialog, select Browse... to select the required TX Text Control assemblies. Navigate to the installation folder of TX Text Control and select the following assemblies from the Assembly folder:
- TXDocumentServer.dll
- TXTextControl.dll
- TXTextControl.Server.dll
Repeat this step with the following assemblies from the Assembly/bin64 folder:
- txic.dll
- txkernel.dll
- txtools.dll
After selecting these assemblies, close the Reference Manager by confirming with OK.
Adding Dependency Files
-
While the project is selected in the Solution Explorer, choose Project ->Add Existing Item..., navigate to the TX Text Control installation folder and add the following files from the Assembly folder:
- TXDocumentServer.dll
- TXTextControl.dll
- TXTextControl.Server.dll
Repeat this step with the following files from the Assembly/bin64 folder:
- txic.dll
- txkernel.dll
- txtools.dll
- tx30_css.dll
- tx30_doc.dll
- tx30_dox.dll
- tx30_htm.dll
- tx30_pdf.dll
- tx30_rtf.dll
- tx30_xlx.dll
- tx30_xml
-
While the project is selected in the Solution Explorer, choose Project -> Add New Item.... Select Text File, name the file licenses.licx and close the dialog by clicking Add.
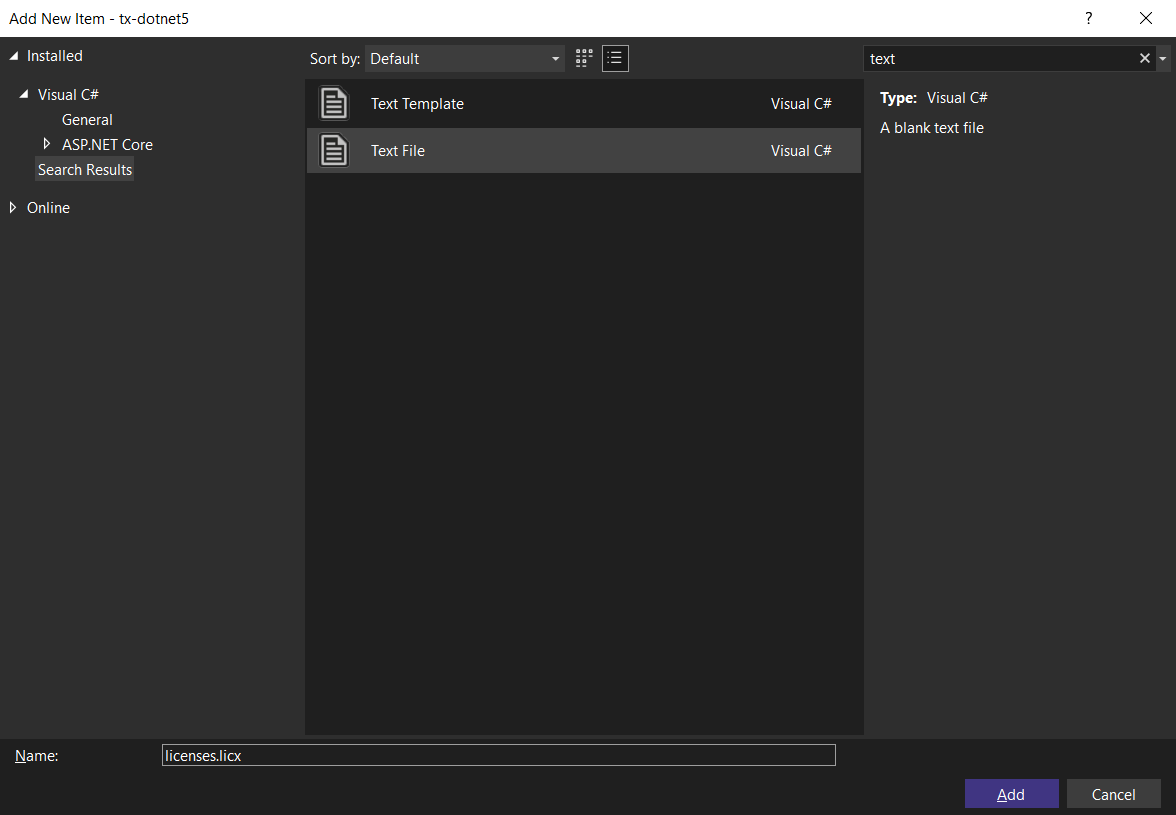
Open the newly added file and add the following content:
This file contains bidirectional Unicode text that may be interpreted or compiled differently than what appears below. To review, open the file in an editor that reveals hidden Unicode characters. Learn more about bidirectional Unicode charactersTXTextControl.ServerTextControl, TXTextControl.Server, Version=30.0.1500.500, Culture=neutral, PublicKeyToken=6b83fe9a75cfb638 Set the Build Action property to Embedded Resource.
-
Select the project in the Solution Explorer and choose Edit Project File from the Project main menu. Find the PropertyGroup entry and replace the whole node with the following code:
This file contains bidirectional Unicode text that may be interpreted or compiled differently than what appears below. To review, open the file in an editor that reveals hidden Unicode characters. Learn more about bidirectional Unicode characters<PropertyGroup> <TargetFramework>net6.0</TargetFramework> <EnableUnsafeBinaryFormatterSerialization>true</EnableUnsafeBinaryFormatterSerialization> <EnableUnsafeBinaryFormatterInDesigntimeLicenseContextSerialization>true</EnableUnsafeBinaryFormatterInDesigntimeLicenseContextSerialization> <ImplicitUsings>enable</ImplicitUsings> <Nullable>enable</Nullable> </PropertyGroup> BinaryFormatter Information
The above setting is required to enable the obsolete .NET BinaryFormatter while compiling the license into the assembly. We are working with Microsoft to avoid this requirement in the near future.
- Select Build Solution from Build main menu.
Embedding the License
GitHub uses the .NET Core version of MSBuild that doesn't support the task "LC". Therefore, the pre-compiled license must be embedded.
-
In the Solution Explorer, select the project and choose Add Existing Item... from the Project main menu. Browse for the namespace.dll.licenses file in the \obj\Debug\net6.0\ folder. This is the pre-compiled license that will be compiled into the assembly resources.
Select the file and confirm with Add.
Learn More
This license file can be also manually created using lc.exe. Learn more about this in the following article.
-
In the Solution Explorer, select this file, press F2 to rename it to dll.licenses.
-
Set the Build Action of this file to Embedded resource.
-
Find the licenses.licx in the Solution Explorer and remove it again from the project. The license is now pre-compiled and will be manually embedded into the resources.
Creating the Action
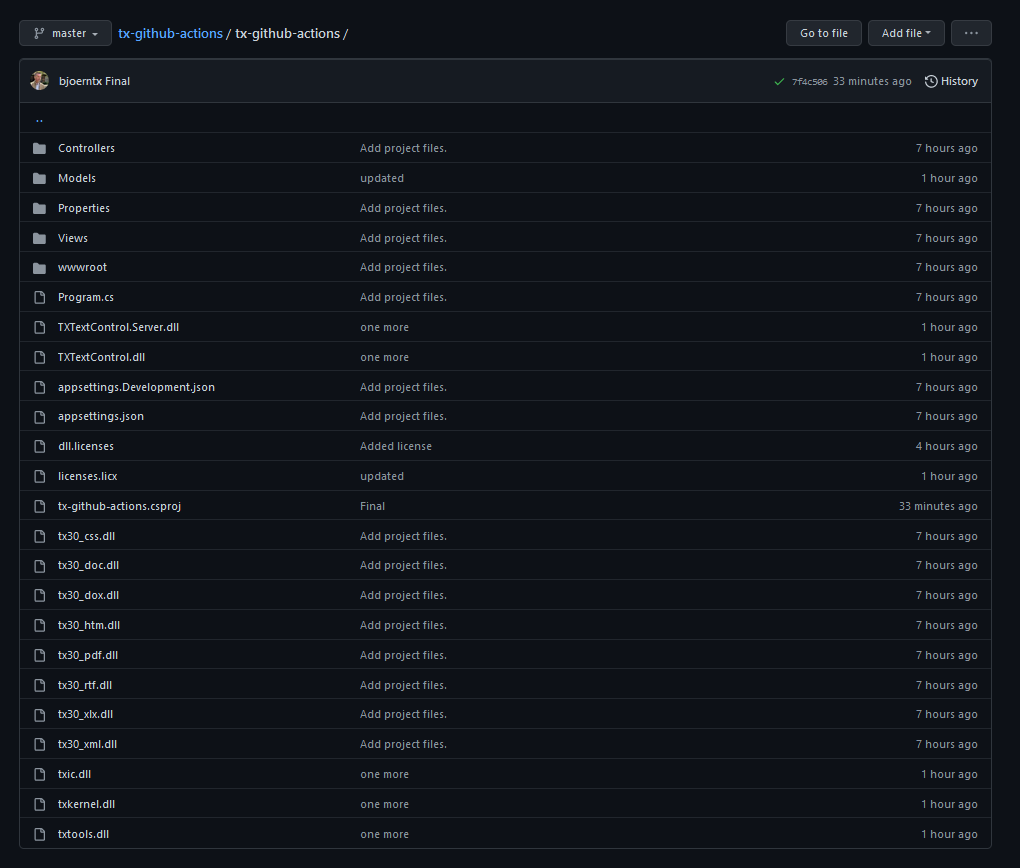
After the project is added as a repository in GitHub, make sure that all included files are available. GitHub requires the TX Text Control dependencies to be able to build the project in GitHub Actions.
-
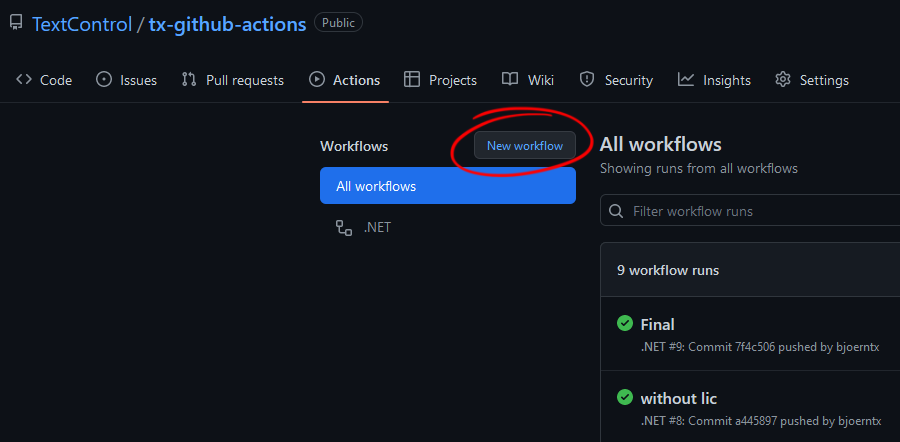
In the GitHub repository, open Actions and choose New workflow.
-
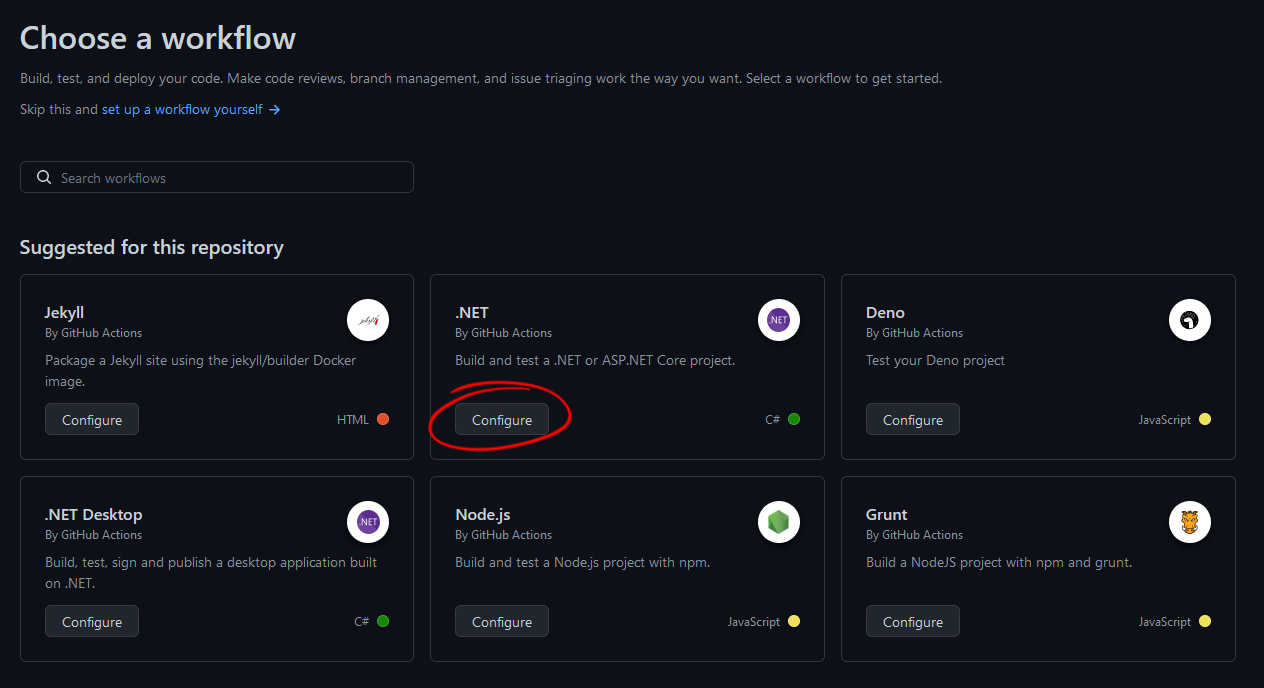
From the suggested workflows, choose .NET and click Configure.
-
The new YAML file dotnet.yml is created in the /.github/workflows/ folder and opened in the integrated editor. Change the entry for runs-on to windows-latest and dotnet-version to 6.0.x. The dotnet.yml should look similar to this:
This file contains bidirectional Unicode text that may be interpreted or compiled differently than what appears below. To review, open the file in an editor that reveals hidden Unicode characters. Learn more about bidirectional Unicode charactersname: .NET on: push: branches: [ "master" ] pull_request: branches: [ "master" ] jobs: build: runs-on: windows-latest steps: - uses: actions/checkout@v3 - name: Setup .NET uses: actions/setup-dotnet@v2 with: dotnet-version: 6.0.x - name: Restore dependencies run: dotnet restore - name: Build run: dotnet build --no-restore - name: Test run: dotnet test --no-build --verbosity normal After making these changes, click Start commit to commit these changes.
When the file has been committed successfully, the new workflow will be listed as an available workflow:
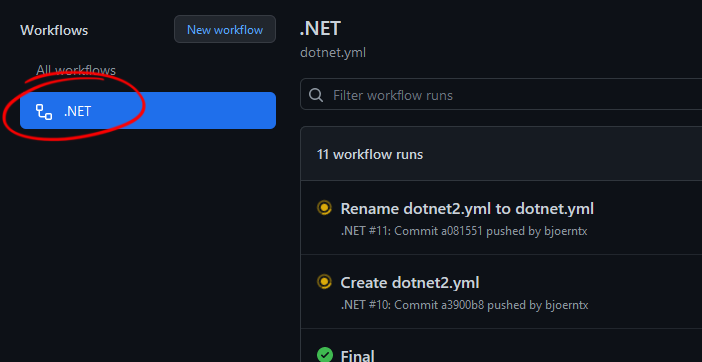
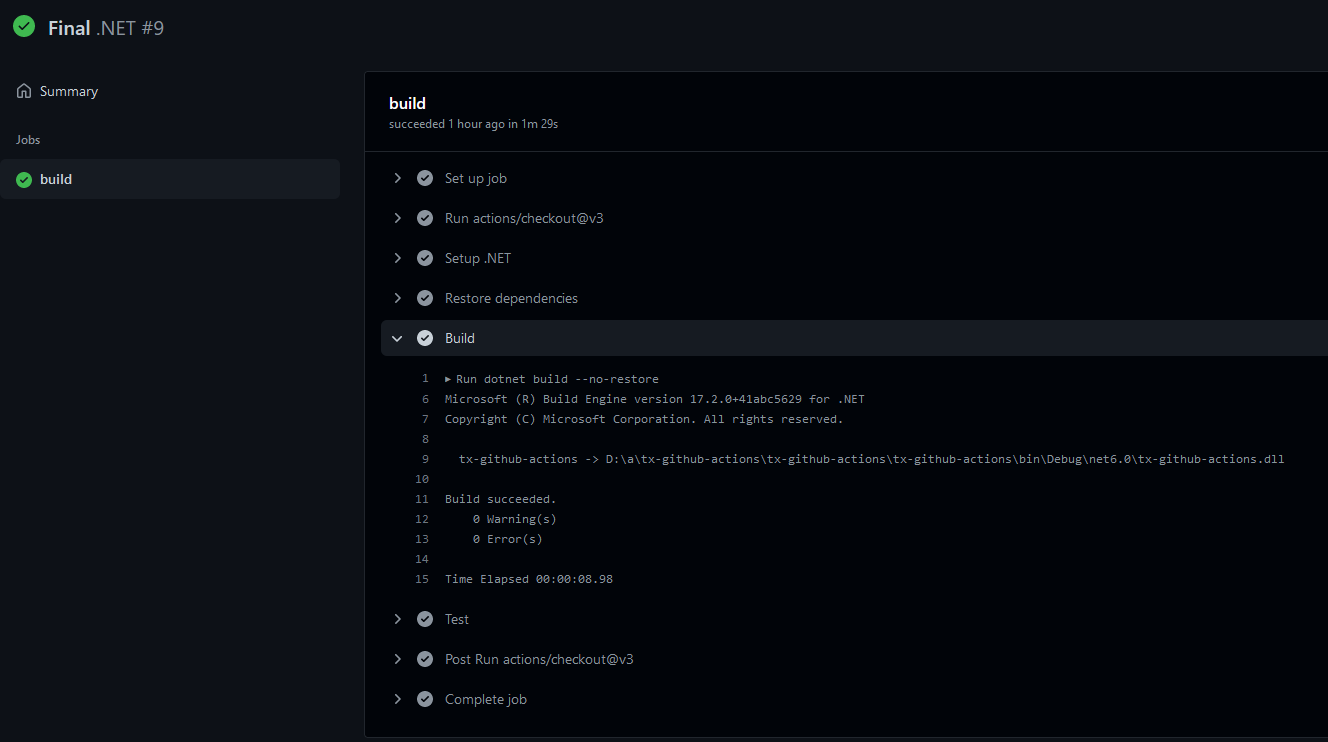
Now, every time the repository changed (after a successful push for example), this workflow will be executed. The following screenshot shows a successful execution.
