Using TX Text Control in an ASP.NET Core Blazor Server App
This tutorial shows how to use the Document Editor of TX Text Control .NET Server in a Blazor Server App. It uses the JSRuntime and DotNetObjectReference classes to communicate between the editor and the server-side ServerTextControl class in .NET code.

Using .NET 8?
This tutorial shows how to create a Blazor Server App with .NET 6. Follow the steps in the following tutorial if you are using .NET 8.
ASP.NET Blazor enables .NET developers to use C# to build rich web applications with less JavaScript. In reality, many applications use JavaScript to communicate between the local JavaScript layer and C# objects because JavaScript has direct access to the HTML DOM.
By creating a Razor component using Interop JavaScript, the TX Text Control Document Editor can be integrated and initialized in Blazor. This sample uses the JSRuntime and DotNetObjectReference classes to communicate between the editor and the server-side ServerTextControl class in .NET code.
Data Flow
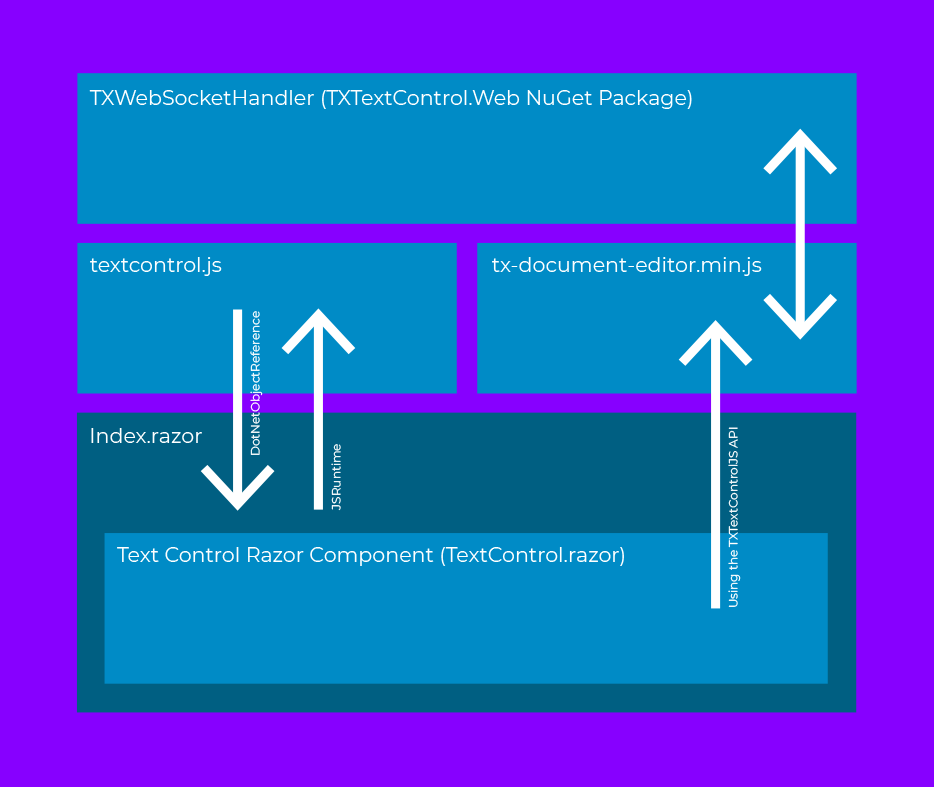
The diagram below is an illustration of the data flow in this concept. The Text Control Razor component dynamically adds the TX Text Control Document Editor to the page by initializing it with JavaScript. The JSRuntime is used to create an object reference to the created JavaScript file. This object reference calls the JavaScript API of the TX Text Control.
Creating the Application
Make sure that you downloaded the latest version of Visual Studio 2022 that comes with the .NET 6 SDK.
-
In Visual Studio 2022, create a new project by choosing Create a new project.
-
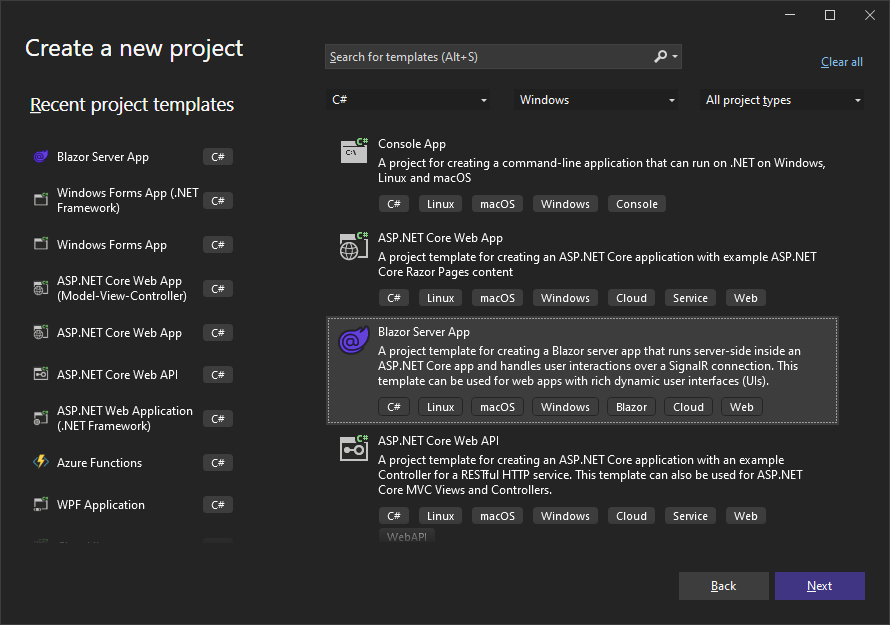
Select Blazor Server App as the project template and confirm with Next.
-
Choose a name for your project and confirm with Next.
-
In the next dialog, choose .NET 6 (Long-term support) as the Framework and confirm with Create.
Adding the NuGet Package
-
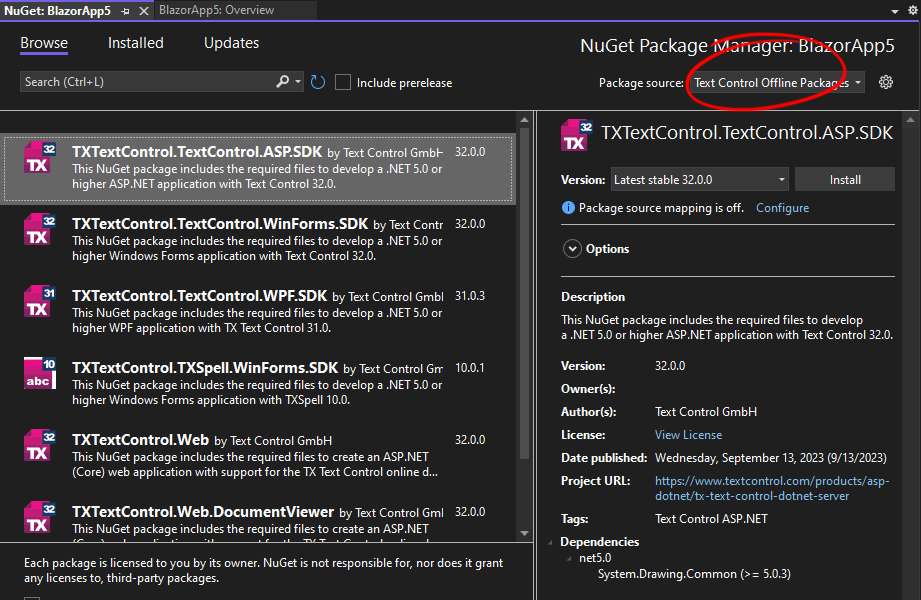
In the Solution Explorer, select your created project and choose Manage NuGet Packages... from the Project main menu.
Package Source
Select either Text Control Offline Packages or nuget.org as the Package source. Packages in the official Text Control NuGet profile are frequently updated.
Browse and install the following packages:
- TXTextControl.Web
- TXTextControl.TextControl.ASP.SDK
Configure the Application
-
Open the Program.cs file located in the project's root folder.
At the very top of the file, insert the following code:
using TXTextControl.Web;Add the following code after the entry
app.UseStaticFiles();:// enable Web Sockets app.UseWebSockets(); // attach the Text Control WebSocketHandler middleware app.UseTXWebSocketMiddleware();
Creating the Interop JavaScript
-
Create a new folder scripts in your wwwroot folder, create a new JavaScript file and name it textcontrol.js. Paste the following content into the file you have just created.
var dotNetObject;

export async function addEditorToElement(dotNetRef, options) {
  dotNetObject = dotNetRef;

  TXTextControl.init({
    containerID: "txDocumentEditorContainer",
    webSocketURL: options.websocketurl
  });

}

export function saveDocument() {

  // save the document on TXTextControl object
  TXTextControl.saveDocument(TXTextControl.StreamType.InternalUnicodeFormat, function (document) {
    // call the .NET method 'ProcessDocument' with the saved document data
    dotNetObject.invokeMethodAsync('ProcessDocument', document.data);
  });

};

export function loadDocument(document) {
  // load the document back into the editor (TXTextControl)
  TXTextControl.loadDocument(TXTextControl.StreamType.InternalUnicodeFormat, document);
};

export function insertTable() {
  TXTextControl.tables.add(5, 5, 10, function (e) {
    if (e === true) { // if added
      TXTextControl.tables.getItem(function (table) {
        table.cells.forEach(function (cell) {

          cell.setText("Cell text");

        });
      }, null, 10);
    }
  })
};
Creating the Razor Component
This step creates a new Razor component named TextControl.razor that initializes both the .NET object reference and the JavaScript object reference.
-
Select the project in the Solution Explorer and choose New Item... from the Project main menu. Select Razor Component, name it TextControl.razor and confirm with Add.
-
Paste the following code into the newly created file:
@inject IJSRuntime JsRuntime
@inject NavigationManager Navigator

<script src="@WebSocketURL/api/TXWebSocket/GetResource?name=tx-document-editor.min.js"></script>

<div id="txDocumentEditorContainer" style="width: @Width; height: @Height;"></div>

@code
{
    [Parameter]
    public string? WebSocketURL { get; set; }

    [Parameter]
    public string? ContainerID { get; set; }

    [Parameter]
    public string? Width { get; set; } = "800px";

    [Parameter]
    public string? Height { get; set; } = "600px";

    private DotNetObjectReference<TextControl> DotNetReference => DotNetObjectReference.Create(this);
    private IJSObjectReference? _txtextcontrol;

    protected override async Task OnAfterRenderAsync(bool firstRender)
    {
        if (firstRender)
        {
            _txtextcontrol = await JsRuntime.InvokeAsync<IJSObjectReference>("import", "./scripts/textcontrol.js");

            var options = new Dictionary<string, object?>();

            var webSocketURL = Navigator.BaseUri.Replace("https://", "wss://").Replace("http://", "ws://");

            if (WebSocketURL != null)
            {
                options["websocketurl"] = $"{webSocketURL}api/TXWebSocket";
                options["baseurl"] = $"{WebSocketURL}api/TXWebSocket";
            }

            if (ContainerID != null)
            {
                options["containerid"] = ContainerID;
            }

            await _txtextcontrol.InvokeVoidAsync("addEditorToElement", DotNetReference, options);
        }
    }

    public async Task SaveDocument()
    {
        await _txtextcontrol.InvokeVoidAsync("saveDocument", DotNetReference);
    }

    [JSInvokable("ProcessDocument")]
    public void ProcessDocument(string document)
    {
        byte[] bDocument;

        // create a ServerTextControl instance to load the saved document
        using (TXTextControl.ServerTextControl tx = new TXTextControl.ServerTextControl())
        {
            tx.Create();
            tx.Load(Convert.FromBase64String(document), TXTextControl.BinaryStreamType.InternalUnicodeFormat);

            // add additional text to the document
            tx.Selection.Text = "This document has been modified by .NET\r\n";

            // save back
            tx.Save(out bDocument, TXTextControl.BinaryStreamType.InternalUnicodeFormat);
        }

        // invoke the JS function 'loadDocument' to load back to the modified document
        _txtextcontrol.InvokeVoidAsync("loadDocument", Convert.ToBase64String(bDocument));
    }

    public async Task InsertTable()
    {
        await _txtextcontrol.InvokeVoidAsync("insertTable");
    }

}
Any function of the referenced textcontrol.js JavaScript file can be called using the created IJSObjectReference _txtextcontrol. The DotNetObjectReference<TextControl> points to this Razor component. This is passed to the JavaScript functions to save and reload the document.
Consuming the TextControl Razor Component
In this step, we are going to use the Razor component we have created on a page.
-
Find the Index.razor page in the Pages folder and replace the content with the following code:
@page "/"
@inject NavigationManager Navigator;

<TextControl WebSocketURL=@Navigator.BaseUri
             ContainerID="txDocumentEditorContainer"
@ref="_txtextcontrol">
</TextControl>

<br />

<button @onclick="InsertTable">Insert Table</button>

<button @onclick="SaveDocument">
    Save and Reload Document (using ServerTextControl)
</button>

@code
{

    private TextControl _txtextcontrol = default!;

    // insert a table using the client-side API
    private async Task InsertTable()
    {
        await _txtextcontrol.InsertTable();
    }

    // save the document and reload it using ServerTextControl
    private async Task SaveDocument()
    {
        await _txtextcontrol.SaveDocument();
    }

}
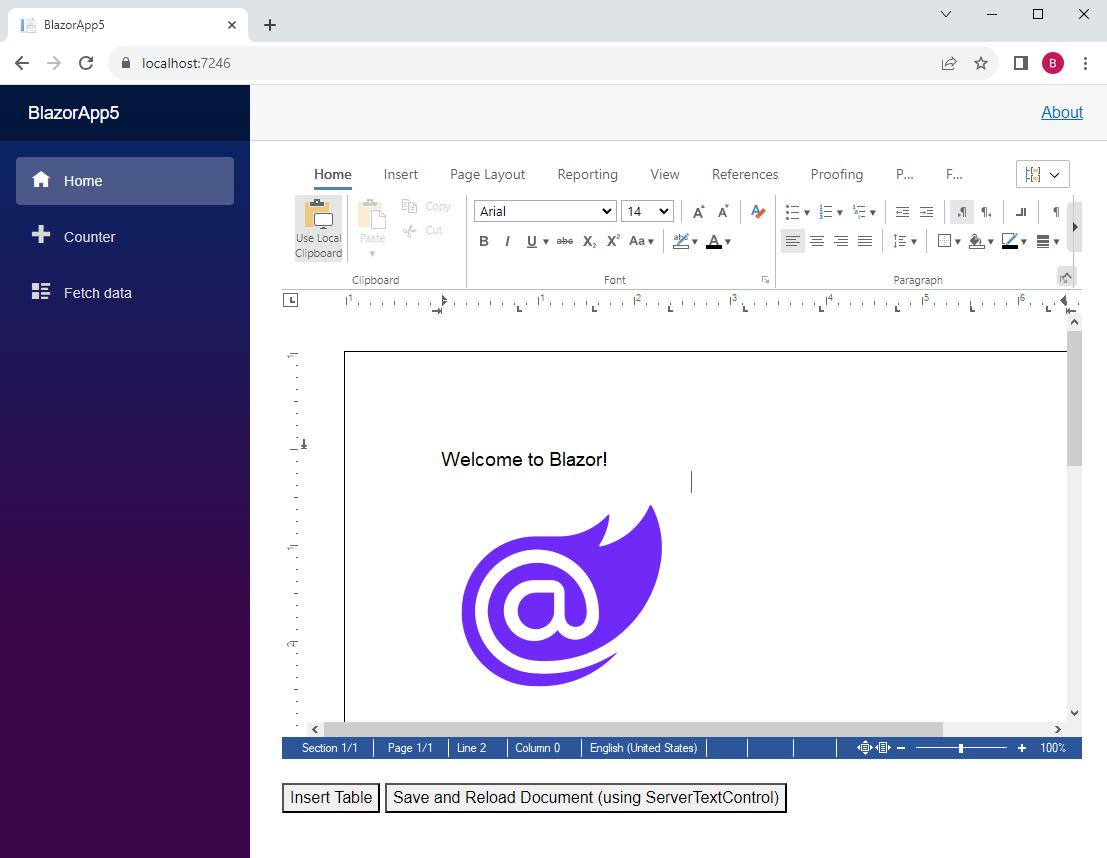
Compile and start the application.
First Button: Insert Table
The InsertTable() method is called in the .NET code of Index.razor when the first button is clicked.
private async Task InsertTable()
{
    await _txtextcontrol.InsertTable();
}
This calls the InsertTable() method of the TextControl.Razor component.
public async Task InsertTable()
{
    await _txtextcontrol.InvokeVoidAsync("insertTable");
}
In this method, the JavaScript object reference _txtextcontrol is used to invoke a JavaScript call to textcontrol.js.
export function insertTable() {
  TXTextControl.tables.add(5, 5, 10, function (e) {
    if (e === true) { // if added
      TXTextControl.tables.getItem(function (table) {
        table.cells.forEach(function (cell) {

          cell.setText("Cell text");

        });
      }, null, 10);
    }
  })
};
Second Button: Save and Reload
TX Text Control's JavaScript API is used to store the document. The document is passed to .NET (the "server"). In .NET, the document is processed using an instance of Server
The SaveDocument() method is called in the .NET code of Index.razor when the second button is clicked.
private async Task SaveDocument()
{
    await _txtextcontrol.SaveDocument();
}
This calls the SaveDocument() method of the TextControl.Razor component.
export function saveDocument() {

  // save the document on TXTextControl object
  TXTextControl.saveDocument(TXTextControl.StreamType.InternalUnicodeFormat, function (document) {
    // call the .NET method 'ProcessDocument' with the saved document data
    dotNetObject.invokeMethodAsync('ProcessDocument', document.data);
  });

};
This calls the JavaScript function saveDocument() in the textcontrol.js JavaScript file:
After the document is saved, it is passed to the .NET ProcessDocument method implemented in TextControl.razor using the created .NET object reference.
[JSInvokable("ProcessDocument")]
 public void ProcessDocument(string document)
 {
     byte[] bDocument;

     // create a ServerTextControl instance to load the saved document
     using (TXTextControl.ServerTextControl tx = new TXTextControl.ServerTextControl())
     {
         tx.Create();
         tx.Load(Convert.FromBase64String(document), TXTextControl.BinaryStreamType.InternalUnicodeFormat);

         // add additional text to the document
         tx.Selection.Text = "This document has been modified by .NET\r\n";

         // save back
         tx.Save(out bDocument, TXTextControl.BinaryStreamType.InternalUnicodeFormat);
     }

     // invoke the JS function 'loadDocument' to load back to the modified document
     _txtextcontrol.InvokeVoidAsync("loadDocument", Convert.ToBase64String(bDocument));
 }
This method is parametrized as JSInvokable and can be called from JavaScript.
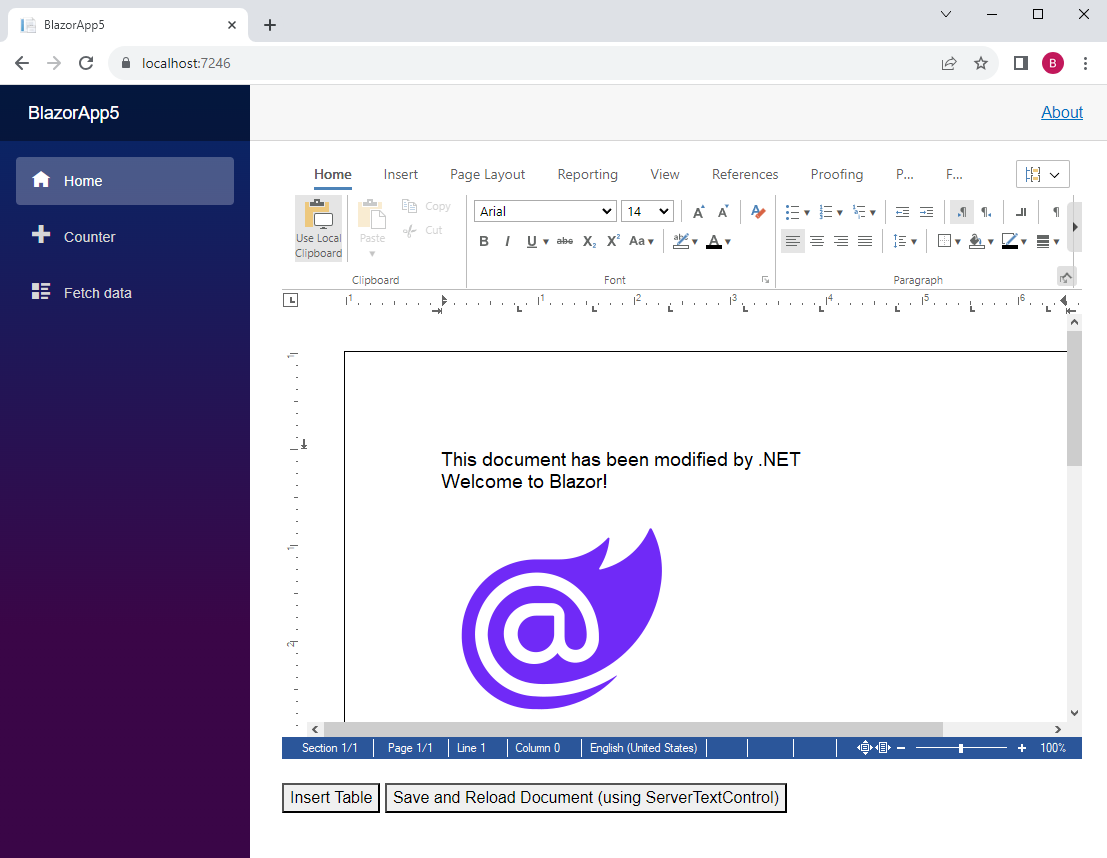
This method loads the document into a ServerTextControl instance to add text at the top. The document is then saved and passed to the loadDocument JavaScript function.
The JavaScript function loadDocument is finally loading the document back into the editor.
export function loadDocument(document) {
  // load the document back into the editor (TXTextControl)
  TXTextControl.loadDocument(TXTextControl.StreamType.InternalUnicodeFormat, document);
};
For your own testing, you can download and try this sample from our GitHub repository.
![]()
Download and Fork This Sample on GitHub
We proudly host our sample code on github.com/TextControl.
Please fork and contribute.
Requirements for this sample
- TX Text Control .NET Server 32.0
- Visual Studio 2022
ASP.NET
Integrate document processing into your applications to create documents such as PDFs and MS Word documents, including client-side document editing, viewing, and electronic signatures.
- Angular
- Blazor
- React
- JavaScript
- ASP.NET MVC, ASP.NET Core, and WebForms
Related Posts
Building an ASP.NET Core Backend (Linux and Windows) for the Document Editor…
This article shows how to create a backend for the Document Editor and Viewer using ASP.NET Core. The backend can be hosted on Windows and Linux and can be used in Blazor, Angular, JavaScript, and…
TX Text Control for Blazor: Mail Merge Integration Tutorial
This tutorial shows how to integrate the TX Text Control MailMerge component into a Blazor application using the TX Text Control .NET Server.
TX Text Control Document Editor and Viewer for Blazor Released
We are very happy to announce the immediate availability of TX Text Control packages for Blazor. This article gives an overview of the available packages and how to use them.
Getting Started: Document Editor for Blazor in ASP.NET Core
This article shows how to integrate the Document Editor for Blazor into an ASP.NET Core application running on Windows and Linux. The Document Editor is a powerful word processing component that…
Announcing Our Work on a Blazor Component for Document Editing and Viewing
We are pleased to announce our work on a Blazor document editing and viewing component. This component will be part of our upcoming release and will provide an easy upgrade path from Web Forms to…


