This blog post contains outdated information.
The cited code snippets may be workarounds, and be part of the official API in the meantime.
Getting Started: Document Viewer with ASP.NET Core and .NET 6
This article shows how to use the TX Text Control ASP.NET document viewer within a .NET 6 application in Visual Studio 2022.

The following tutorial shows how to create a .NET 6 ASP.NET Core web application that uses the Document
Creating the Application
Make sure that you downloaded the latest version of Visual Studio 2022 that comes with the .NET 6 SDK.
-
In Visual Studio 2022, create a new project by choosing Create a new project.
-
Select ASP.NET Core Web App (Model-View-Controller) as the project template and confirm with Next.
-
Choose a name for your project and confirm with Next.
-
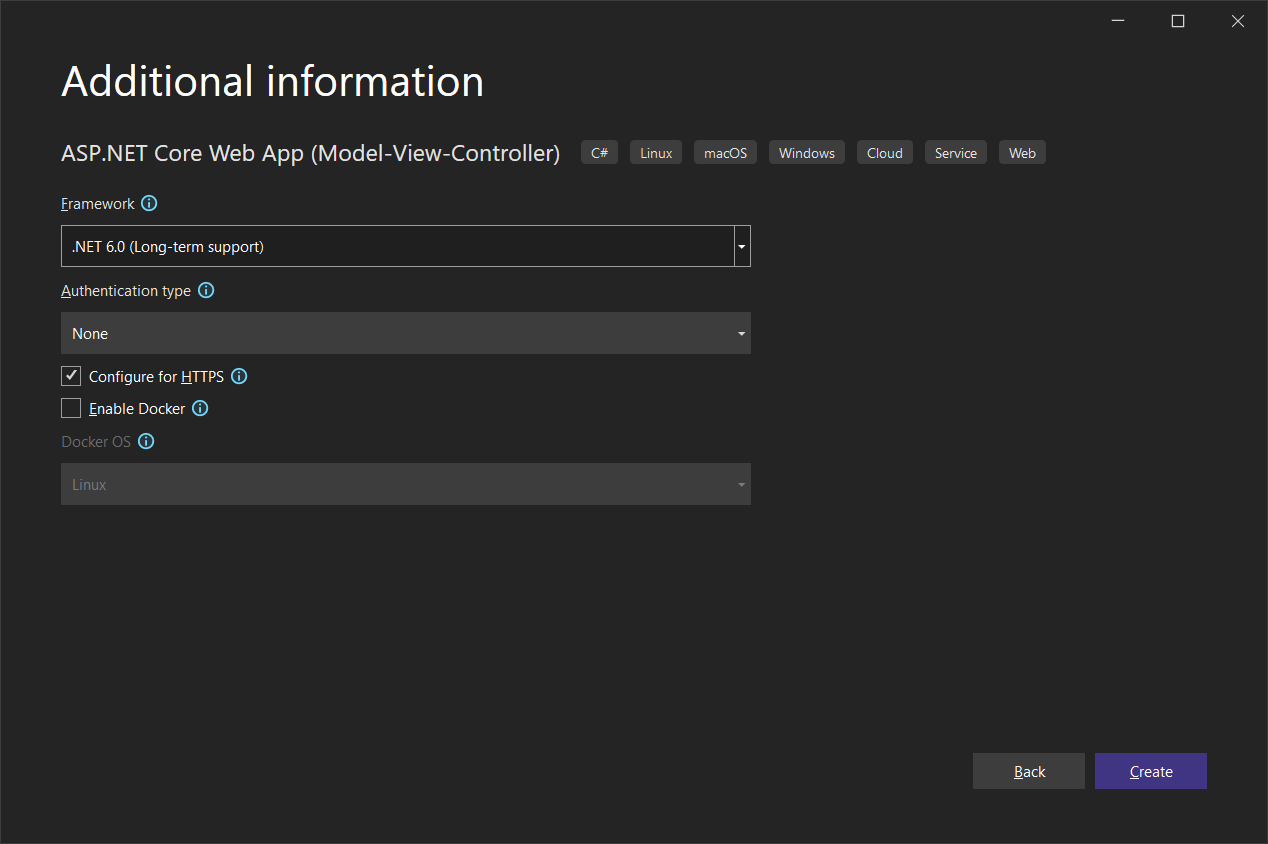
In the next dialog, choose .NET 6 (Long-term support) as the Framework and confirm with Create.

Adding the NuGet Package
-
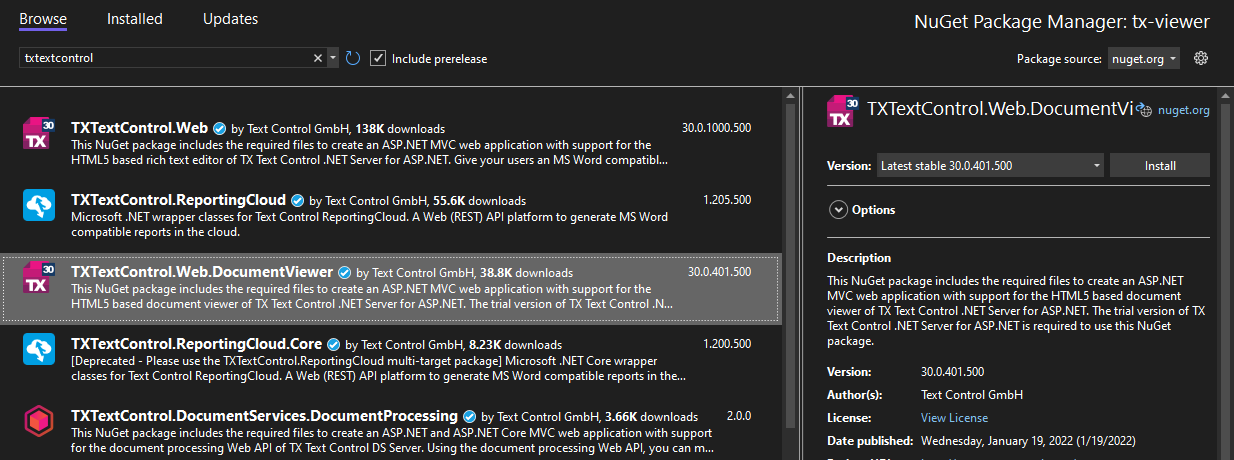
In the Solution Explorer, select your created project and choose Manage NuGet Packages... from the Project main menu.
Browse for txtextcontrol and Install the latest version of the TXTextControl.Web.DocumentViewer package.

Adding the Control to the View
-
Find the Index.cshtml file in the Views -> Home folder. Replace the complete content with the following code:
@using TXTextControl.Web.MVC.DocumentViewer
@using System.Text

<div style="width: 800px; height: 600px;">

@Html.TXTextControl().DocumentViewer(settings => {
    settings.DocumentData = Convert.ToBase64String(
        Encoding.ASCII.GetBytes("<strong>Sample Content</strong>"));
    settings.Dock = DocumentViewerSettings.DockStyle.Fill;
}).Render()

</div>

<script>

    var jsonAnnotations = '[[{"pen":{"type":"comment","objectWidth":32,"objectHeight":32},"user":"Unknown User","location":{"x":127,"y":50},"time":1658908087097,"comments":[{"comment":"Welcome to Text Control","user":"Unknown User","date":1658908100339,"id":"c8d818ce-ff1e-4c0c-b78c-6ba95a98dede","status":"none"}],"id":"feed80ff-1c94-4abf-9838-3e833faa4092","status":"Accepted"}]]';

    window.addEventListener("documentViewerLoaded", function () {
        TXDocumentViewer.annotations.showToolbar(true);
        TXDocumentViewer.annotations.load(jsonAnnotations);
    });

</script>
This code adds the DocumentViewer to the view and loads a simple HTML string.
Adding TX Text Control References
-
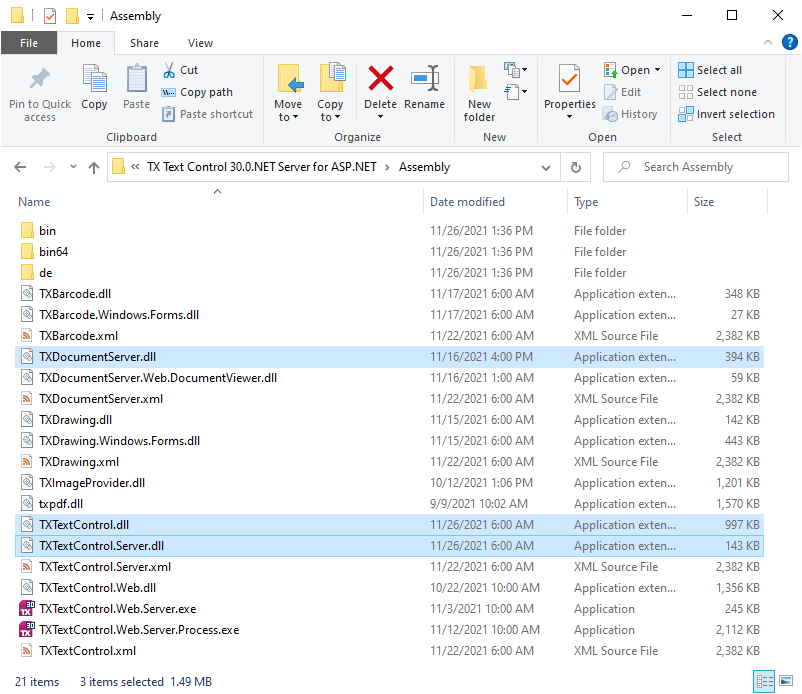
While the project is selected in the Solution Explorer, choose Project -> Add Project Reference... to open the Reference Manager. In the opened dialog, select Browse... to select the required TX Text Control assemblies. Navigate to the installation folder of TX Text Control and select the following assemblies from the Assembly folder:
- TXDocumentServer.dll
- TXTextControl.dll
- TXTextControl.Server.dll

Repeat this step with the following assemblies from the Assembly/bin64 folder:
- txic.dll
- txkernel.dll
- txtools.dll
After selecting these assemblies, close the Reference Manager by confirming with OK.
-
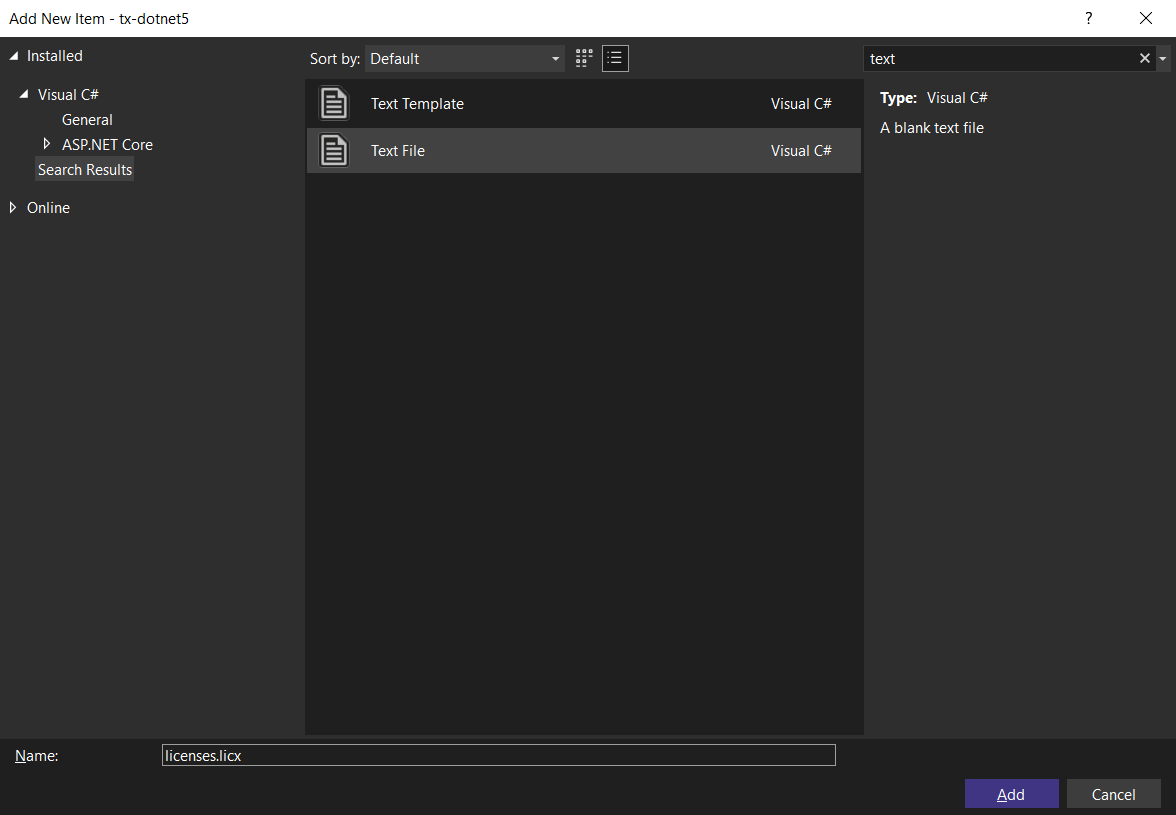
While the project is selected in the Solution Explorer, choose Project -> Add New Item.... Select Text File, name the file licenses.licx and close the dialog by clicking Add.

Open the newly added file and add the following content:
TXTextControl.ServerTextControl, TXTextControl.Server, Version=30.0.1500.500, Culture=neutral, PublicKeyToken=6b83fe9a75cfb638Set the Build Action property to Embedded Resource.
-
Select the project in the Solution Explorer and choose Edit Project File from the Project main menu. Find the PropertyGroup entry and insert the nodes EnableUnsafeBinaryFormatterSerialization and EnableUnsafeBinaryFormatterInDesigntimeLicenseContextSerialization:
<PropertyGroup>
        <TargetFramework>net6.0</TargetFramework>
        <EnableUnsafeBinaryFormatterSerialization>true</EnableUnsafeBinaryFormatterSerialization>
        <EnableUnsafeBinaryFormatterInDesigntimeLicenseContextSerialization>true</EnableUnsafeBinaryFormatterInDesigntimeLicenseContextSerialization>
        <ImplicitUsings>enable</ImplicitUsings>
        <Nullable>enable</Nullable>
</PropertyGroup>
BinaryFormatter Information
The above setting is required to enable the obsolete .NET BinaryFormatter while compiling the license into the assembly. We are working with Microsoft to avoid this requirement in the near future.
Now, compile and start the application.
ASP.NET
Integrate document processing into your applications to create documents such as PDFs and MS Word documents, including client-side document editing, viewing, and electronic signatures.
- Angular
- Blazor
- React
- JavaScript
- ASP.NET MVC, ASP.NET Core, and WebForms
Related Posts
Getting Started: ServerTextControl and MailMerge with ASP.NET Core
This article shows how to use the TX Text Control ASP.NET ServerTextControl and MailMerge classes within a .NET 6 application in Visual Studio 2022.
ASP.NETASP.NET CoreDocument Viewer
Getting Started: Document Viewer with ASP.NET Core
This article shows how to use the TX Text Control ASP.NET document viewer within a .NET 6 application in Visual Studio 2022.
Getting Started: Document Editor with ASP.NET Core and .NET 6
This article shows how to use the TX Text Control ASP.NET document editor within a .NET 6 application in Visual Studio 2022.
Using TX Text Control .NET Server with .NET 6
This article shows how to use the TX Text Control ASP.NET document editor and the ServerTextControl class within a .NET 6 application in Visual Studio 2022.
Storing Documents on the Blockchain
Storing documents or document hashes on a blockchain provides functionality such as validation and tamper resistance. This article shows how to store document hashes on a blockchain and how to…


