The electronic signature best practices demo Text Control eSign shows how to use TX Text Control to integrate electronic signature processes into your applications. This article shows how to combine form fields, merge fields and signature boxes to deploy the perfect signature experience.
The reason why electronic signatures help companies to work more efficiently is that the overall signing process is accelerated. That implies that customers are potentially signing contracts or agreements faster which improves closing rates and speeds up the sales cycle.
User Experience
But this is only possible, if the user is experiencing a perfectly prepared contract. To provide that experience, a contract should fulfil the following requirements:
- Customized and pre-filled
- Provide easy to complete, smart form fields
- Easy to sign signature boxes
Text Control eSign Demo
Test the above on your own and try our best practices eSign demo live.
To showcase a typical workflow and the Text Control electronic signature technology, we published a fully functional demo that can be used to create and request signatures, sign documents and to validate executed PDF documents.
Creating a Template
In this article, we will use a combination of templates with merge fields and form fields in the created instance of the template. In the first step, a template is created:
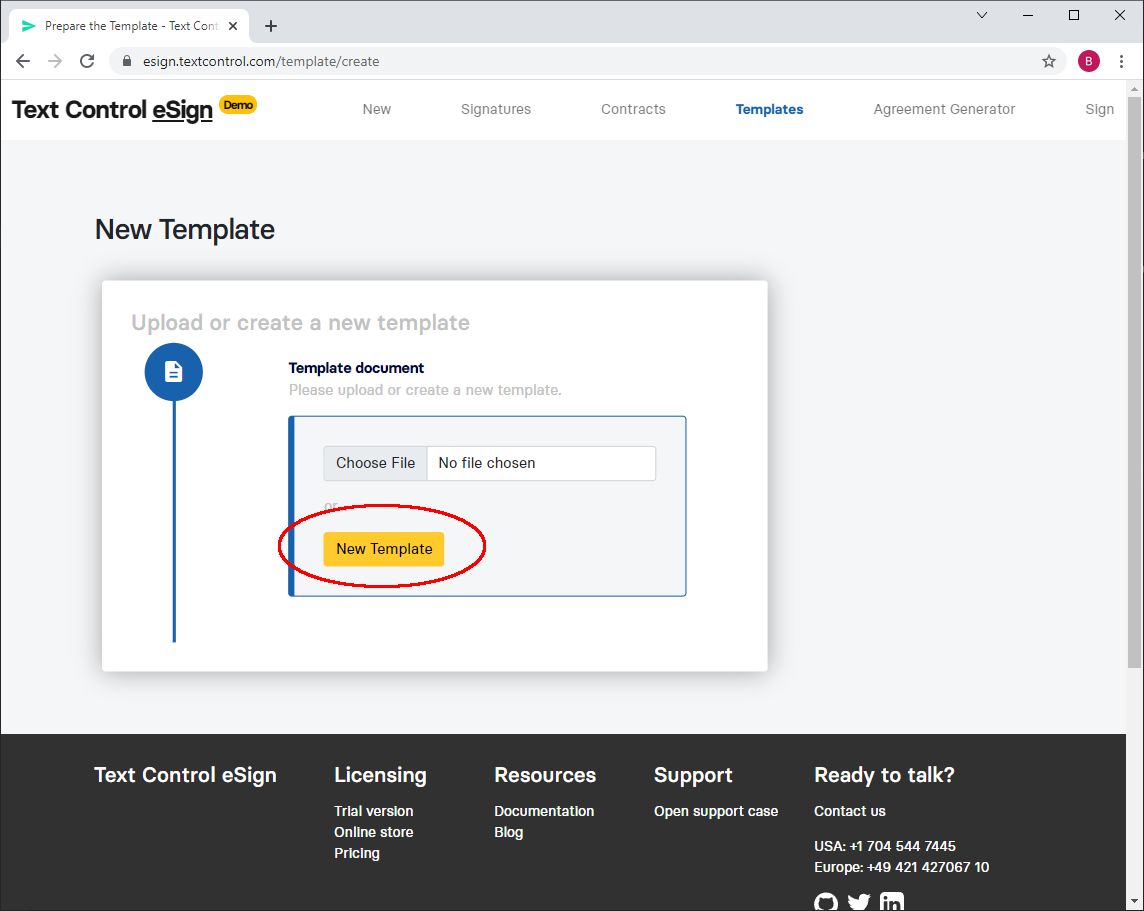
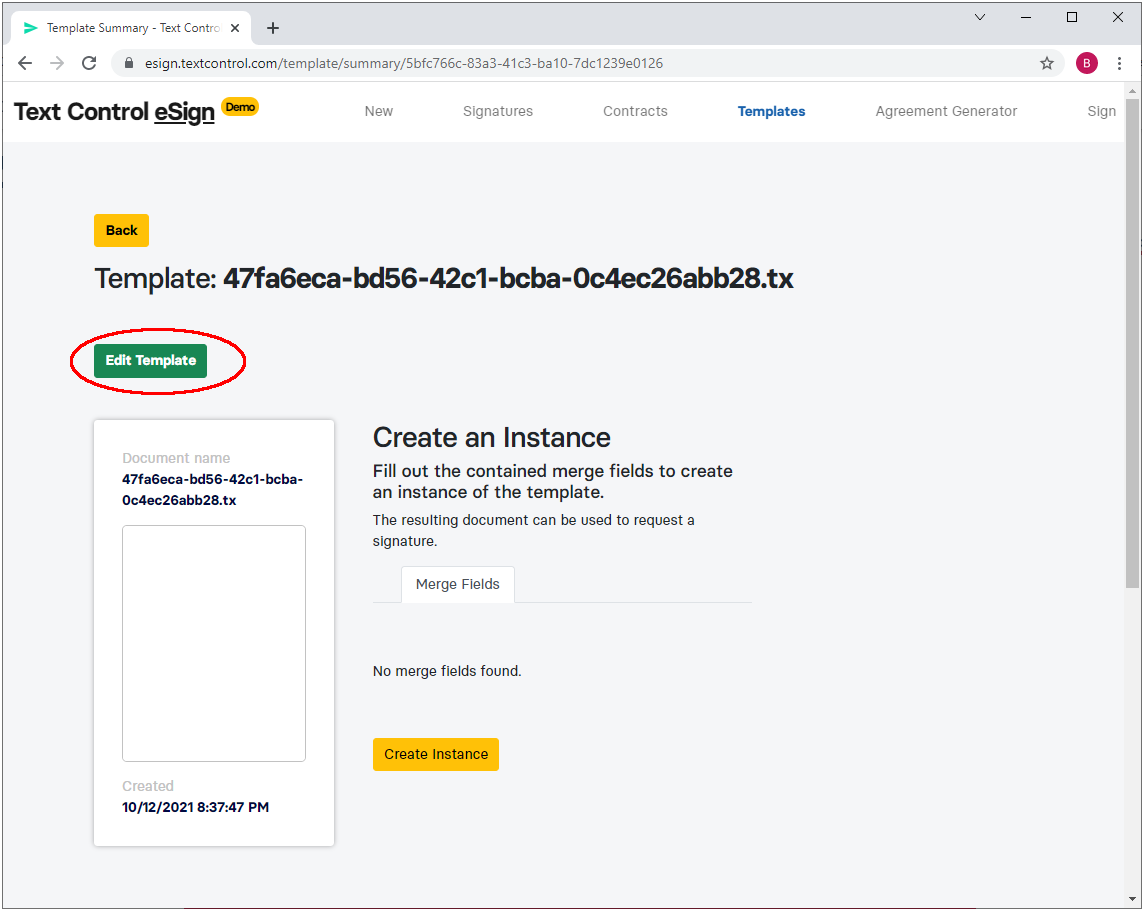
After the template has been created, click on Edit Template to open the document editor:
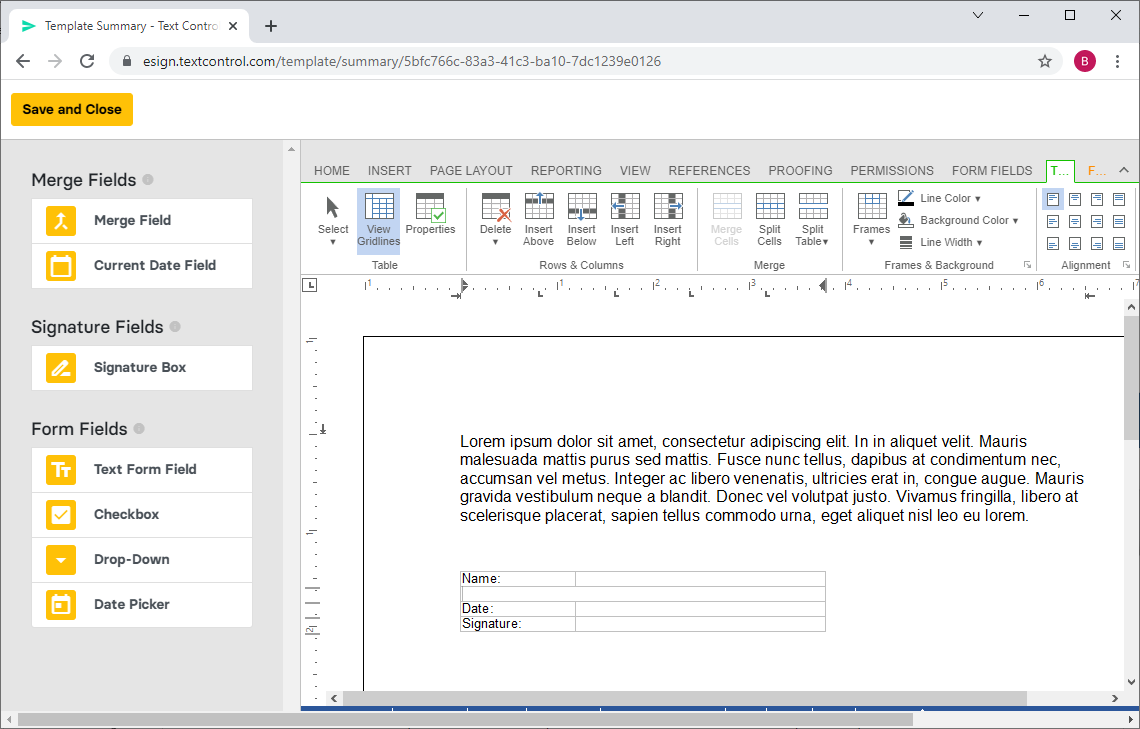
Consider a document where only one signer will need to sign a contract at the end of the document. A table is used that provides some structure to the signature elements:
Adding Merge Fields
A merge field is added to the table with the field name signer_name.
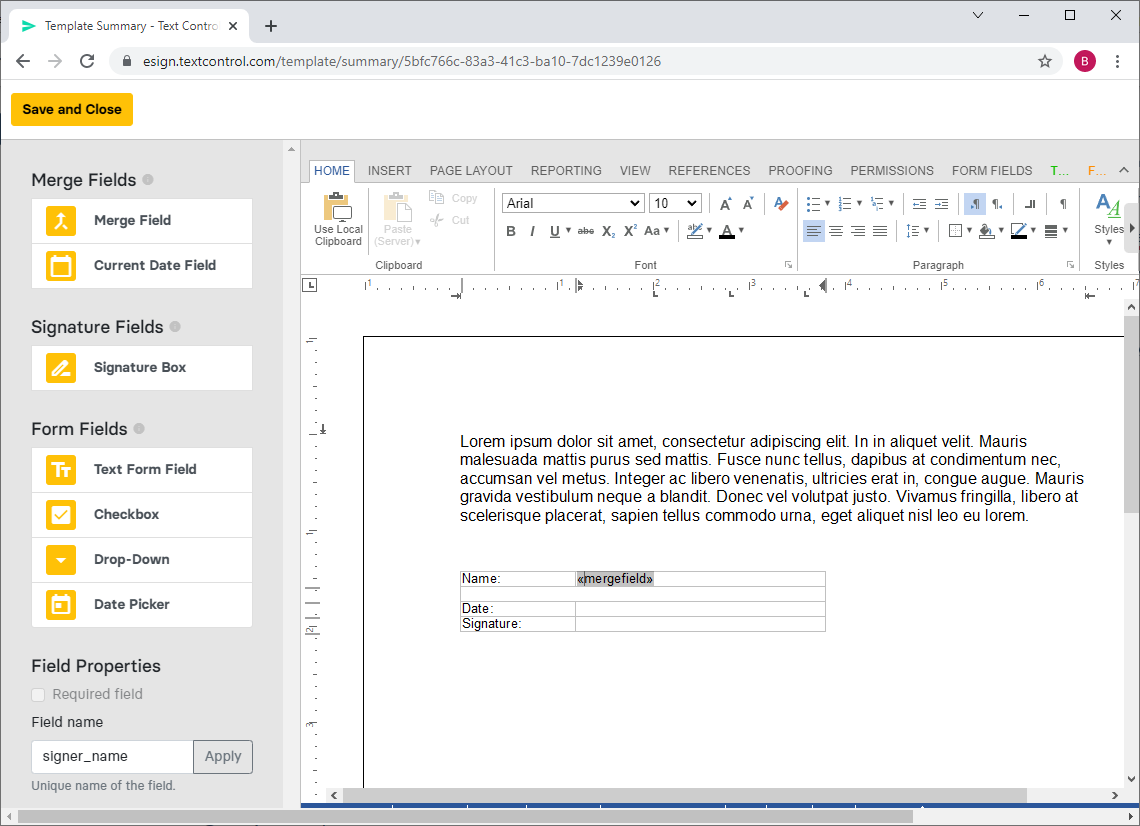
When this is done, we can save and close the editor. Other fields are added later in the process.
Creating an Instance
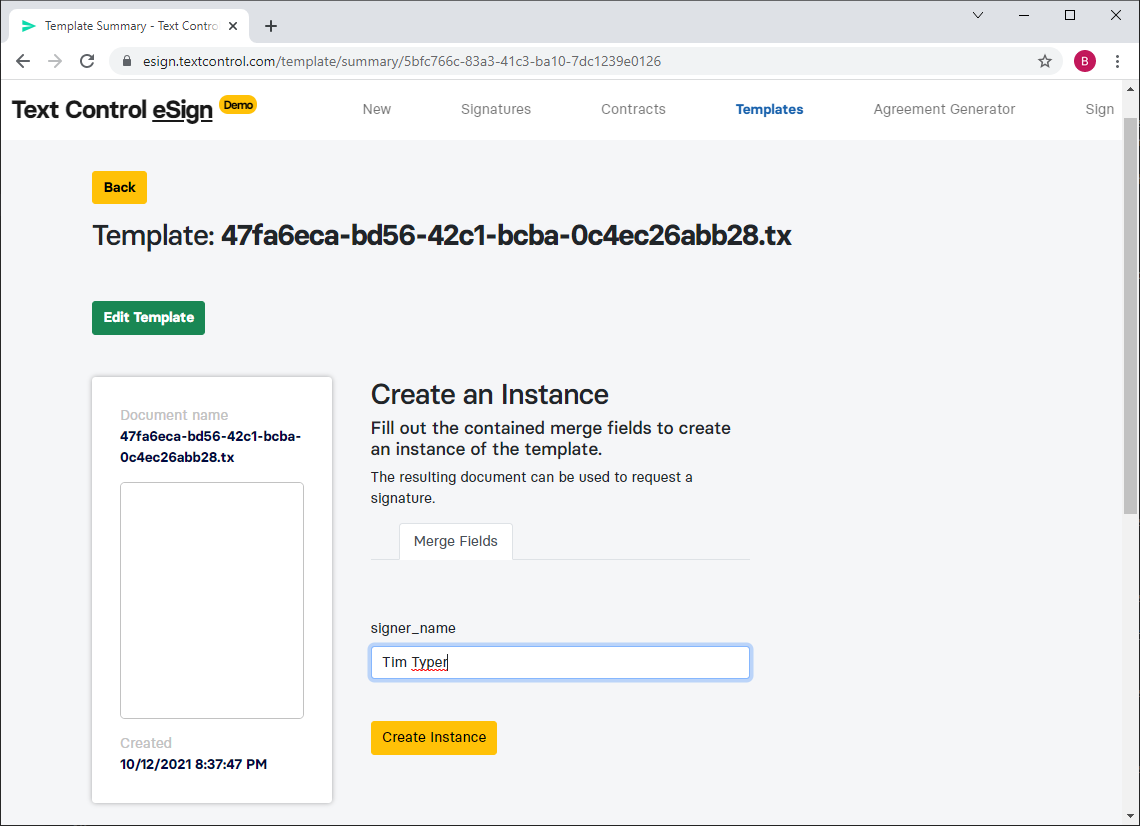
Back in the template overview, the inserted field is now displayed as a form field that can be completed before an instance of this template is created. Enter the name of the signer and click Create Instance:
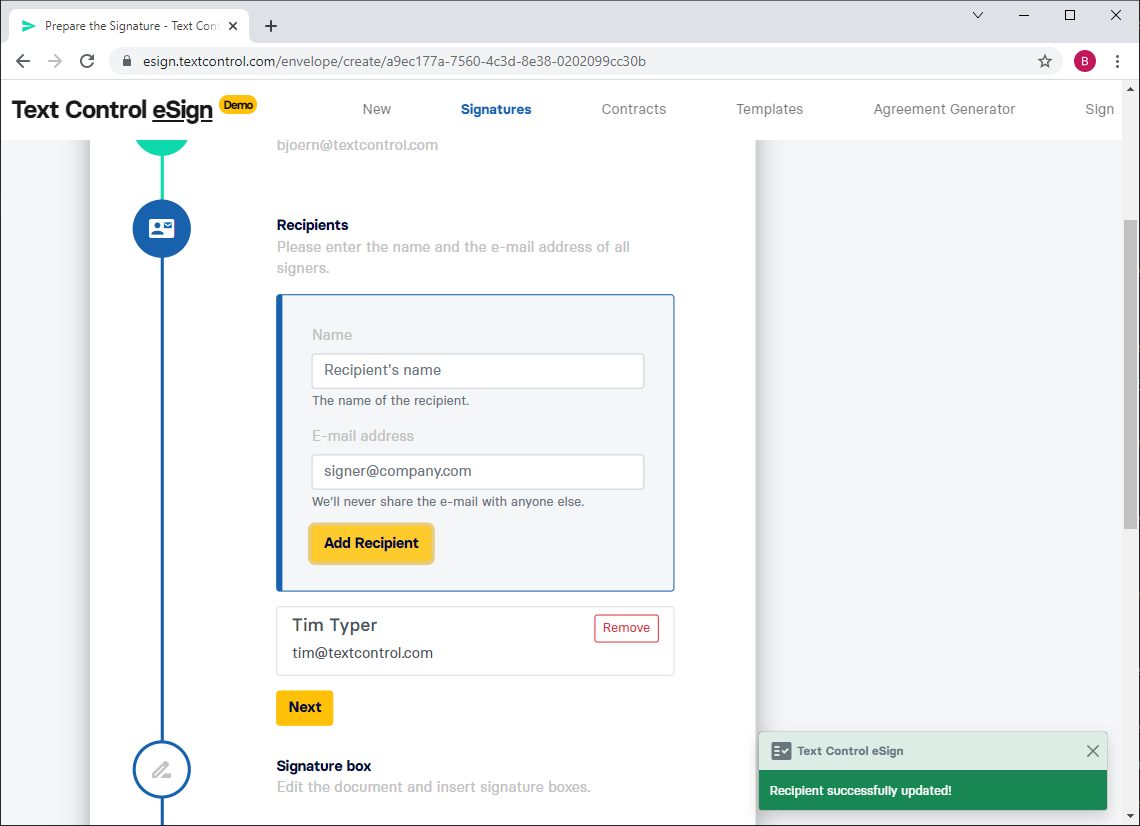
An instance of the template is created and a new signature request process has been started. You can add the recipients including the e-mail address and click Next:
In the next step, click Add Signature Boxes to open the editor again:
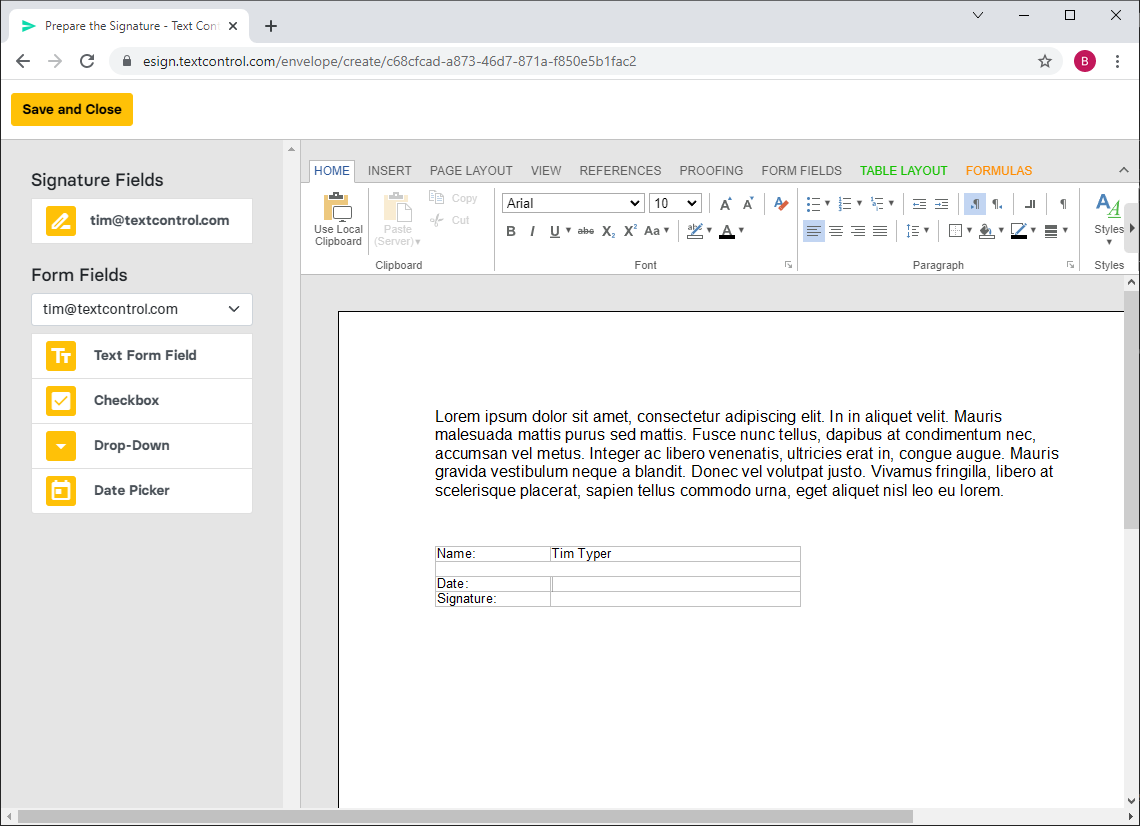
The merge field has been merged with the name of the signer automatically. This customized document accelerates the process as known values can be already merged into the document. They are also not editable in case that these fields should not be changeable by the signer.
Adding Form Fields
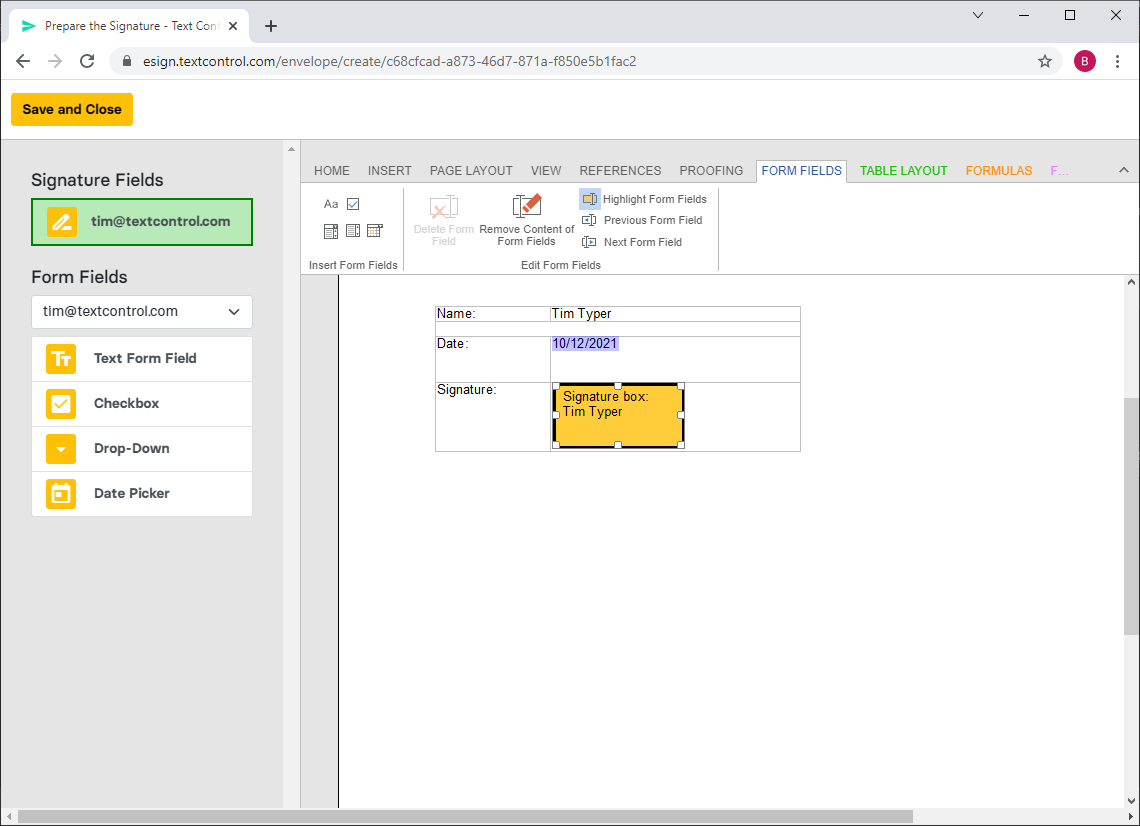
As the last step, customized form fields can be added such as a date field. Make sure that the signer is selected in the drop-down box above the available form fields and insert a date picker field. You can even pre-select the current date to help the user to complete this field.
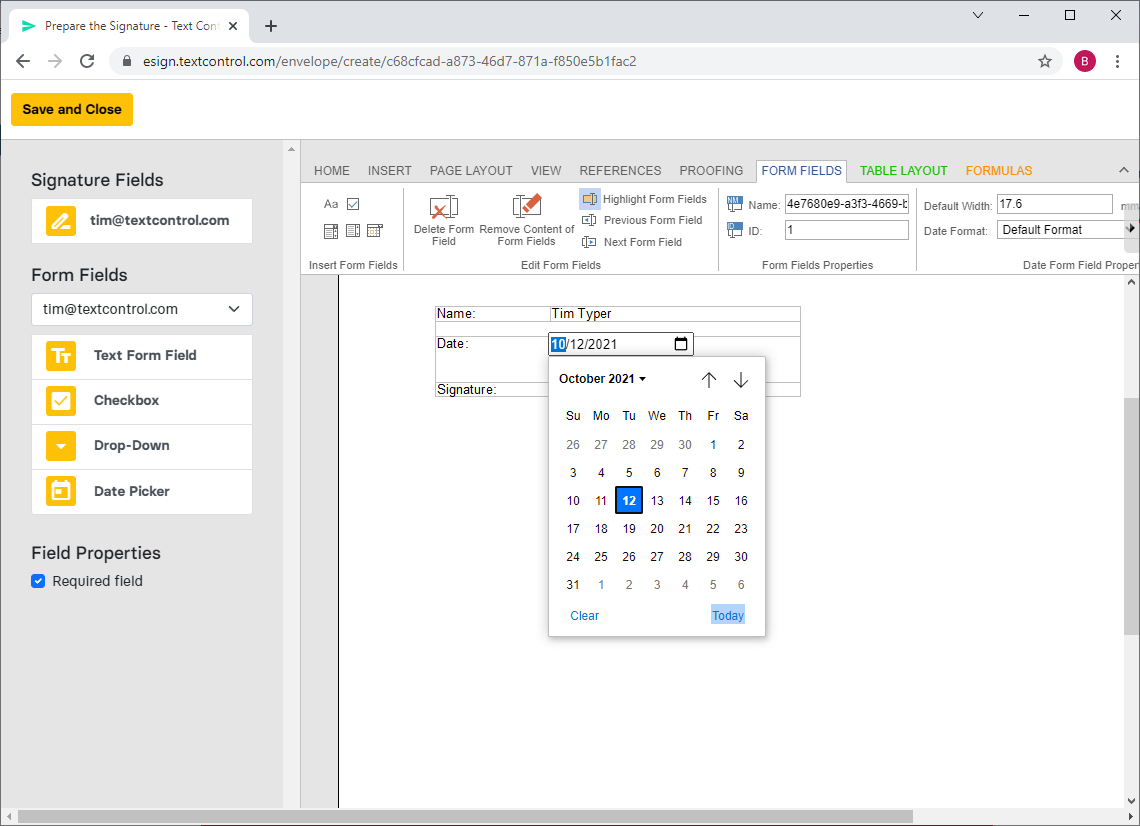
Adding the Signature Box
Finally, insert the signature box for the specific signer and Save and Close the document.
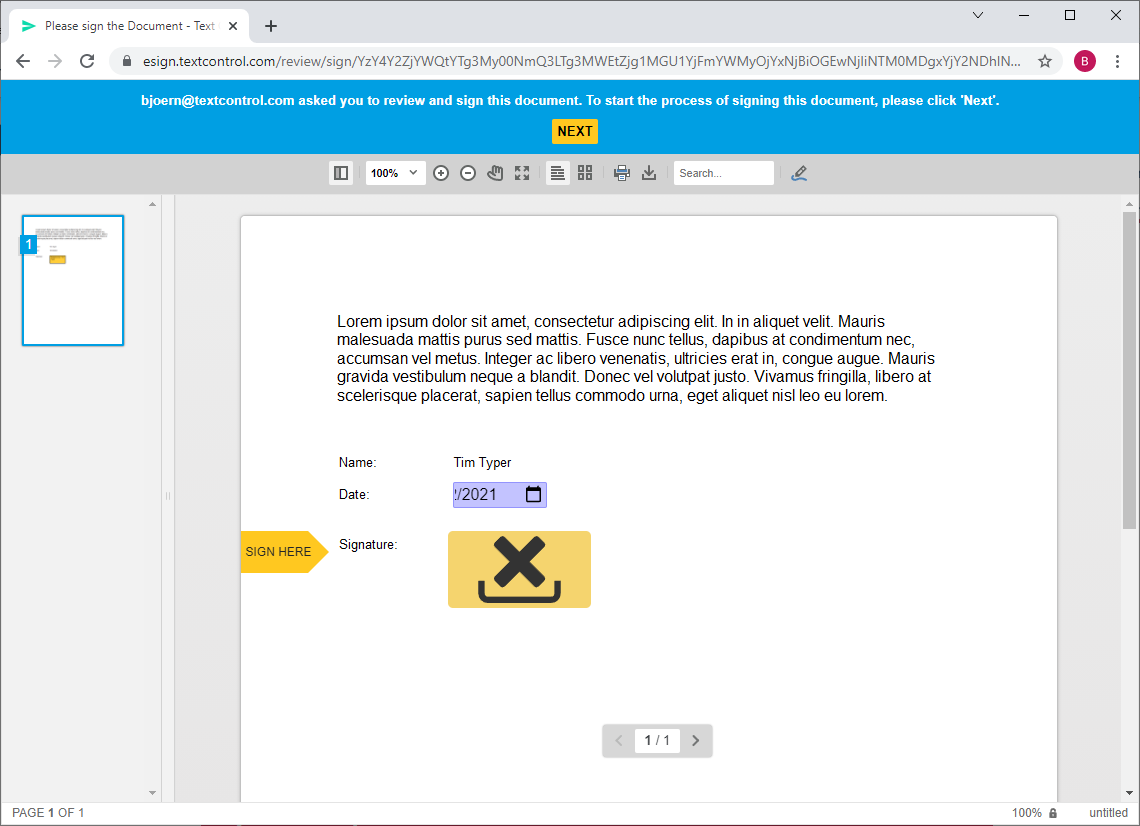
After following the next steps to deploy the document to the signer, the signer will see this pre-completed document for an easy signing process:
Signing the Document
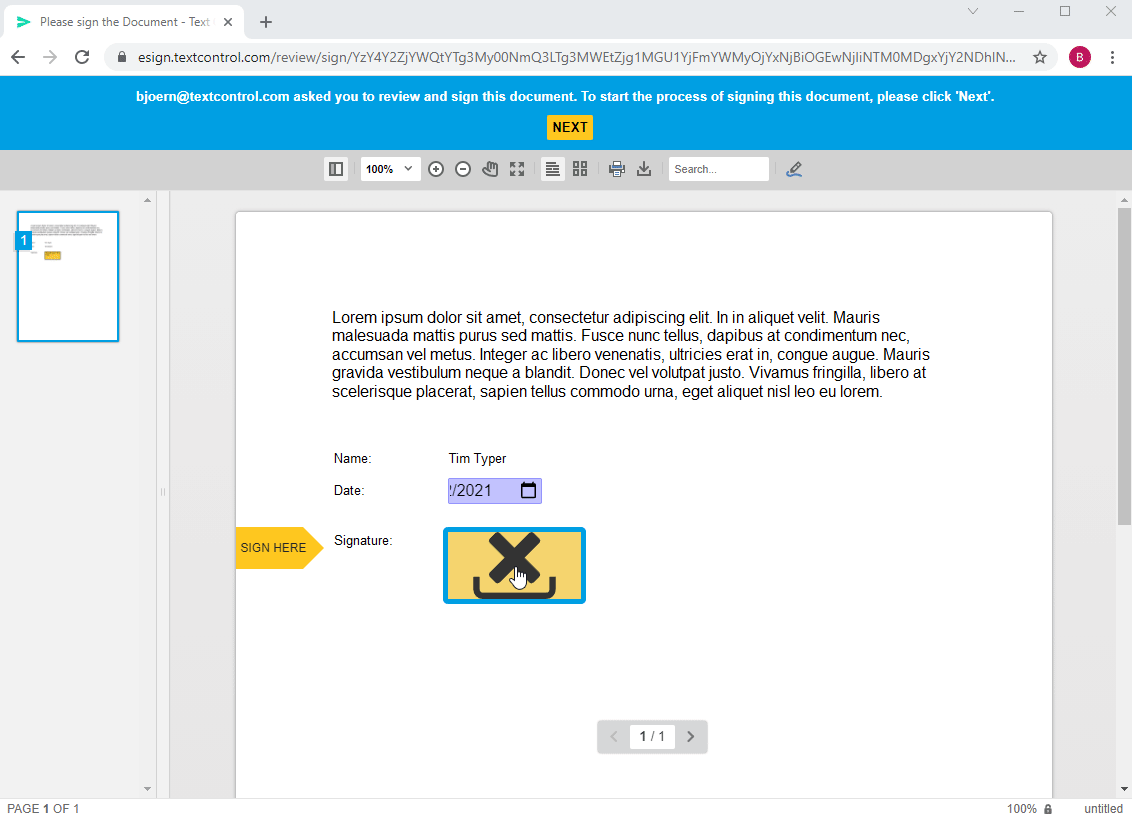
The name is pre-merged and the form field is already completed. The user must simply sign the document and submit it to complete the signing process:
Test the above on your own and try our best practices eSign demo live.
Text Control eSign Demo
To showcase a typical workflow and the Text Control electronic signature technology, we published a fully functional demo that can be used to create and request signatures, sign documents and to validate executed PDF documents.

