Deploying TX Text Control to Azure App Service
This article shows how to deploy web applications built with TX Text Control .NET Server to Azure App Service.

Azure App Service is used to build and host web applications without managing the infrastructure. Azure is taking over the task of auto-scaling and high availability.
There are two options to deploy applications to Azure App Service:
-
Code
This option is used to simply deploy an application to Azure App Service. The application runs in a ready-to-use virtual environment where several settings such as the supported .NET Framework or platform bitness can be adjusted. -
Container
Web App for Containers gives developers more control over what is installed in their containers.
The App Service Sandbox
The major problem with the first Code approach is the Azure Web App Sandbox. The limitations of the sandbox include access to write to the registry, access to event logs and it prevents access to most User32 and GDI32 system calls. TX Text Control leverages these calls to provide the true WYSIWYG rendering, just like most other libraries that create PDF documents for instance.
When using Web App for Containers, these calls will succeed and TX Text Control can be used in Azure App Service applications. Also, Microsoft is offering cached base Windows images for faster initialization. Therefore, a typical initial deployment of Windows Server 2019 Core takes only several minutes.
Quickstart: Deploying TX Text Control
This quickstart tutorial shows how to deploy an ASP.NET web application in a Windows image to Docker Hub from Visual Studio 2019. The application uses the Server
Prerequisites
In order to complete this tutorial, the following prerequisites are required:
- Download and install TX Text Control .NET Server
- Create a Docker Hub account
- Install Docker for Windows
-
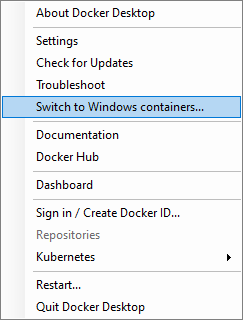
Switch the container type to Windows containers. This can be done during setup or using the system tray menu:
- Install Visual Studio 2019 with ASP.NET and web development and Azure development options enabled (Tools > Get Tools and Features).
Creating the ASP.NET Web Application
The following steps are required to create a new ASP.NET Web Application.
- Open Visual Studio 2019 and select Create a new project.
-
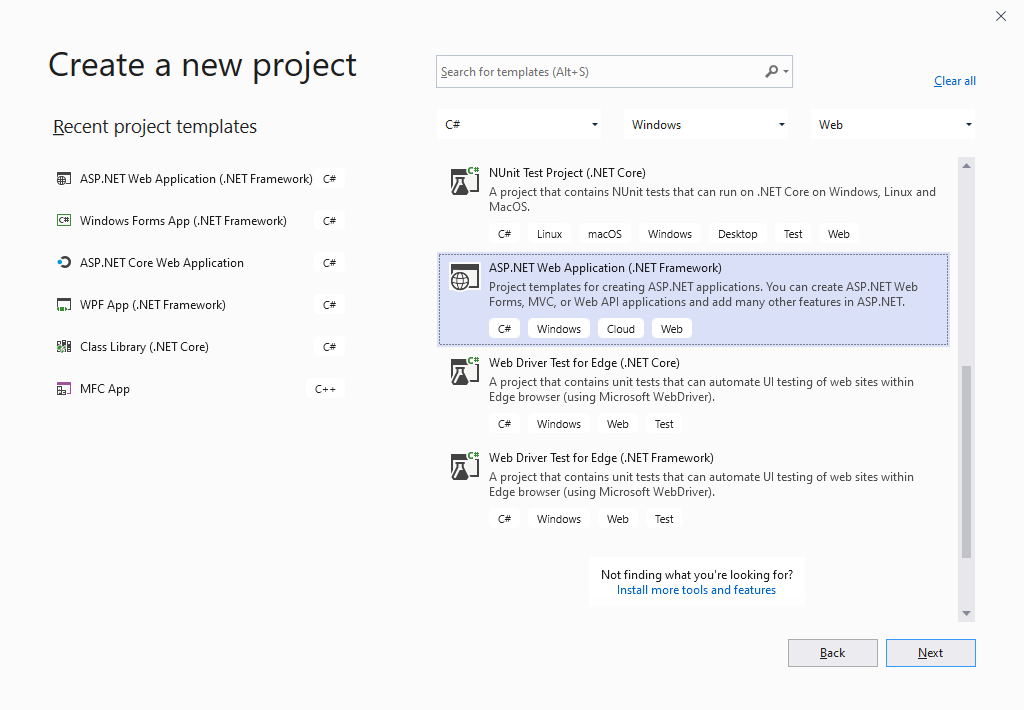
In the dialog Create a new project, select ASP.NET Web Application (.NET Framework) for C# and confirm with Next.
-
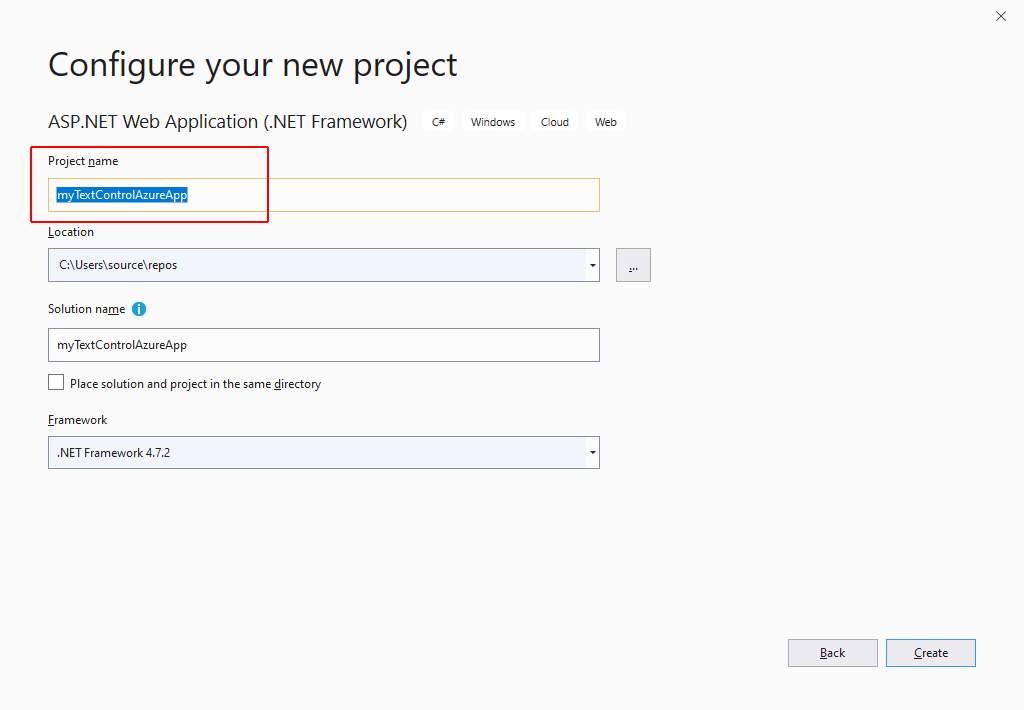
In Configure a new project, enter the name myTextControlAzureApp and confirm with Create.
-
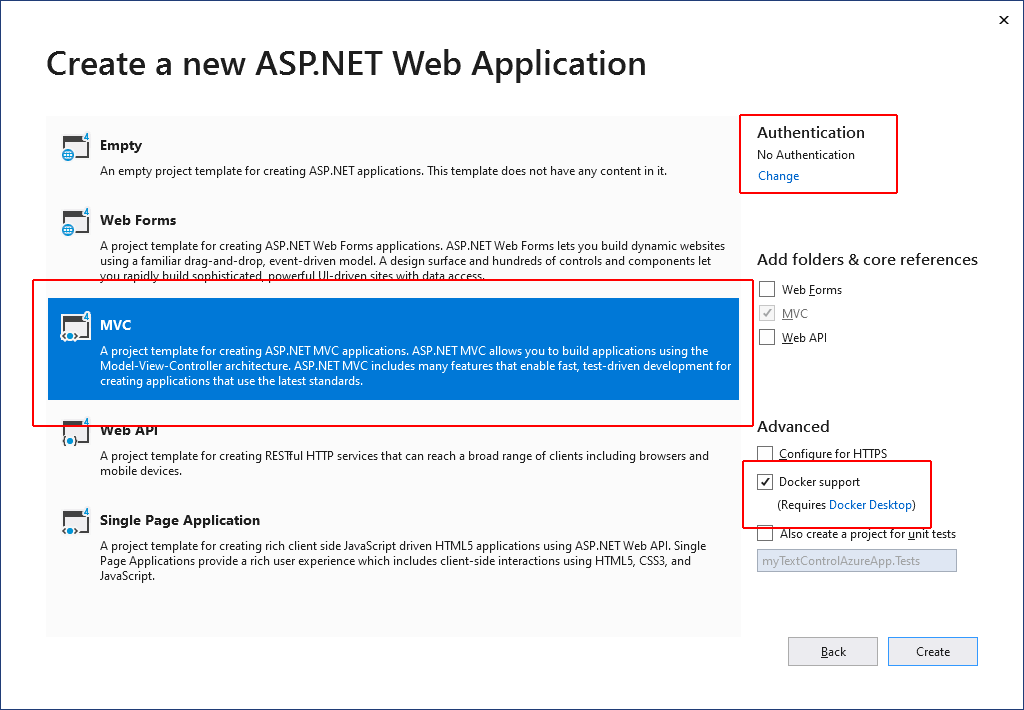
Select MVC as the project template, select Docker support and make sure that No Authentication is selected for the Authentication type. To finish the creation, click Create.
-
After the project has been created, find the Dockerfile file in the Solution Explorer and open it. Change the parent image to a supported parent image (> Server Core 2016). Also, the C++ 2013 Redistributables are required and will be automatically deployed to the container. Replace the content with the following commands, so that the complete Dockerfile looks like this:
FROM mcr.microsoft.com/dotnet/framework/aspnet:4.7.2-windowsservercore-ltsc2019

ADD http://download.microsoft.com/download/0/5/6/056dcda9-d667-4e27-8001-8a0c6971d6b1/vcredist_x64.exe vcredist_x64.exe
RUN Start-Process -filepath C:\vcredist_x64.exe -ArgumentList "/install", "/passive", "/norestart", "'/log a.txt'" -PassThru | wait-process

ARG source
WORKDIR /inetpub/wwwroot
COPY ${source:-obj/Docker/publish} .
Adding TX Text Control
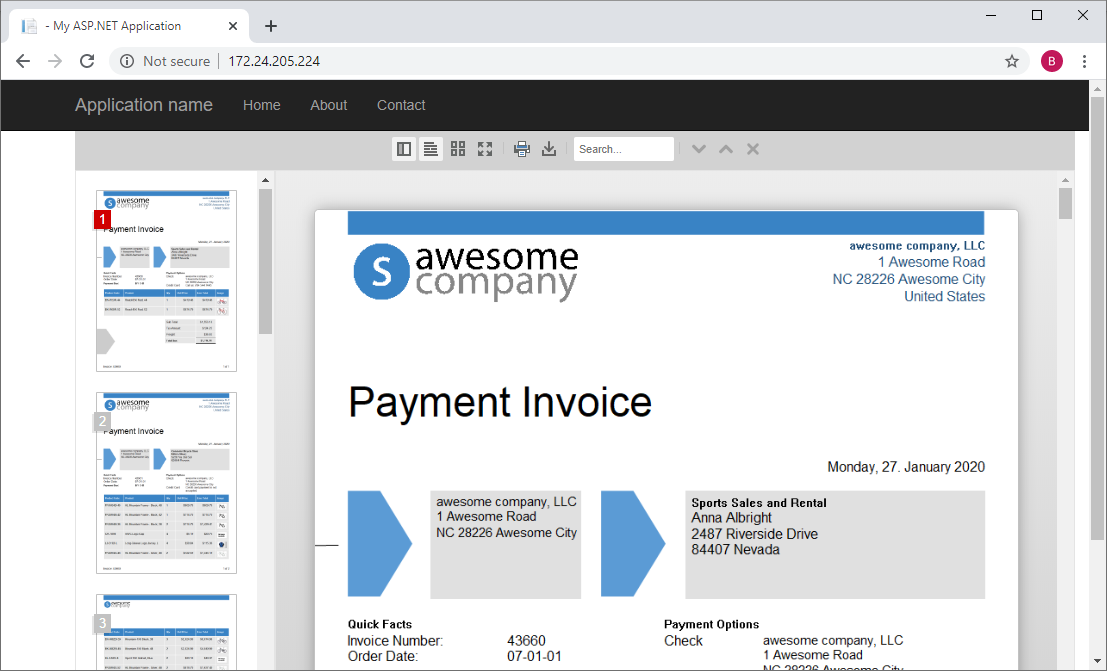
In this tutorial step, the sample invoice template and the shipped XML data source is used to create a document that is displayed in the DocumentViewer.
-
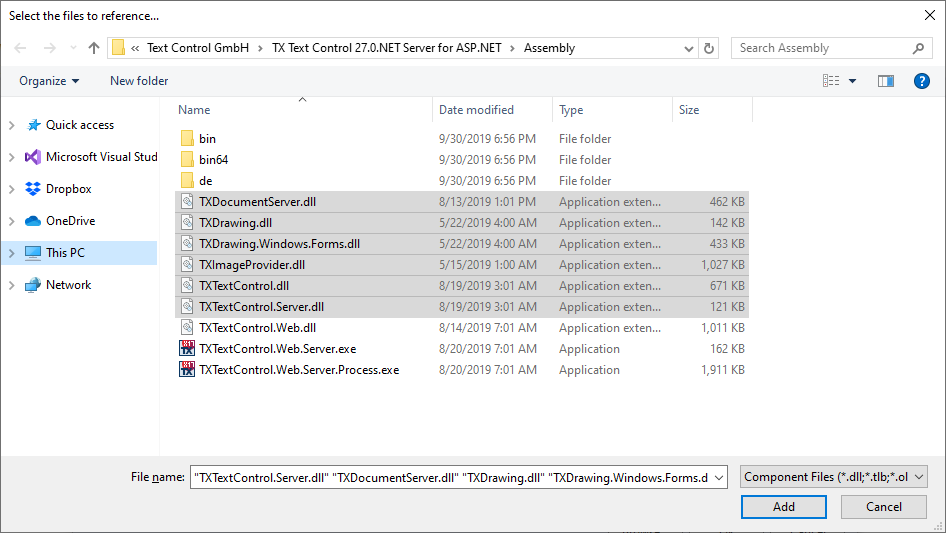
Select Add Reference... from the Project main menu. In the opened dialog box, click Browse... and navigate to the TX Text Control installation folder. Select the files TXDocumentServer.dll, TXDrawing.dll, TXDrawing.Windows.Forms.dll, TXImageProvider.dll, TXTextControl.dll and TXTextControl.Server.dll and click Add to add these references. Click OK to close the Reference Manager.
-
In the Solution Explorer, right-click the folder Properties and select Add > Text File, name it licenses.licx and click OK. Add the following content to the file:
TXTextControl.ServerTextControl, TXTextControl.Server, Culture=neutral, PublicKeyToken=6b83fe9a75cfb638 -
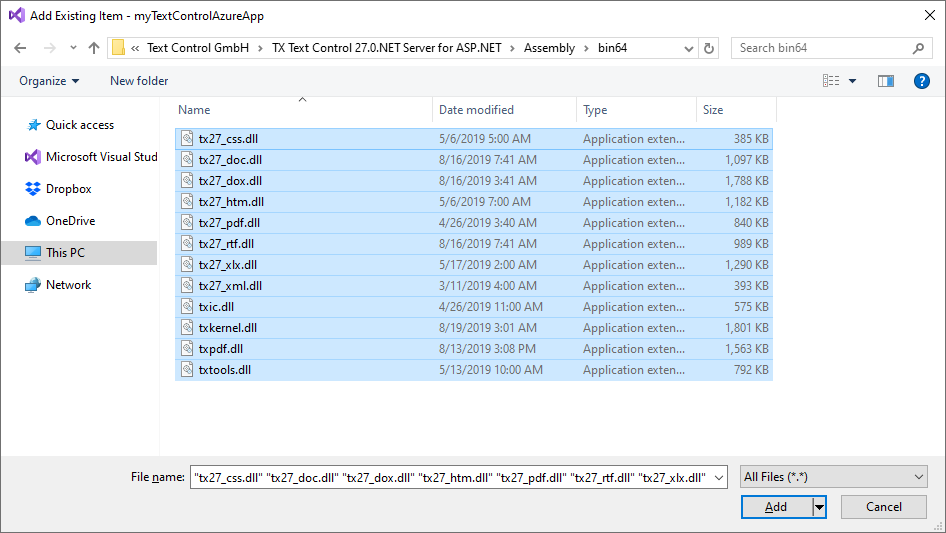
In the Solution Explorer, select the project myTextControlAzureApp and select Add Existing Item... form the Project main menu. Navigate to the TX Text Control installation folder and find the Assembly > bin64 folder. Select all files and click Add.
-
In the Solution Explorer, select the added files and set the properties Build Action to Content and Copy to Output Directory to Copy Always.
-
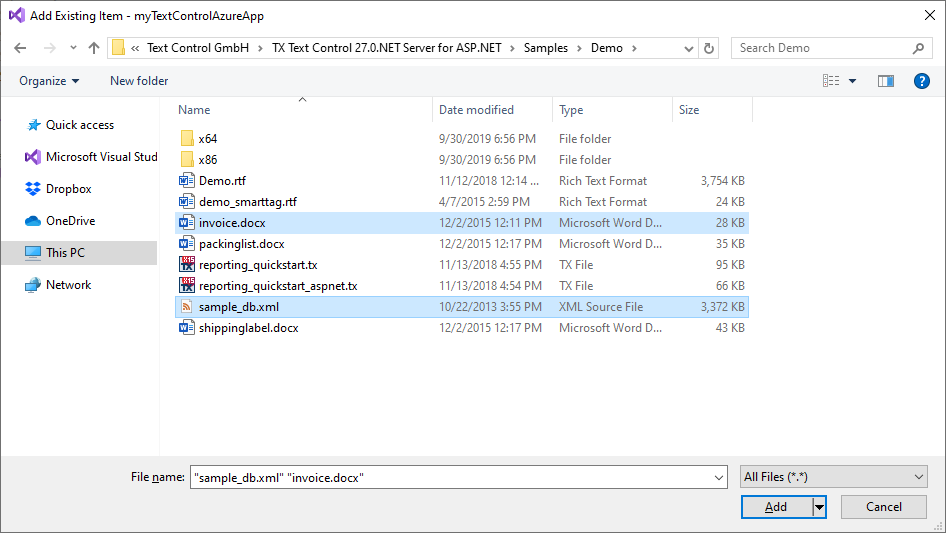
In the Solution Explorer, select the App_Data folder and select Add Existing Item... from the Project main menu. Find the TX Text Control installation folder, open Samples > Demo and add the files invoice.docx and sample_db.xml. Click Add to include the files. Set the properties Build Action to Content and Copy to Output Directory to Copy Always.
-
Click Manage NuGet Packages... from the Project main menu. Select nuget.org from the Online package source panel. In the upper right corner, search for TXTextControl.Web.DocumentViewer. Find the latest version and click on Install.
Creating the Demo Code
-
In the Solution Explorer, select the Models folder and create a new class file by choosing Add Class... from the Project main menu. Name the new class DocumentView.cs and add the following code:
namespace myFirstAzureWebApp.Models { public class DocumentView { public string DocumentName { get; set; } public string DocumentData { get; set; } } } -
Open the HomeController from the Controllers folder and replace the code with the following controller code:
using myFirstAzureWebApp.Models; using System; using System.Data; using System.Web.Mvc; namespace myFirstAzureWebApp.Controllers { public class HomeController : Controller { public ActionResult Index() { using (TXTextControl.ServerTextControl tx = new TXTextControl.ServerTextControl()) { tx.Create(); // load MS Word merge fields and included merge blocks TXTextControl.LoadSettings ls = new TXTextControl.LoadSettings() { ApplicationFieldFormat = TXTextControl.ApplicationFieldFormat.MSWord, LoadSubTextParts = true }; // load the template tx.Load(Server.MapPath("~/App_Data/invoice.docx"), TXTextControl.StreamType.WordprocessingML, ls); using (TXTextControl.DocumentServer.MailMerge mailMerge = new TXTextControl.DocumentServer.MailMerge()) { mailMerge.TextComponent = tx; DataSet ds = new DataSet(); ds.ReadXml(Server.MapPath("~/App_Data/sample_db.xml"), XmlReadMode.Auto); // merge data into template mailMerge.Merge(ds.Tables[0]); byte[] data = null; tx.Save(out data, TXTextControl.BinaryStreamType.InternalUnicodeFormat); // return the document and the document name DocumentView documentView = new DocumentView() { DocumentData = Convert.ToBase64String(data), DocumentName = ls.LoadedFile }; return View(documentView); } } } } } -
Open the view file Views > Home > Index.cshtml and replace the content with the following content:
@using TXTextControl.Web.MVC.DocumentViewer
@model myFirstAzureWebApp.Models.DocumentView

<div style="width: 1000px; height: 600px;">

    @Html.TXTextControl().DocumentViewer(settings =>
    {
        settings.DocumentData = Model.DocumentData;
        settings.DocumentPath = Model.DocumentName;
        settings.Dock = DocumentViewerSettings.DockStyle.Fill;
    }).Render()

</div>
Installing Required Fonts
Windows Server Core 2019 does not come with pre-installed fonts which is an essential part for document processing applications. Instead of deploying fonts to the server, fonts can be locally registered for individual applications.
-
Create 2 new folders in the project named InstallFonts and Helpers.
-
In the folder Helpers, create a new class file Fonts.cs and copy the following code into it:
using System.Runtime.InteropServices; namespace myFirstAzureWebApp.Helpers { public class Fonts { [DllImport("gdi32", EntryPoint = "AddFontResource")] public static extern int AddFontResourceA(string lpFileName); [System.Runtime.InteropServices.DllImport("gdi32.dll")] public static extern int AddFontResource(string lpszFilename); } } -
Copy required fonts from your local font folder (C:\Windows\Fonts) to the InstallFonts folder. For testing, copy only a handful of fonts to safe space. Set the properties Build Action to Content and Copy to Output Directory to Copy Always
-
Find the file Global.asax in the project's root folder and replace it with this code:
using myFirstAzureWebApp.Helpers; using System.IO; using System.Web; using System.Web.Mvc; using System.Web.Optimization; using System.Web.Routing; namespace myTextControlAzureApp { public class MvcApplication : System.Web.HttpApplication { protected void Application_Start() { foreach (string font in Directory.GetFiles( Path.Combine(HttpRuntime.AppDomainAppPath, "InstallFonts"))) { Fonts.AddFontResource(font); } AreaRegistration.RegisterAllAreas(); FilterConfig.RegisterGlobalFilters(GlobalFilters.Filters); RouteConfig.RegisterRoutes(RouteTable.Routes); BundleConfig.RegisterBundles(BundleTable.Bundles); } } } -
From the Visual Studio menu, select Debug > Start Without Debugging to run the web application locally.
Publish to Docker Hub
-
In the Solution Explorer, right-click myTextControlAzureApp and select Publish.
-
Select Container Registry as the target and Docker Hub as the registry. Click Create Profile to confirm.
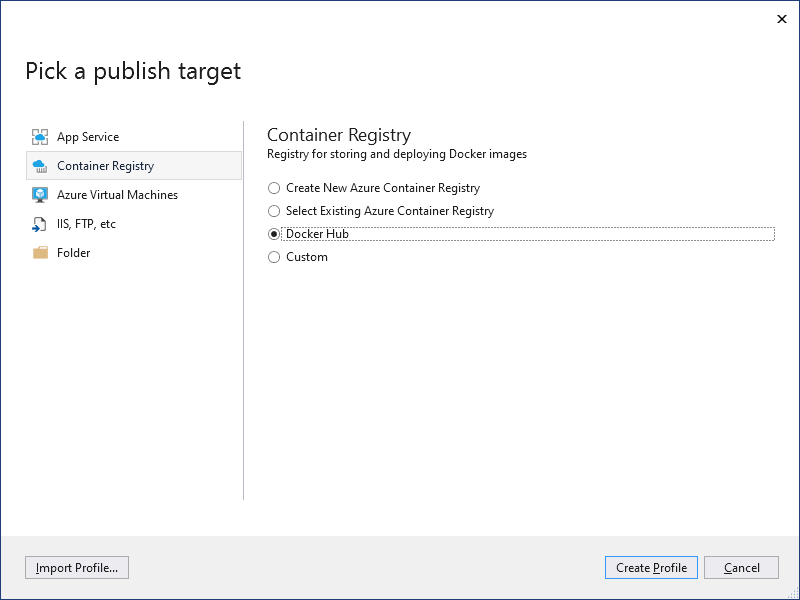
-
In the opened Docker Hub dialog box, enter your Docker Hub credentials and confirm with Save.
-
In the opened Publish page, click on Publish to publish your project to the Docker Hub.

Creating an Azure Windows Container App
Now, the created Docker container can be deployed as an Azure Windows Container App to Azure App Service.
-
Open the Azure Portal and sign in with your Azure account.
-
Find App Services in the left-hand menu and open it. Select + Add from the menu to create a new service.
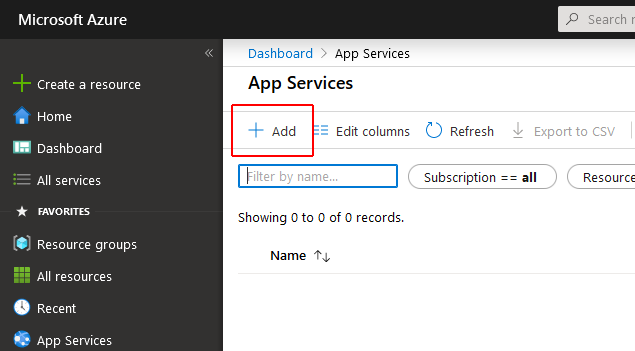
-
In the opened page, choose your Azure subscription and a Resource Group.
-
Choose a Name for your application, select Docker Container and Windows as the Operating System. Select a region for your deployment and click Next: Docker.
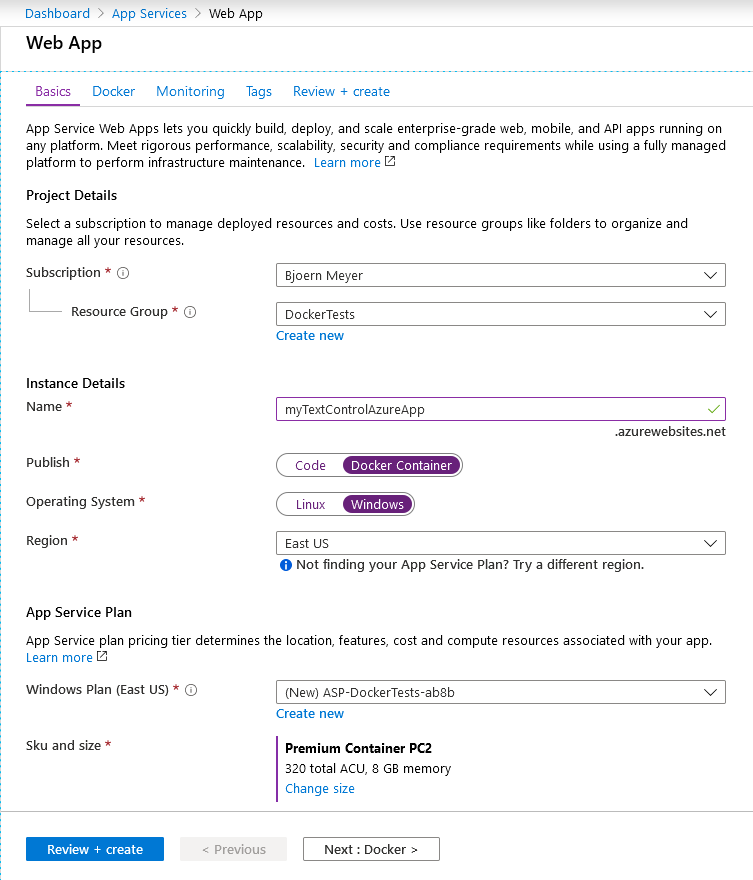
-
In the next page Docker, select Docker Hub as the Image Source, Public as the Access Type and enter your Image name and tag of the create container image (in this case: textcontrol/mytextcontrolazureapp:latest).
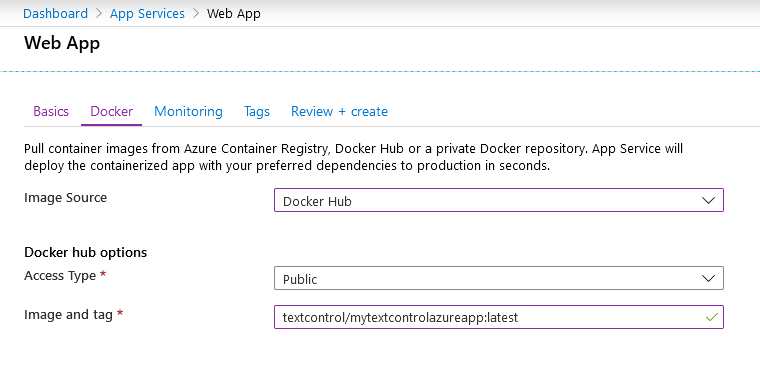
-
Select Review and Create and click Create.
Browse the Container App
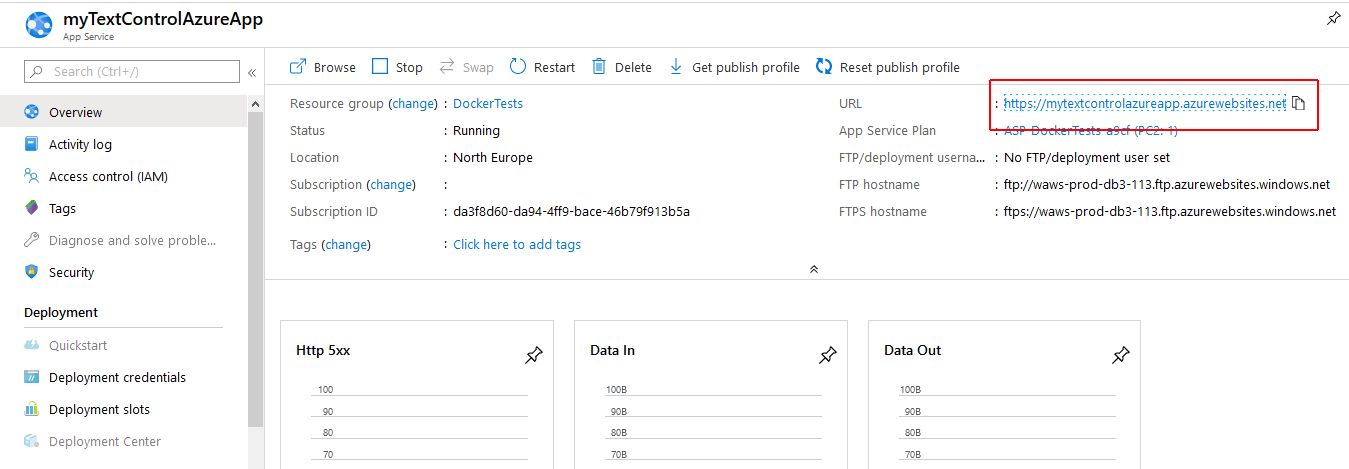
After Azure created the application, a notification box is displayed. You will also find the deployed application in the list of App Services.
-
Select the newly created App Service. Find the URL in the overview page and click on the link to open it in a new browser tab.
ASP.NET
Integrate document processing into your applications to create documents such as PDFs and MS Word documents, including client-side document editing, viewing, and electronic signatures.
- Angular
- Blazor
- React
- JavaScript
- ASP.NET MVC, ASP.NET Core, and WebForms
Related Posts
Modules of TX Text Control .NET Server Explained
This article gives an overview of all modules that are part of TX Text Control .NET Server and explains when to use what.
Why an Unlimited Runtime License (OEM) for TX Text Control is Perfect for…
Platforms such as AWS Fargate and Azure App Services enable developers to build and deploy applications that dynamically scale to meet demand. For these deployments, this article explains why it…


