The MVC DocumentViewer provides a feature to request electronic signatures from document signers. This sample shows the workflow to request signatures from multiple signers.
Creating the Template
In a first step, a document needs to be prepared for electronic signatures. The MVC DocumentViewer checks for TextFrames with a specific Name that can be specified in the settings.
- Open the shipped TX Text Control Words sample application and create a simple document or load a document that should be signed.
-
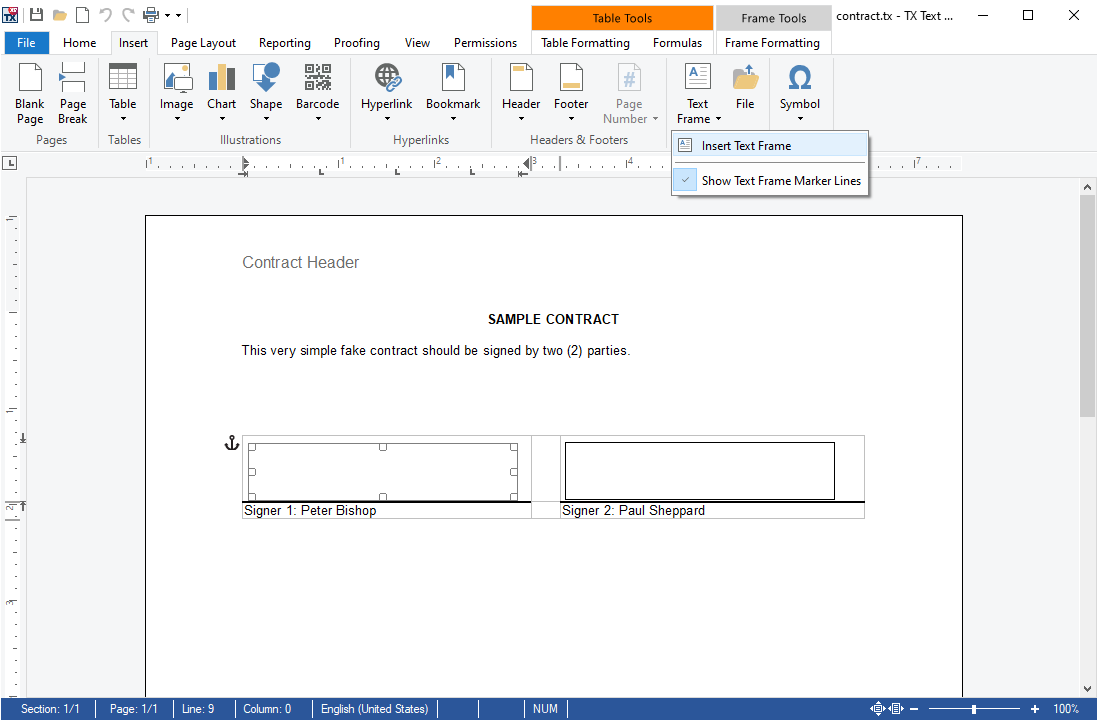
Select Insert Text Frame from the Text Frame drop-down box in the Insert ribbon tab to insert a text frame at the desired location.
-
Select the text frame, find the contextual tab Frame Tools and set the Name of the inserted frame to txsign_1 (or any other unique name).
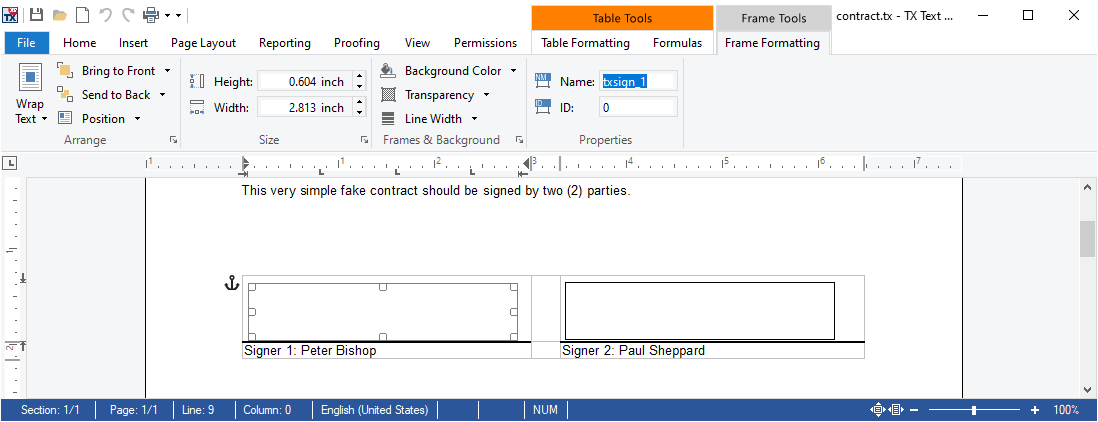
Repeat this step with as many signature frames as required. Use a unique name for each signer (txsign_1, txsign_2, ...).
The Document Workflow
The sample application implements a document workflow structure. For each document signing process (envelope), a folder is created with the unique envelope ID. This folder contains the template (contract.tx) and a JSON description file (documentflow.json):
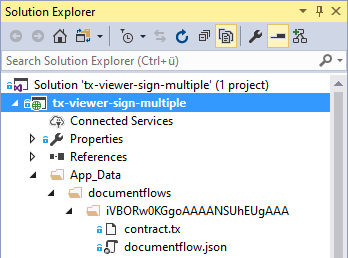
The JSON file contains the object DocumentFlow serialized as JSON:
| { | |
| "EnvelopeId": "iVBORw0KGgoAAAANSUhEUgAAA", | |
| "Template": "contract.tx", | |
| "Owner": "Jack Lawyer", | |
| "Signers": [ | |
| { | |
| "Id": 1, | |
| "Name": "Bishop", | |
| "Initials": "PB", | |
| "FirstName": "Peter", | |
| "Email": "peter@bishop.com", | |
| "SignatureBoxName": "txsign_1", | |
| "SignatureComplete": false | |
| }, | |
| { | |
| "Id": 2, | |
| "Name": "Sheppard", | |
| "Initials": "PS", | |
| "FirstName": "Paul", | |
| "Email": "paul@sheppard.com", | |
| "SignatureBoxName": "txsign_2", | |
| "SignatureComplete": false | |
| } | |
| ] | |
| } |
The Sample Application
When launching the sample application, an overview of all available document flows is shown. This is the view of the document owner:
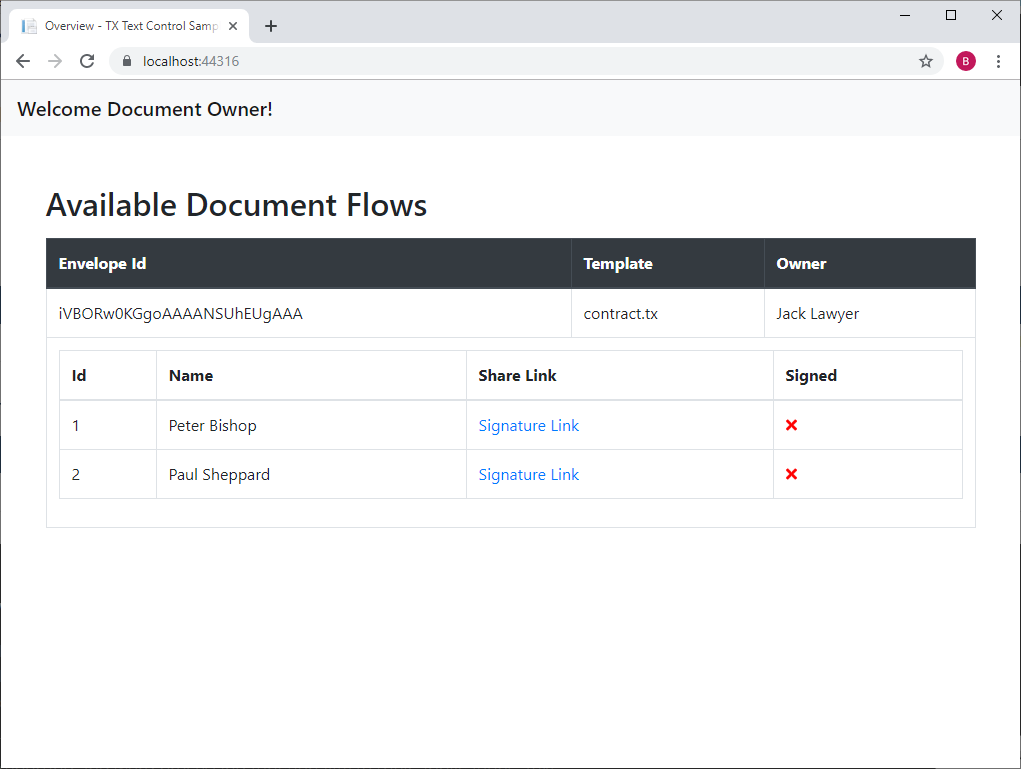
If you click on a link Signature Link, the end-user view is opened to request an electronic signature. In real-world scenarios, this link would be shared with the specific end-user for signing a document.
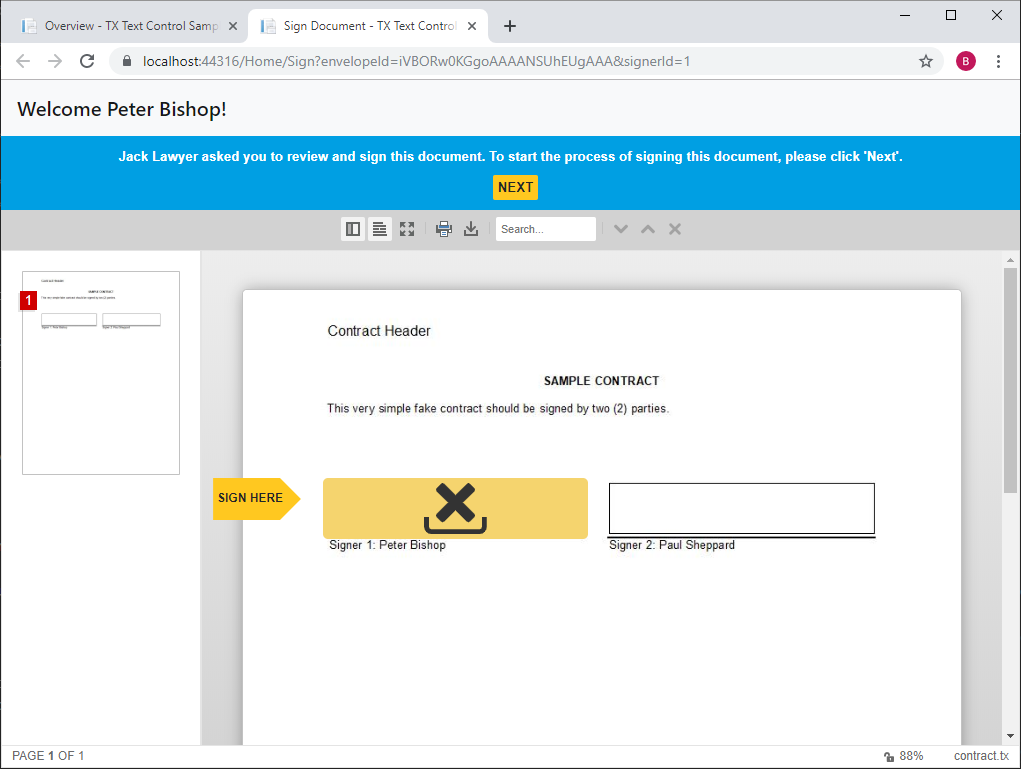
In this view, the DocumentViewer is initialized with SignatureSettings. The property SignatureBoxName defines which text frames in the document should be used as signature boxes:
| @Html.TXTextControl().DocumentViewer(settings => | |
| { | |
| settings.DocumentPath = Server.MapPath("~/App_Data/documentflows/" | |
| + Model.EnvelopeId + "/" + Model.Template); | |
| settings.Dock = DocumentViewerSettings.DockStyle.Fill; | |
| settings.SignatureSettings = new SignatureSettings() | |
| { | |
| OwnerName = Model.Owner, | |
| ShowSignatureBar = true, | |
| SignatureBoxName = Model.Signer.SignatureBoxName, | |
| SignerInitials = Model.Signer.Initials, | |
| SignerName = Model.Signer.FirstName + " " + Model.Signer.Name, | |
| UniqueId = Model.EnvelopeId | |
| }; | |
| }).Render() |
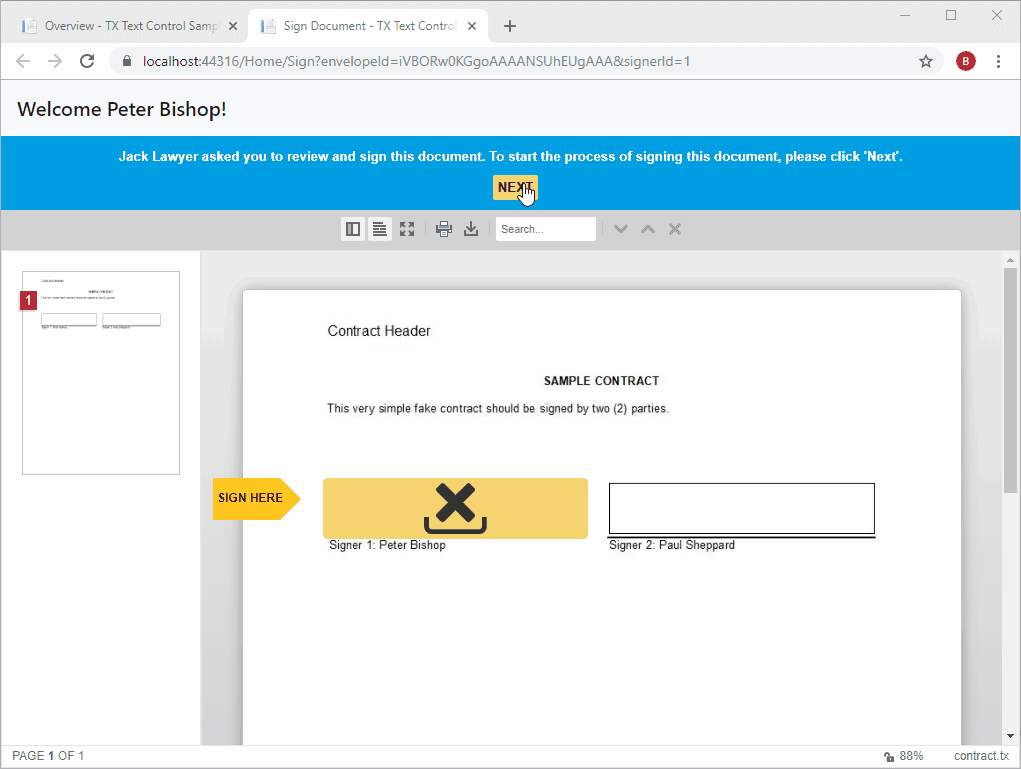
The "end-user" is now clicking Next in order to setup the signature and to sign the document.
Back in the Overview page (close the opened "end-user" tab), refresh the page to see the updated status:
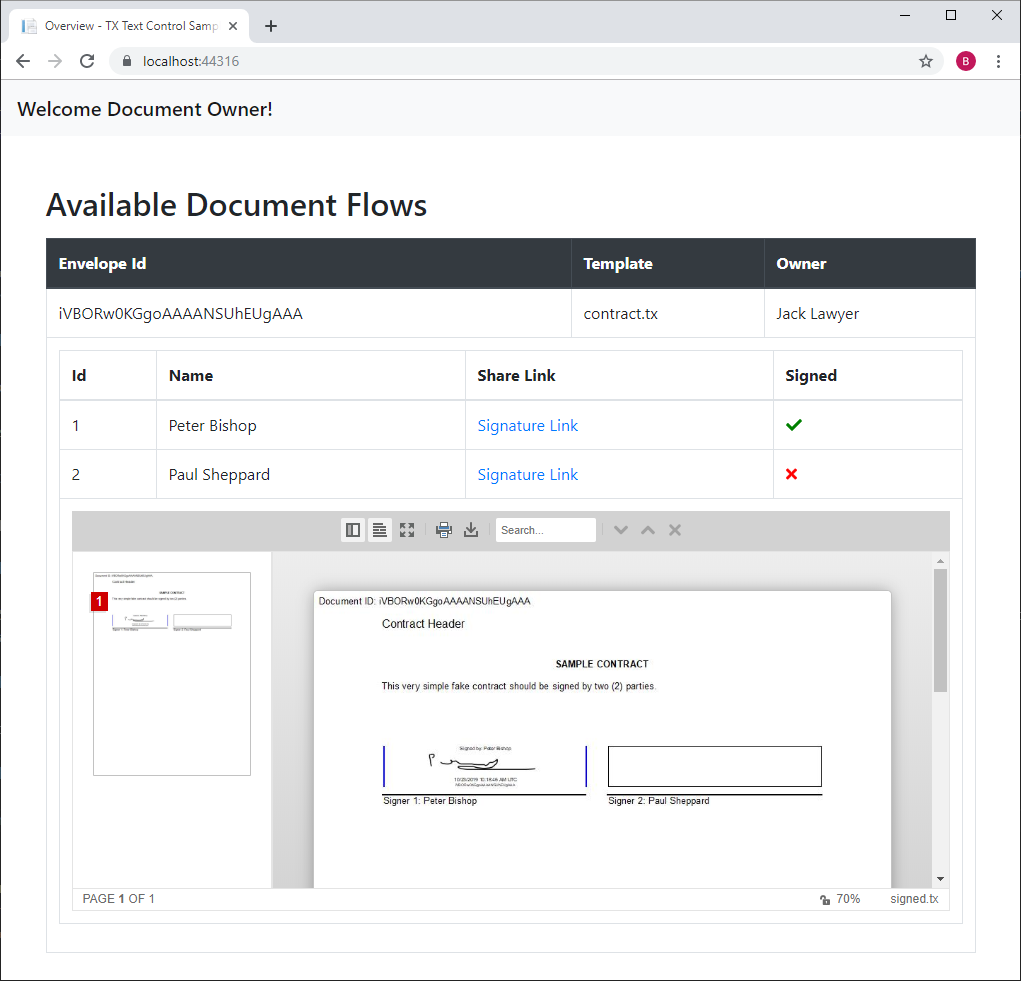
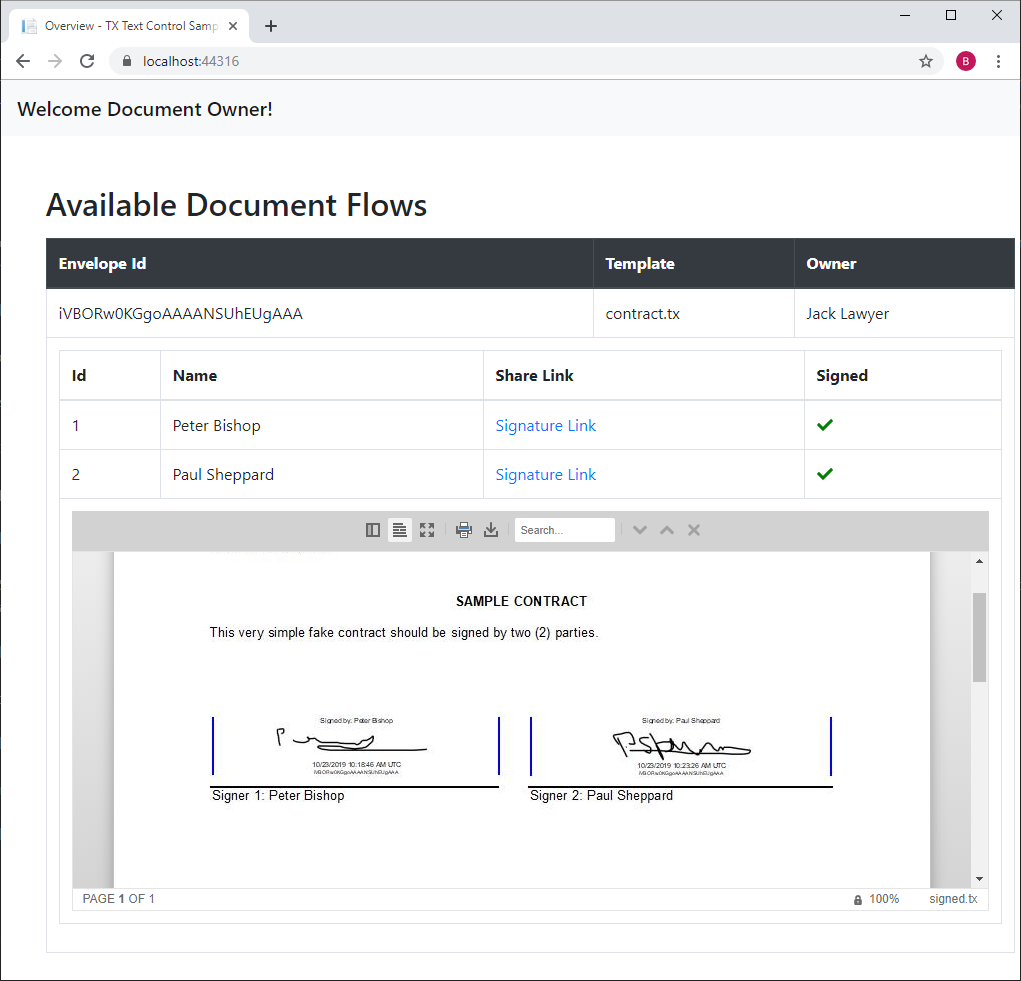
You can see that one of the signers completed the signature and a preview of the signed document is shown. Repeat the above steps for the second signer to see the completely signed document:
This sample shows one possible workflow controlled by a JSON file and folder structure. In real-world applications, the workflow might be stored in a database and the document workflow can be automated. The advantage of TX Text Control is that the logic and workflow can be adapted to the exact requirements of the application. At the end, the document could be exported to PDF/A encrypted with an SSL certificate using TX Text Control. The flexibility of TX Text Control allows developers to integrate and control the complete document workflow.
Test this on your own and download this sample from our GitHub repository.


