Electronic signatures (e-signatures) have transformed business by providing a fast, secure, and legally binding way to digitally sign documents. This technology has been particularly valuable in accelerating processes such as contract approvals, vendor agreements, and onboarding, allowing companies to significantly reduce cycle times.
Pixel-Perfect Design
There are several design and usability advantages to using an editable Microsoft Word-compatible document for e-signatures over a read-only PDF, especially if the focus is on creating a pixel-perfect document with signature fields. Signature fields in editable documents can be precisely positioned and styled, making them intuitive and easy for signers to find. Unlike PDFs, which may require additional software for precise field placement, TX Text Control allows easy placement of signature fields with pixel-level accuracy.
Various TX Text Control components work hand in hand to provide the perfect document signing experience for both the end user and the developer who integrates it into applications and workflows.
This tutorial will guide you through the process of creating a document with multiple signature fields for different signers.
Creating a Signature Template
Consider the following scenario: A contract is to be signed by two parties with signatures and initials in different locations. The following screenshot shows the TX Text Control Document Editor, which is available for ASP.NET (Core) and Windows applications with a typical non-disclosure agreement (NDA).
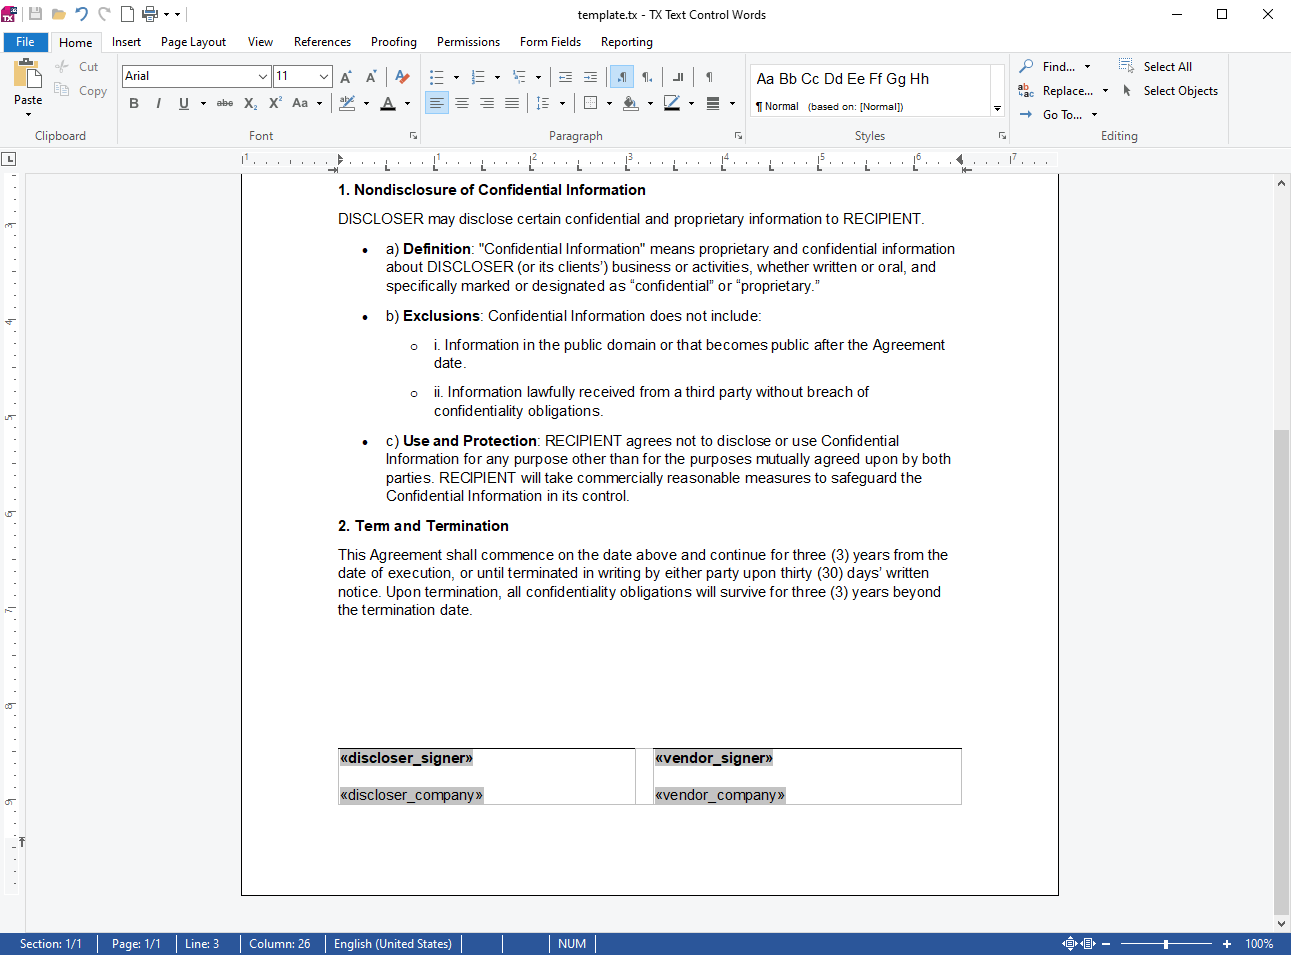
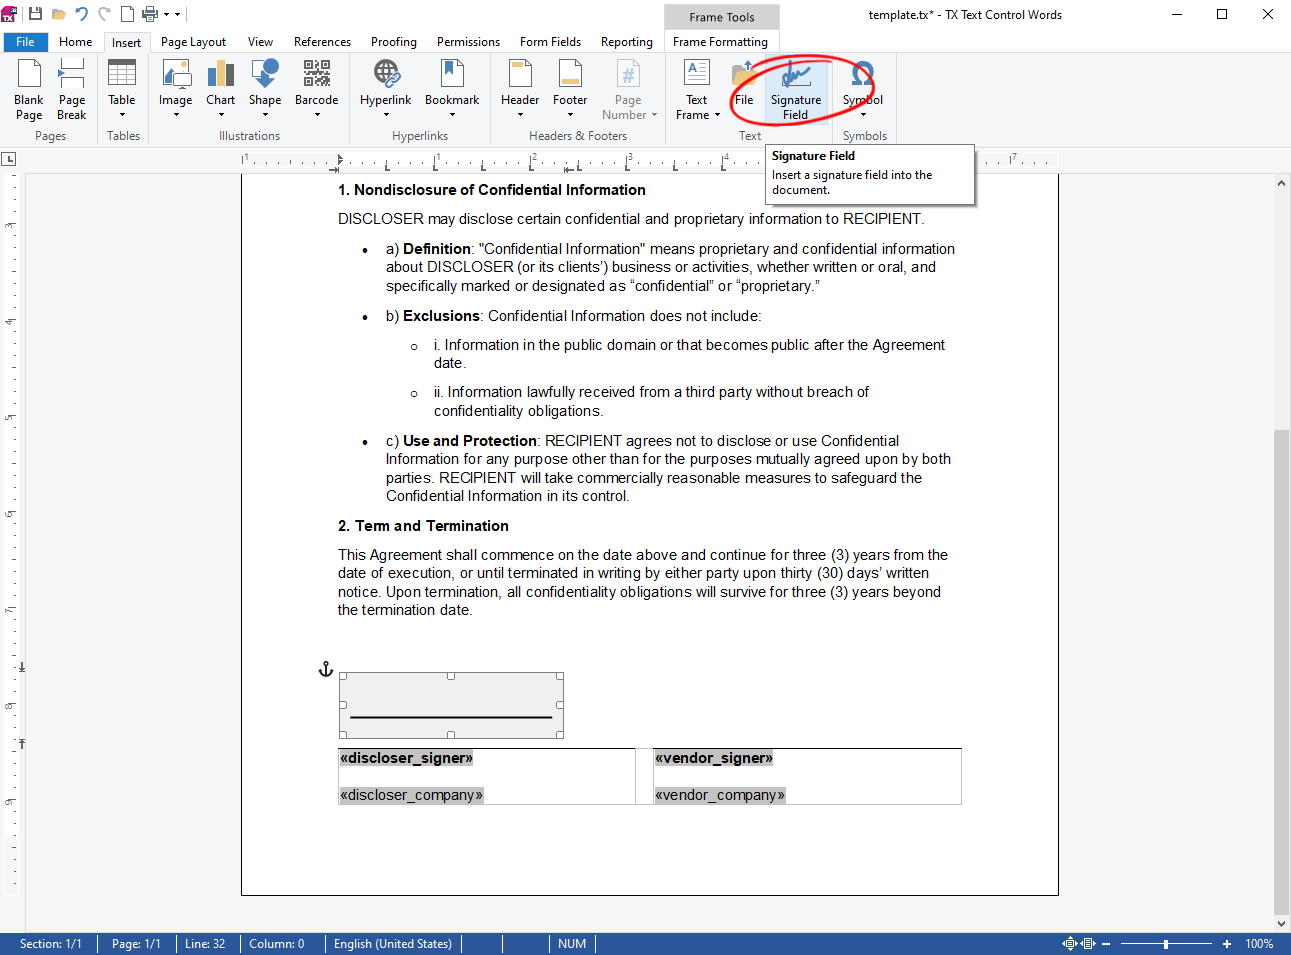
There are two signatories required to sign this agreement, the disclosing party and a selling party. In addition, the selling party should initial a special paragraph to indicate this feature as well. We will start with the first signature for the disclosing party. With Insert -> Signature Field we will draw a signature field at the exact position.
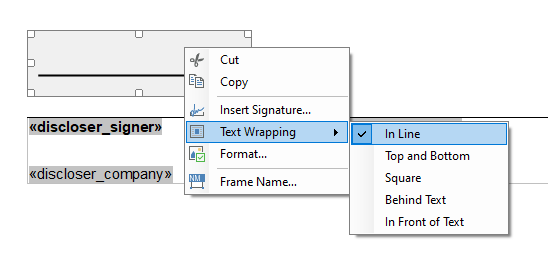
You can also set Text Wrapping to In Line to dynamically move the signature with the next one, but this is optional.
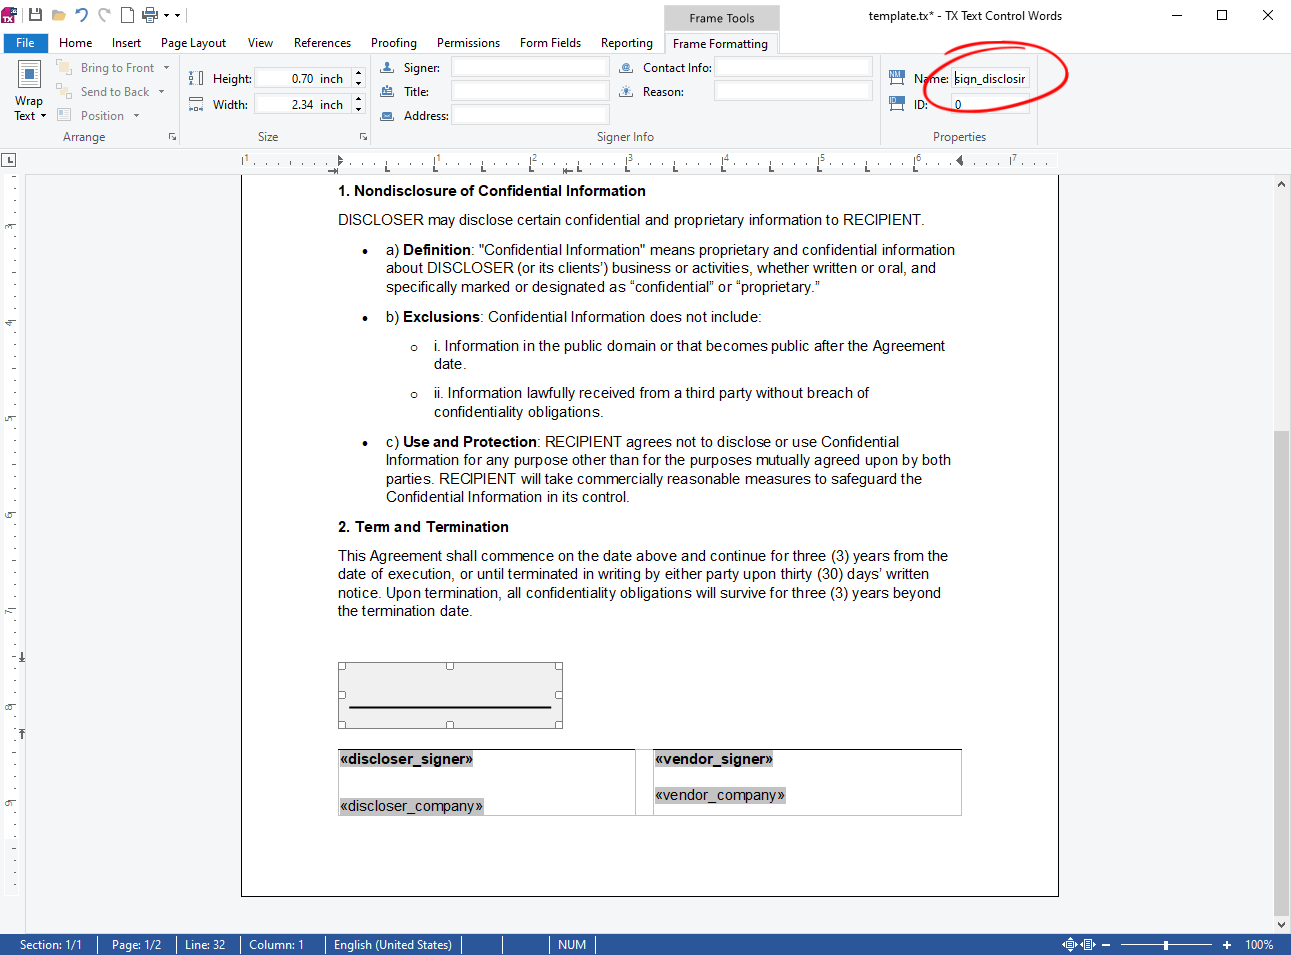
Now select the signature field and change the field name to sign_discloser.
Now, we will add the second signature field for the selling party. Repeat the steps above to add a second signature field and name it sign_vendor.
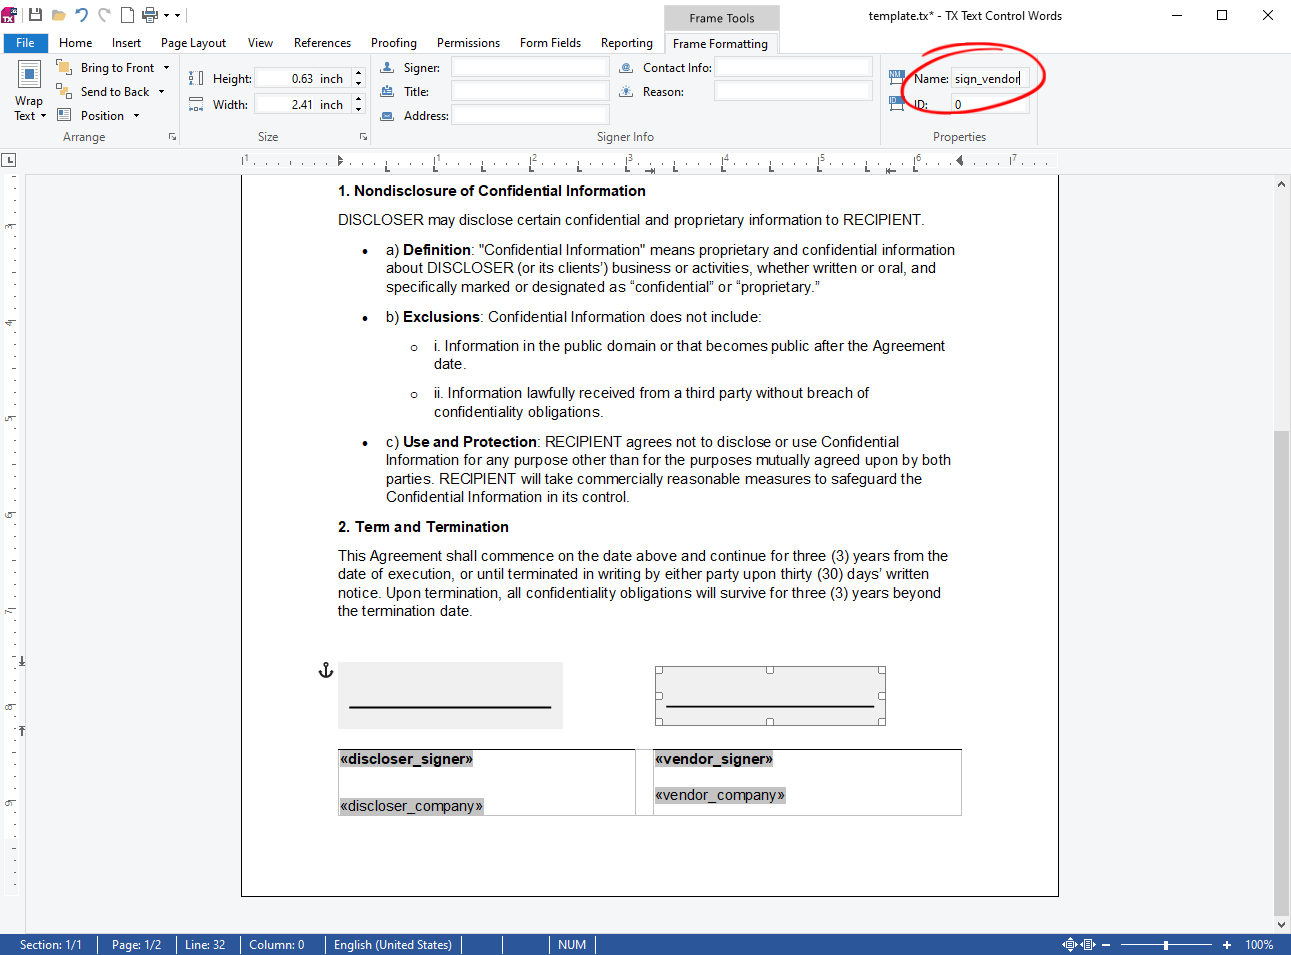
Finally, we will add the initial field for the selling party. Repeat the steps above to add an initial field and name it init_vendor.
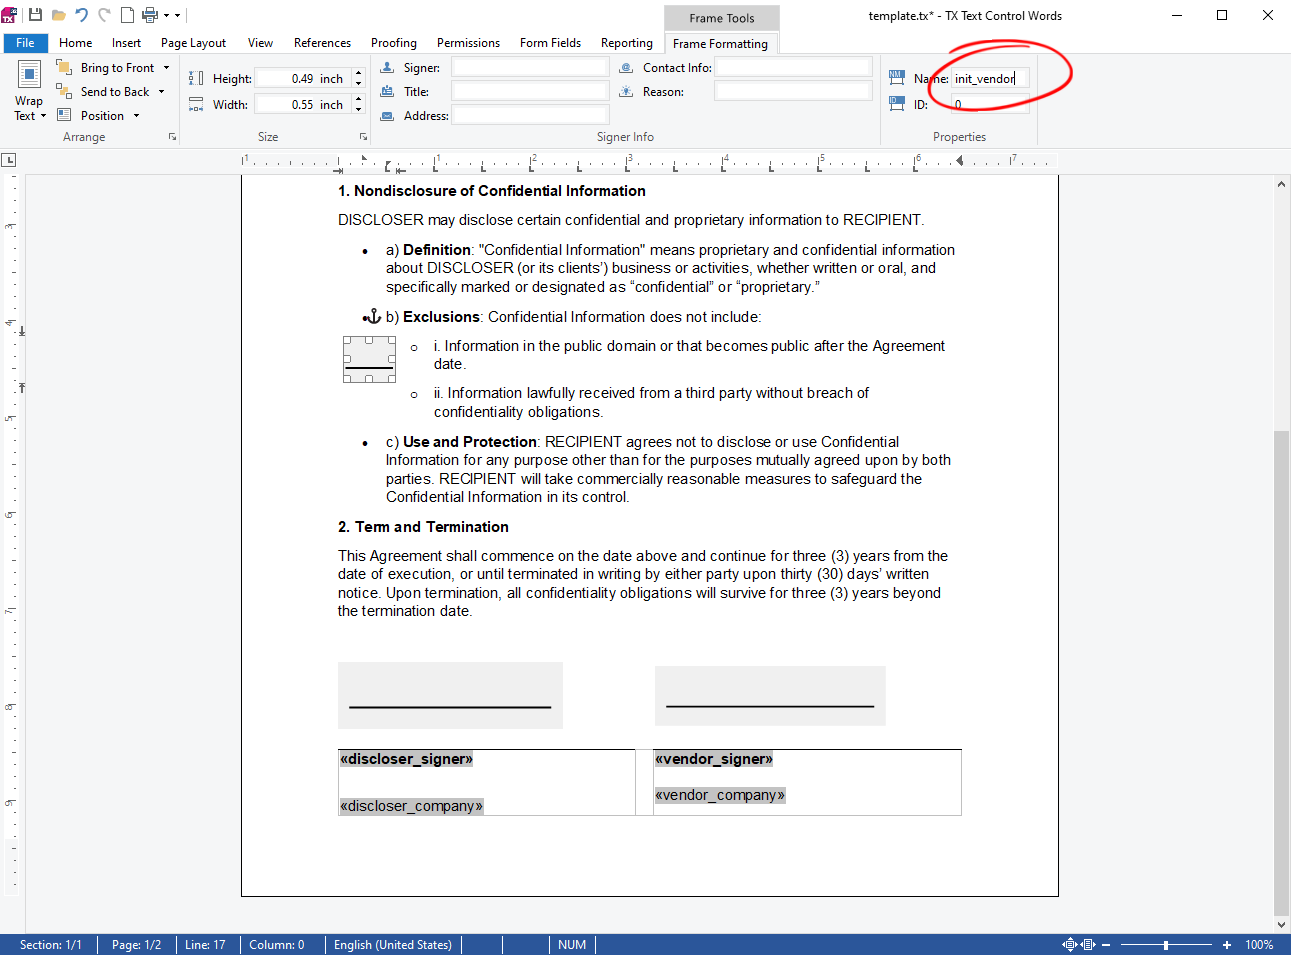
The different names for the signature fields are used to distinguish the different signers during the signature process using the Document Viewer. The names are used to identify the fields and to assign the signature to the correct signer.
Initializing the Document Viewer
TX Text Control provides an out-of-the-box document viewer that can be used to display and sign documents in a web application. After you have created an application using the Document Viewer, you can use the SignatureSettings to initialize the Viewer with the correct signature field. The following tutorial will help you create a web application from scratch.
Learn More
This article shows how to use the TX Text Control ASP.NET document viewer within a .NET 6 application in Visual Studio 2022.
In the view where the Document Viewer is created, use the following code to initialize the signature fields for the disclosing party.
| @using TXTextControl.Web.MVC.DocumentViewer | |
| <div style="width: 800px; height: 600px;"> | |
| @Html.TXTextControl().DocumentViewer(settings => | |
| { | |
| settings.DocumentPath = "template.tx"; | |
| settings.Dock = DocumentViewerSettings.DockStyle.Fill; | |
| settings.SignatureSettings = new SignatureSettings() { | |
| ShowSignatureBar = true, | |
| OwnerName = "Paul Paulsen", | |
| SignerName = "Tim Typer", | |
| SignerInitials = "TT", | |
| SignatureBoxes = new SignatureBox[] { | |
| new SignatureBox("sign_discloser") { | |
| SigningRequired = true, Style = SignatureBox.SignatureBoxStyle.Signature | |
| } | |
| } | |
| }; | |
| }).Render() | |
| </div> |
The following screenshot shows the Document Viewer with the first signature box enabled. Note the other signature fields that are disabled for this session.
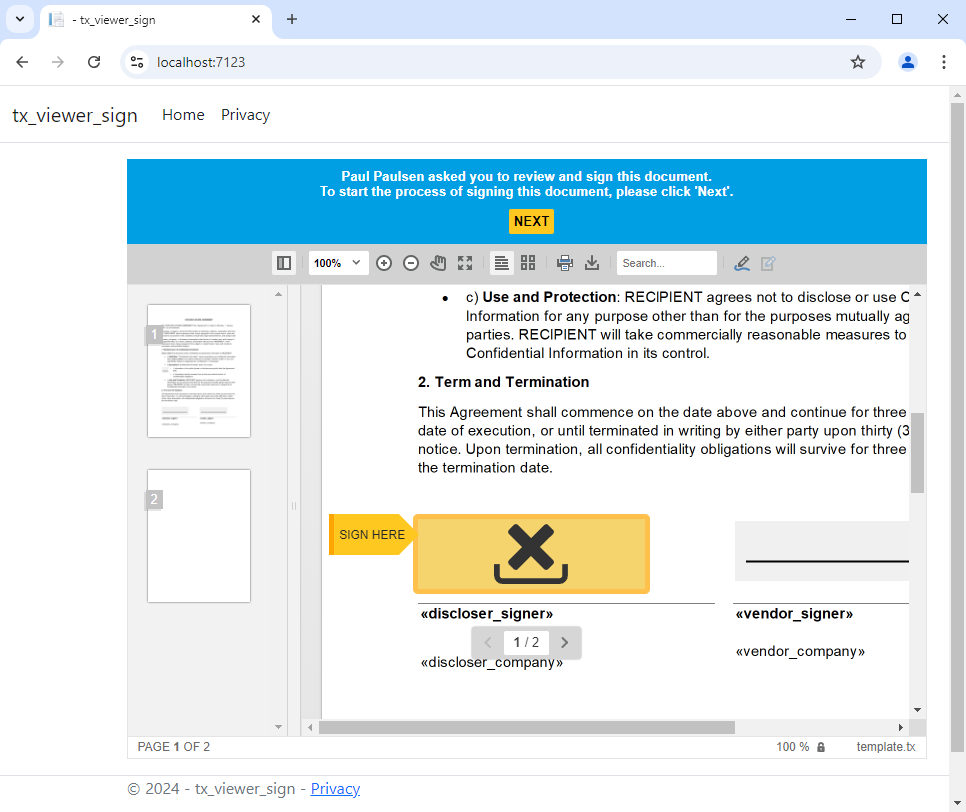
To initialize the Document Viewer for the vendor signature, use the following code.
| @using TXTextControl.Web.MVC.DocumentViewer | |
| <div style="width: 800px; height: 600px;"> | |
| @Html.TXTextControl().DocumentViewer(settings => | |
| { | |
| settings.DocumentPath = "template.tx"; | |
| settings.Dock = DocumentViewerSettings.DockStyle.Fill; | |
| settings.SignatureSettings = new SignatureSettings() { | |
| ShowSignatureBar = true, | |
| OwnerName = "Paul Paulsen", | |
| SignerName = "Tim Typer", | |
| SignerInitials = "TT", | |
| SignatureBoxes = new SignatureBox[] { | |
| new SignatureBox("sign_vendor") { | |
| SigningRequired = true, Style = SignatureBox.SignatureBoxStyle.Signature | |
| }, | |
| new SignatureBox("init_vendor") { | |
| SigningRequired = true, Style = SignatureBox.SignatureBoxStyle.Initials | |
| } | |
| } | |
| }; | |
| }).Render() | |
| </div> |
The following screenshot shows the Document Viewer with the second signature box and the initial box enabled.
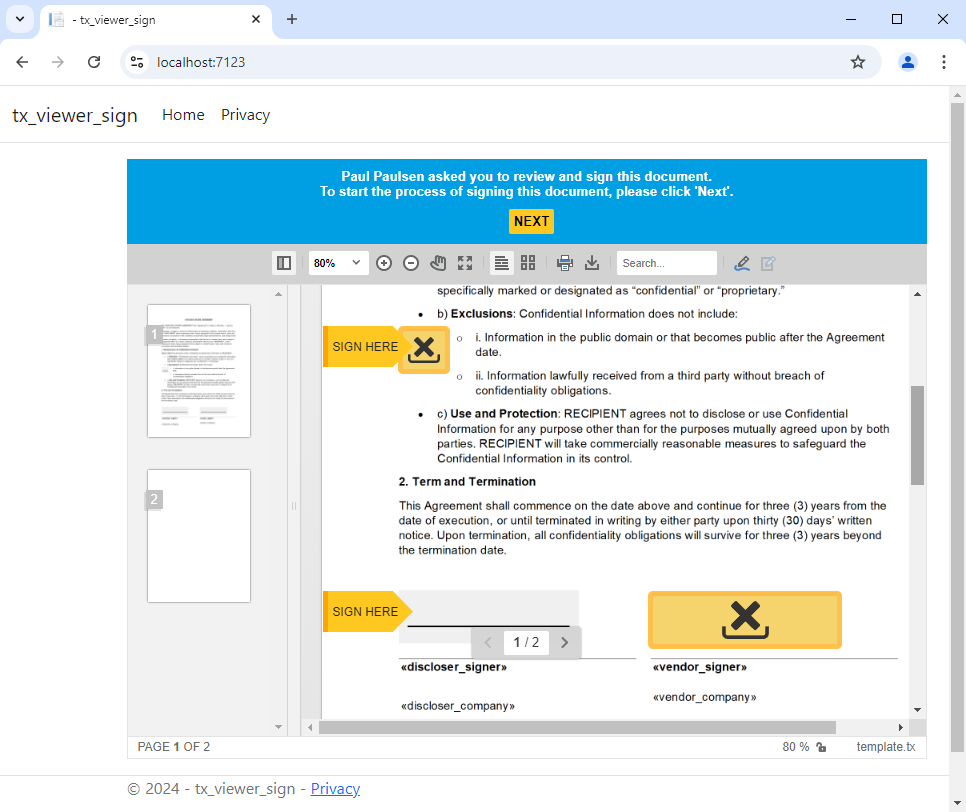
Of course, you can use unique names for these signature fields, or you can use generic names that are valid in all scenarios. Another option is to read the signature box names from the document before the initiation of the viewer.
To learn how to merge the various signatures into the final document that can be exported to PDF, read the following tutorial and sample application.
Learn More
This sample shows how to request signatures from multiple signers by using custom signature workflows and routing signature requests to custom endpoints.
Electronic Signatures: Requesting Signatures from Multiple Signers using Custom Signature Workflows
Conclusion
Creating signature templates with TX Text Control is a simple process that allows you to create pixel-perfect documents with signature fields. The Document Viewer can be initialized with the correct signature fields for different signers, allowing you to create a seamless signing experience for your users.


