Flow Type Layout Reporting Series: Creating a Simple Mailing
In this tutorial, you will learn how to create a simple template for a typical mail merge letter. This template consists of static text, the current date and the addressed person. A sample database and the final template is available for review. In a first step, open the template designer TX Text Control Words. This application is your designer to create, modify or test your templates for the TX Text Control reporting classes. In the Mailings tab, choose Select Data Source. This tutorial…


In this tutorial, you will learn how to create a simple template for a typical mail merge letter. This template consists of static text, the current date and the addressed person. A sample database and the final template is available for review.
-
In a first step, open the template designer TX Text Control Words. This application is your designer to create, modify or test your templates for the TX Text Control reporting classes.
-
In the Mailings tab, choose Select Data Source.

This tutorial shows how to use an Excel file as the data source. You could use all types of databases for your reports.
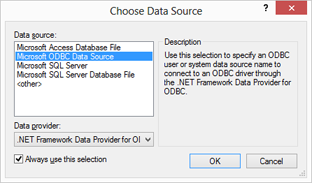
In the opened database connection wizard, choose Microsoft ODBC Data Source as the Data source and confirm with OK.
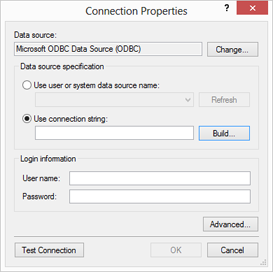
Select Use connection string as the Data source specification and click the Build... button.
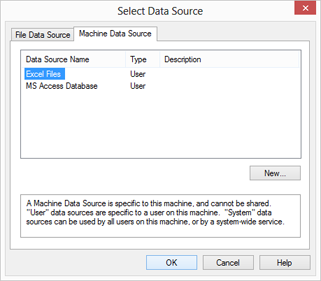
In the second tab page of the following dialog, select Excel from the list of available Machine Data Sources and confirm with OK.
Choose the sample Excel file address.xlsx and confirm with OK.
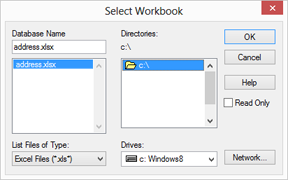
Close the underlying dialog as well by clicking OK.
-
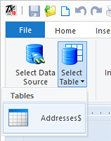
Open the drop-down button Select Table and select the table Addresses$.
-
Now start to insert the address fields into the template by choosing them from the Insert Merge Field drop-down button.
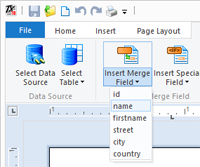
Start with the firstname and add a space after the field. After that, add the field name to the template. Insert a new line by pressing Enter and repeat the above steps for the street, city and country. The document should look like this:

-
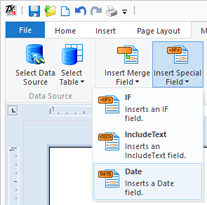
In order to insert the current date, add some blank lines and choose Date from the Insert Special Field drop-down button.
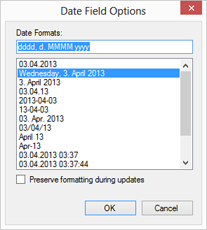
Choose the desired format of the date field such as dddd, d. MMMM yyyy and confirm with OK.
-
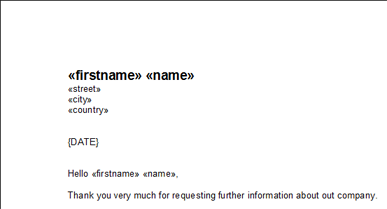
In the last step, you could add some additional text and apply some formatting to the text and fields. The final template could look like shown in the following screenshot:
-
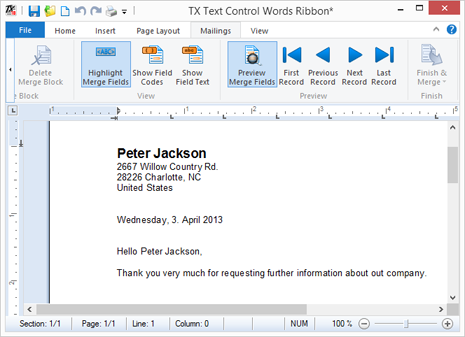
Finally, click on Preview to see the template in action. Use the arrow icons to navigate through the records.
You can download the template and the sample data source here.
Related Posts
Windows FormsGetting StartedTutorial
Windows Forms Tutorial: Create Your First Windows Forms C# Application
This tutorial shows how to create your first Windows Forms application with C# using TX Text Control .NET for Windows Forms in Visual Studio 2022.
How to Mail Merge MS Word DOCX Documents in ASP.NET Core C#
Mail merge is the process of merging data, such as Json or IEnumerable objects, into a template document, such as a DOC or DOCX file. This tutorial is a walkthrough of the steps necessary to…
Creating an Angular Document Editor Application with a Node.js WebSocket Server
This tutorial shows how to create an Angular application that uses the Document Editor with a Node.js WebSocket server.
Adding SVG Watermarks to Documents
This article shows how to add SVG images to document section headers that repeat automatically on each page. This watermark will be inserted vertically and horizontally centered on each section page.
Using MailMerge in ASP.NET Core 6 Web Applications
This article shows how to use the TX Text Control ASP.NET MailMerge class to merge templates with JSON data within a .NET 6 application in Visual Studio 2022.

