Prerequisites
Step 1: Create a New Project
- Open Visual Studio 2022.
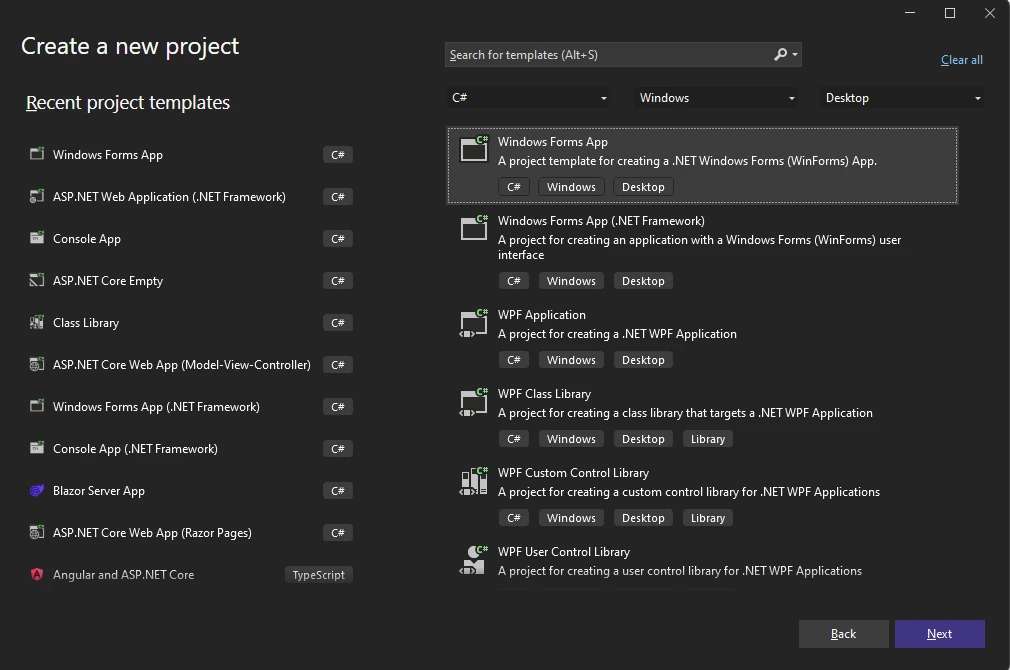
- Click on "Create a new project".
- From the options, select C# under Languages, Windows under Platform, and Desktop under Project Type.
- Scroll to find the Windows Forms App template.
- Select it and click Next.
Step 2: Name Your Project and Choose the Framework
- Enter a project name and click Next.
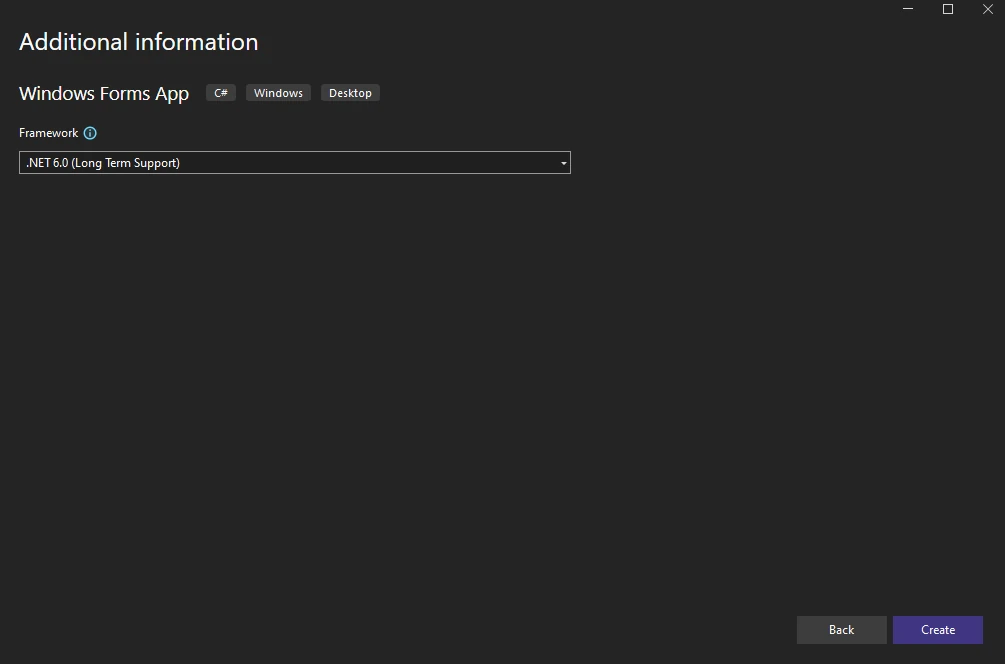
- Select your Framework version as .NET 6 (Long-term support) and click Create.
Step 3: Install the Required NuGet Package
- Right-click the project in Solution Explorer.
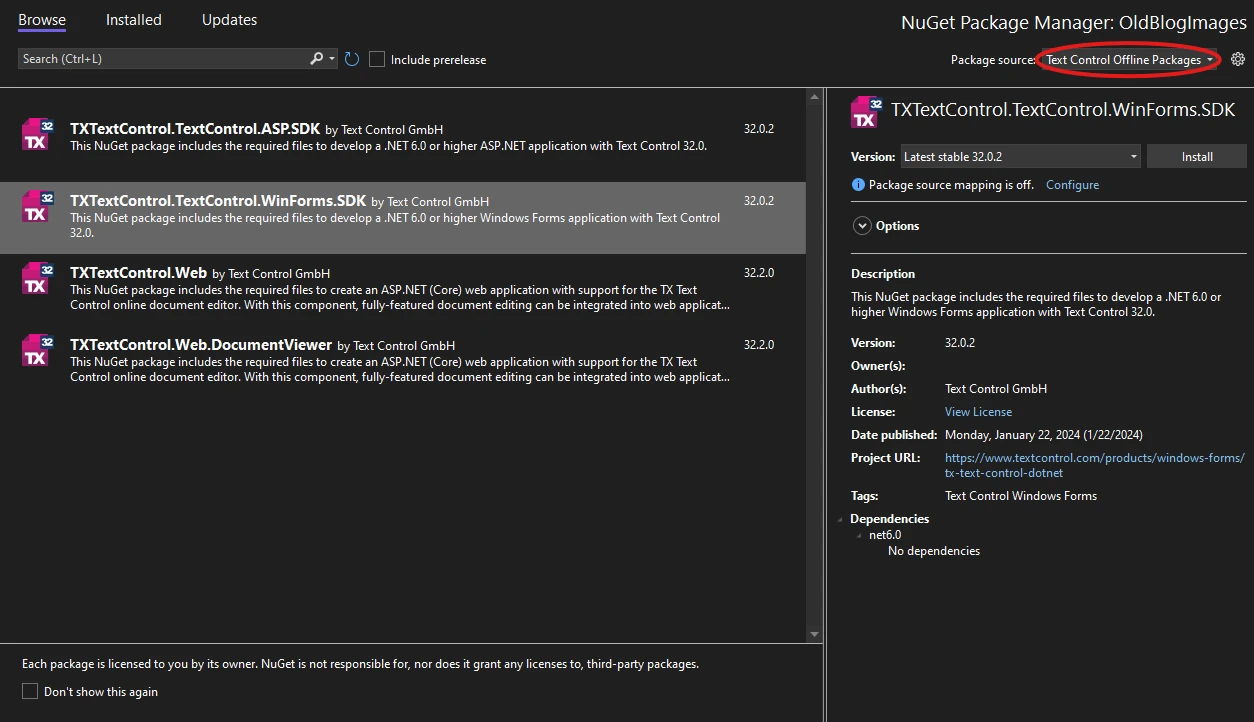
- Select Manage NuGet Packages from the context menu.
- Choose Text Control Offline Packages as the package source, then click Browse.
- Find TXTextControl.TextControl.WinForms.SDK and click Install.
Step 4: Add the Text Control to Your Form
- In Solution Explorer, open Form1.
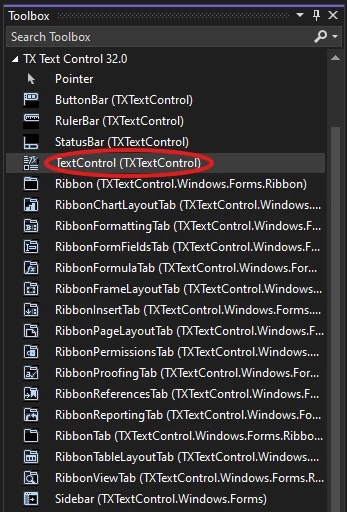
- In the Toolbox, find the TX Text Control 32.0 tab.
- Select the TextControl icon and draw it onto the Windows form.
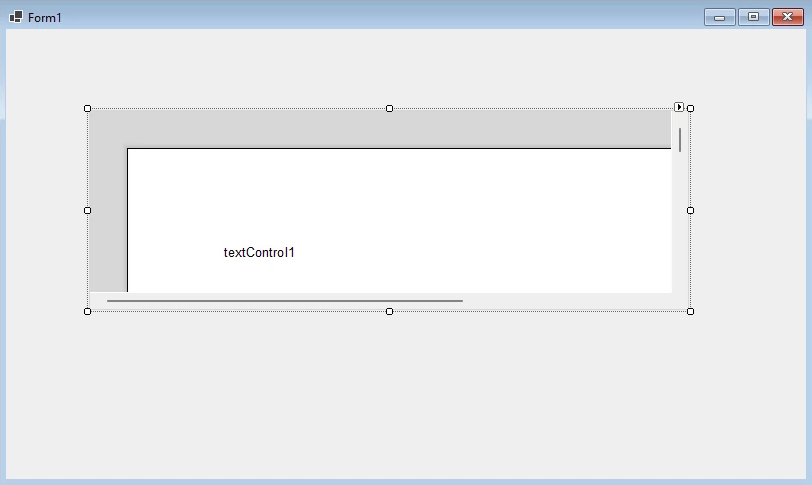
Step 5: Customize the Text Control
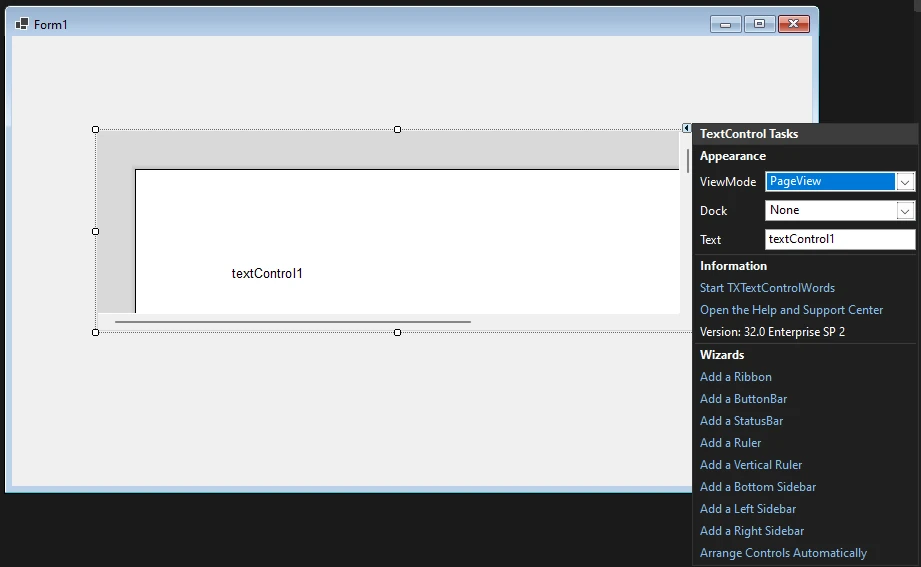
- Click the Smart Tag in the upper right corner of TextControl.
- In the Wizards group, click on:
- Add a Button Bar
- Add a Status Bar
- Add a Ruler
- Add a Vertical Ruler
- Finally, click Arrange Controls Automatically.
The controls will now be connected and docked to fill the container.
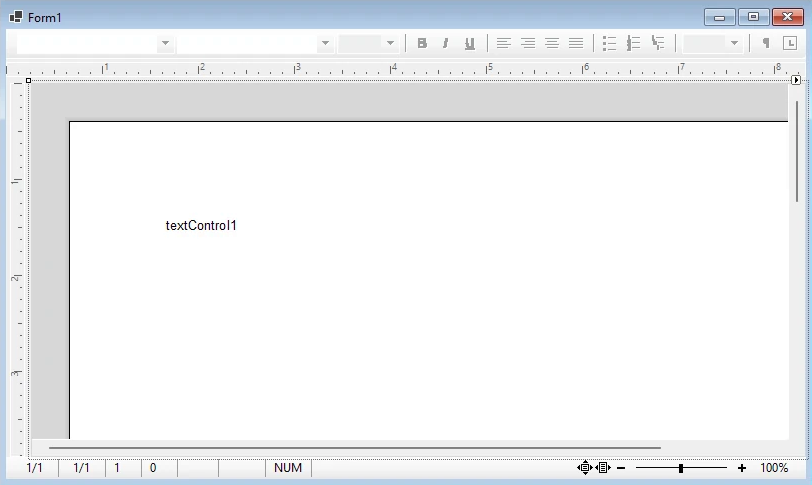
Step 6: Build and Compile
- Click the Start button to build and compile the project.
- The application will start and the Text Control will be displayed on the form.
Conclusion
In this tutorial, you learned how to create a new Windows Forms application in Visual Studio 2022 and how to add a Text Control to the form. You also learned how to customize the Text Control by adding a Button Bar, Status Bar, Ruler, and Vertical Ruler. Finally, you built and compiled the project to see the Text Control in action.

