 Cloud everywhere - everyone is in the cloud. But cloud computing is not just hype - it might be one of the most important paradigm shifts in the coming years.
http://www.microsoft.com/windowsazure/windowsazure/
Windows Azure™ is a cloud services operating system that serves as the development, service hosting and service management environment for the Windows Azure platform. Windows Azure provides developers with on-demand compute and storage to host, scale, and manage web applications on the internet through Microsoft® datacenters.
ASP.NET applications built with TX Text Control .NET Server can be deployed to Windows Azure without any limitations and the Visual Studio template for Windows Azure is fully supported. This tutorial shows how to create a new Windows Azure cloud project using TX Text Control .NET Server. The application is very simple: When the user clicks on a button, a TXTextControl.ServerTextControl instance is used to create an Adobe PDF document server-side which is returned to the browser.
-
Ensure that the Windows Azure Tools for Visual Studio are installed, start Visual Studio 2010 and create a new project. The Windows Azure Tools for Visual Studio can be downloaded on this dedicated website:
 Get Started with Windows Azure
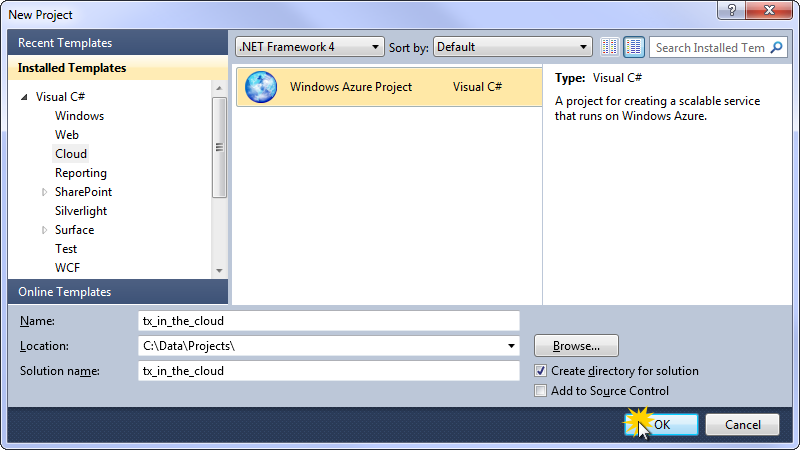
From the installed project templates, choose Windows Azure Project from the Cloud category.
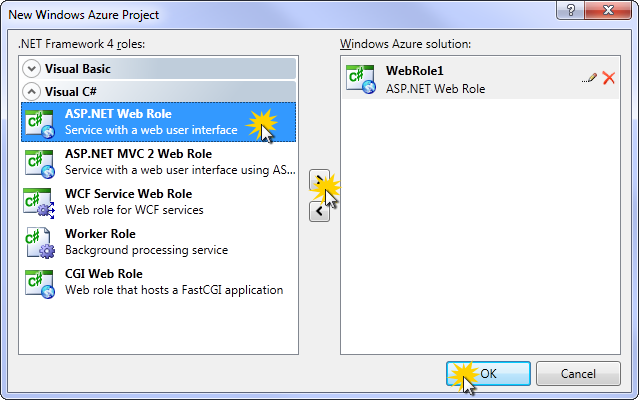
In the next dialog box, choose an appropriate role for this new project. For this tutorial, we will select ASP.NET Web Role. Add this role to the solution and confirm with OK.
-
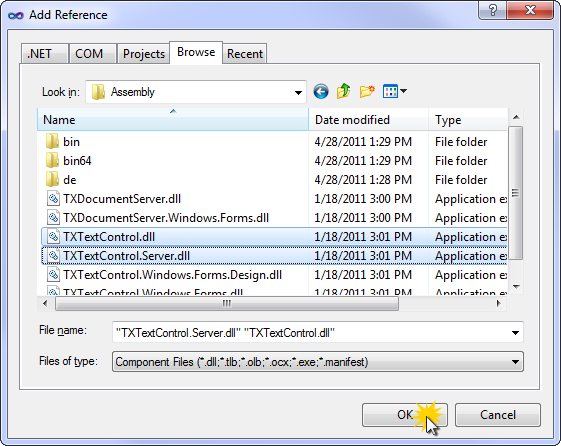
Select the web application (WebRole1) in the Solution Explorer and select Add Reference... from the Project main menu. Browse for the TXTextControl.dll and the TXTextControl.Server.dll from the Assembly folder of the TX Text Control installation directory.
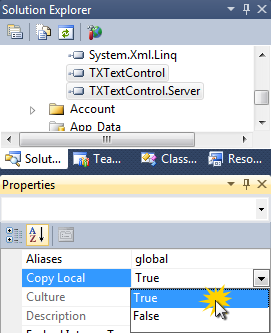
Select the added references in the Solution Explorer and set their Copy Local property to True.
-
Select the web application (WebRole1) in the Solution Explorer again and choose Add Existing Item... from the Project main menu. Browse for the TX Text Control installation folder (default: C:\Program Files\The Imaging Source Europe GmbH\TX Text Control 16.0.NET for Windows Forms\Assembly\bin64), select all files from the bin64 folder and confirm with Add.
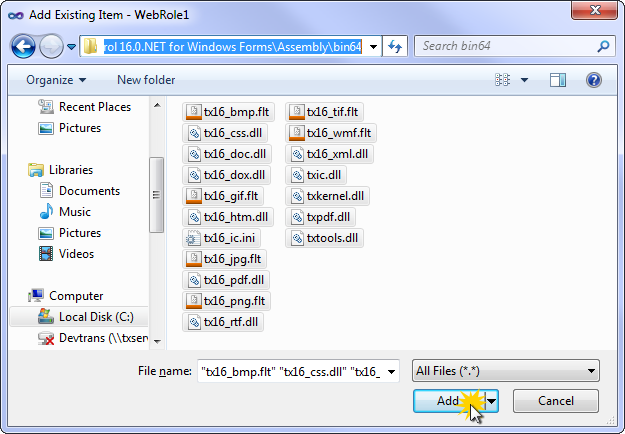
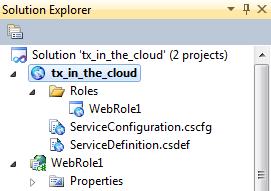
Now, select all newly added files in the Solution Explorer and set their properties Build Action to Content and Copy to Output Directory to Copy always.
-
A 'licenses.licx' file must exist in the 'Properties' folder (C#) or the 'My Project' folder (VB.NET). To build such a file, create a new text file in this folder and name it 'licenses.licx'. Open the file and add the following string:
TXTextControl.ServerTextControl, TXTextControl.Server, Version=16.0.100.500, Culture=neutral, PublicKeyToken=6b83fe9a75cfb638
-
Open the Split view of the Default.aspx page and remove the default content between the MainContent placeholder tags.
Add a simple button to the page and double-click it to open the code-behind automatically. Add the following code to the button click event:
using (TXTextControl.ServerTextControl tx = new TXTextControl.ServerTextControl()) { byte[] data = null; tx.Create(); tx.Text = "This is a sample text."; tx.Save(out data, TXTextControl.BinaryStreamType.AdobePDF); Response.Clear(); Response.ContentType = "application/pdf"; Response.BinaryWrite(data); Response.End(); } -
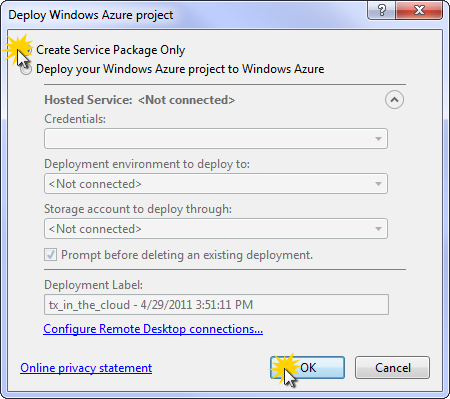
Select the Windows Azure Project in the Solution Explorer and select Publish [tx_in_the_cloud] from the Build main menu.
In the opened dialog box, select Create Service Package Only and confirm with OK.
Visual Studio is opening a folder with two created files.
-
Open the Windows Azure Management Portal:
If you did not create an account for Windows Azure yet, follow the required steps on their website.
-
Choose New Hosted Service from the Common Tasks. Complete the form fields in the opened dialog box describing the name and URL of the newly created application. Browse for the Package location and the Configuration file by clicking the Browse Locally... buttons. Choose the files that have been created by Visual Studio. Upload the project by clicking OK.
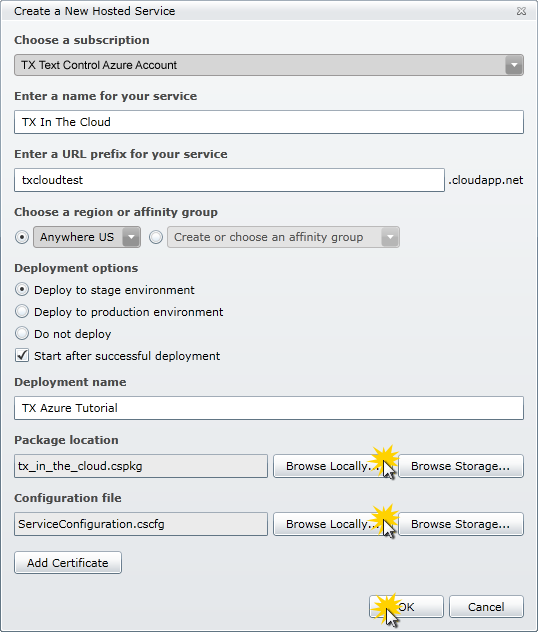
The uploading and finalizing by Windows Azure might take some time. Depending on the size of the project up to 30 minutes or more.

-
If the upload process is successful, the hosted service is displayed in the list as shown in the following screenshot:

Now, the application is available "in the cloud" using the given URL (e.g. http://txcloudtest.cloudapp.net/).

