In the default signing process, users sign a document and click the Submit button to submit signature data such as the signature image and form field data. The server-side DocumentViewer controller is processing the signature and creates a document with the patched electronic signature images.
But the DocumentViewer can be also utilized to implement custom workflows. In this sample, the DocumentViewer is essentially used to acquire the signature images from multiple signers. At the end, when all signatures are captured, the document is finalized by merging signature images into the signature fields and by signing them using a certificate.
Server-Side Processing
The acquired signature data can be forwarded to a custom HTTP endpoint given through the Redirect
╰ Web.MVC.DocumentViewer Namespace
╰ SignatureSettings Class
╰ RedirectUrlAfterSignature Property
Specifies an Url that is used for a controller-side redirection after a successful signature acquisition process. property.
| @Html.TXTextControl().DocumentViewer(settings => | |
| { | |
| settings.DocumentPath = "App_Data/documentflows/" | |
| + Model.EnvelopeId + "/template.tx"; | |
| settings.Dock = DocumentViewerSettings.DockStyle.Fill; | |
| settings.SignatureSettings = new SignatureSettings() { | |
| OwnerName = Model.Owner, | |
| ShowSignatureBar = true, | |
| SignerInitials = Model.Signer.Initials, | |
| SignerName = Model.Signer.Name, | |
| UniqueId = Model.EnvelopeId, | |
| RedirectUrlAfterSignature = Url.Action("Sign", "Sign", new { signerId = Model.Signer.Id } , Context.Request.Scheme, null), | |
| SignatureBoxes = new SignatureBox[] { | |
| new SignatureBox(Model.Signer.SignatureFieldName) { | |
| SigningRequired = true, Style = SignatureBox.SignatureBoxStyle.Signature } | |
| } | |
| }; | |
| }).Render() |
Custom HTTP Endpoint
The custom controller HttpPost method Sign is called by the DocumentViewer after a document has been signed successfully and should implement the SignatureData object:
| [HttpPost] | |
| public IActionResult Sign([FromBody] SignatureData data, string signerId) { | |
| DocumentFlow flow = new DocumentFlow(data.UniqueId); | |
| Signer signer = flow.Signers.Find(x => x.Id == signerId); | |
| signer.SignatureComplete = true; | |
| flow.Save(); | |
| byte[] imageData = Convert.FromBase64String(data.SignatureImage); | |
| System.IO.File.WriteAllBytes("App_Data/documentflows/" + flow.EnvelopeId + "/signature_" + signer.Id + ".svg", imageData); | |
| bool allSigned = flow.Signers.All(y => y.SignatureComplete == true); | |
| if (allSigned == true) { | |
| using (TXTextControl.ServerTextControl tx = new TXTextControl.ServerTextControl()) { | |
| tx.Create(); | |
| // load the signed document | |
| tx.Load("App_Data/documentflows/" + flow.EnvelopeId + "/template.tx", TXTextControl.StreamType.InternalUnicodeFormat); | |
| List<TXTextControl.DigitalSignature> digitalSignatures = new List<DigitalSignature>(); | |
| foreach (SignatureField field in tx.SignatureFields) { | |
| signer = flow.Signers.Find(x => x.SignatureFieldName == field.Name); | |
| field.Image = new SignatureImage("App_Data/documentflows/" + flow.EnvelopeId + "/signature_" + signer.Id + ".svg", 4); | |
| field.SignerData = new SignerData(signer.Name, "", "", "", "Text Control Signature Demo"); | |
| // provide unique field name | |
| field.Name = field.Name + "_" + Guid.NewGuid().ToString(); | |
| digitalSignatures.Add(new DigitalSignature( | |
| new System.Security.Cryptography.X509Certificates.X509Certificate2( | |
| "App_Data/textcontrolself.pfx", "123"), null, field.Name)); | |
| } | |
| SaveSettings saveSettings = new SaveSettings() { | |
| SignatureFields = digitalSignatures.ToArray() | |
| }; | |
| tx.Save("App_Data/documentflows/" + flow.EnvelopeId + "/results.pdf", TXTextControl.StreamType.AdobePDF, saveSettings); | |
| flow.Closed = true; | |
| flow.Save(); | |
| } | |
| } | |
| return Ok(); | |
| } |
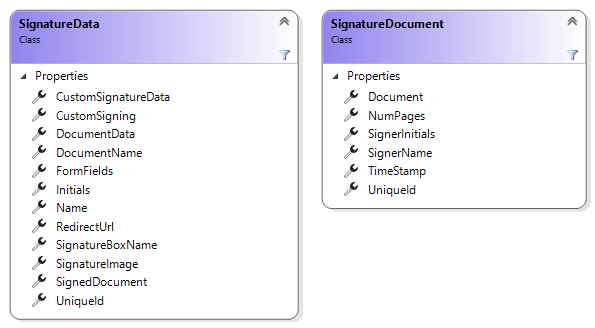
The forwarded SignatureData object contains meta data about the signature and the signed document:
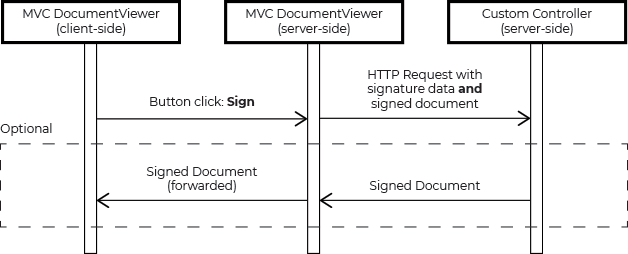
After the user signed the document, the electronic signature is stored server-side until all signatures are acquired. After that, all signature images are patched to the document and finally, the document is signed digitally. The following sequence diagram shows the general workflow::
The Sample Application
After starting the sample application, an overview of all signature requests ("flows") is shown:
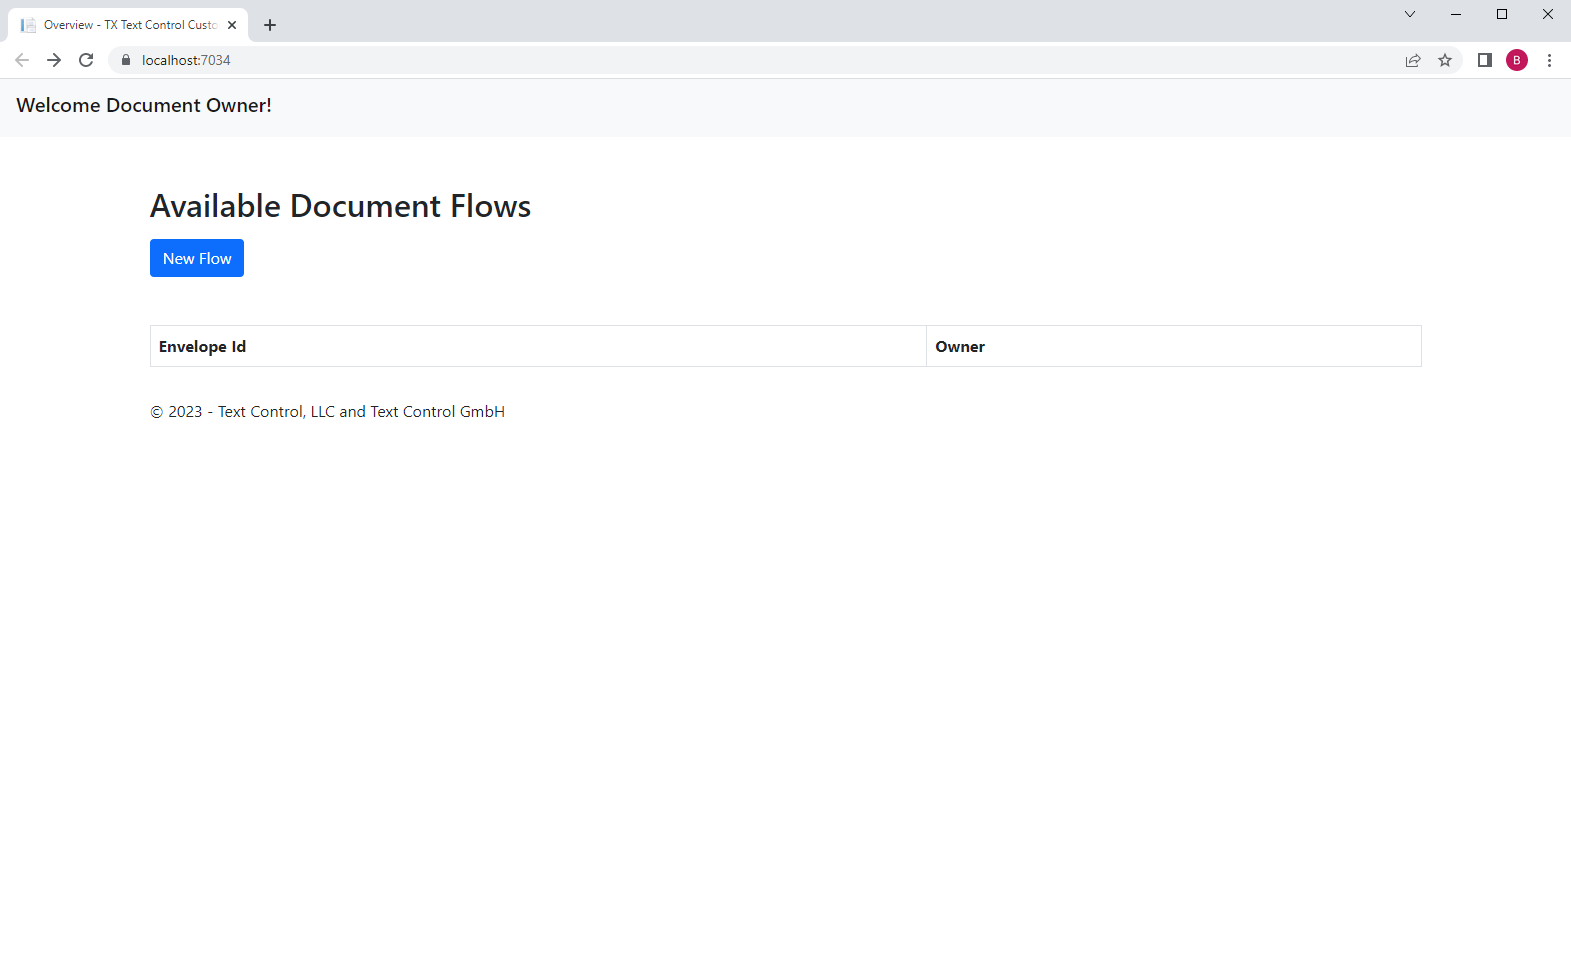
To create a new flow, click the button New Flow. This page is asking the user to upload a document that is used for the document signing process. For this demo, the document must be in the internal Text Control format.

The document is analyzed server-side for contained Signature
╰ TXTextControl Namespace
╰ SignatureField Class
An instance of the SignatureField class represents a signature field in a Text Control document. objects with unique Names 
╰ TXTextControl Namespace
╰ FrameBase Class
╰ Name Property
Gets or sets a name for the frame. .
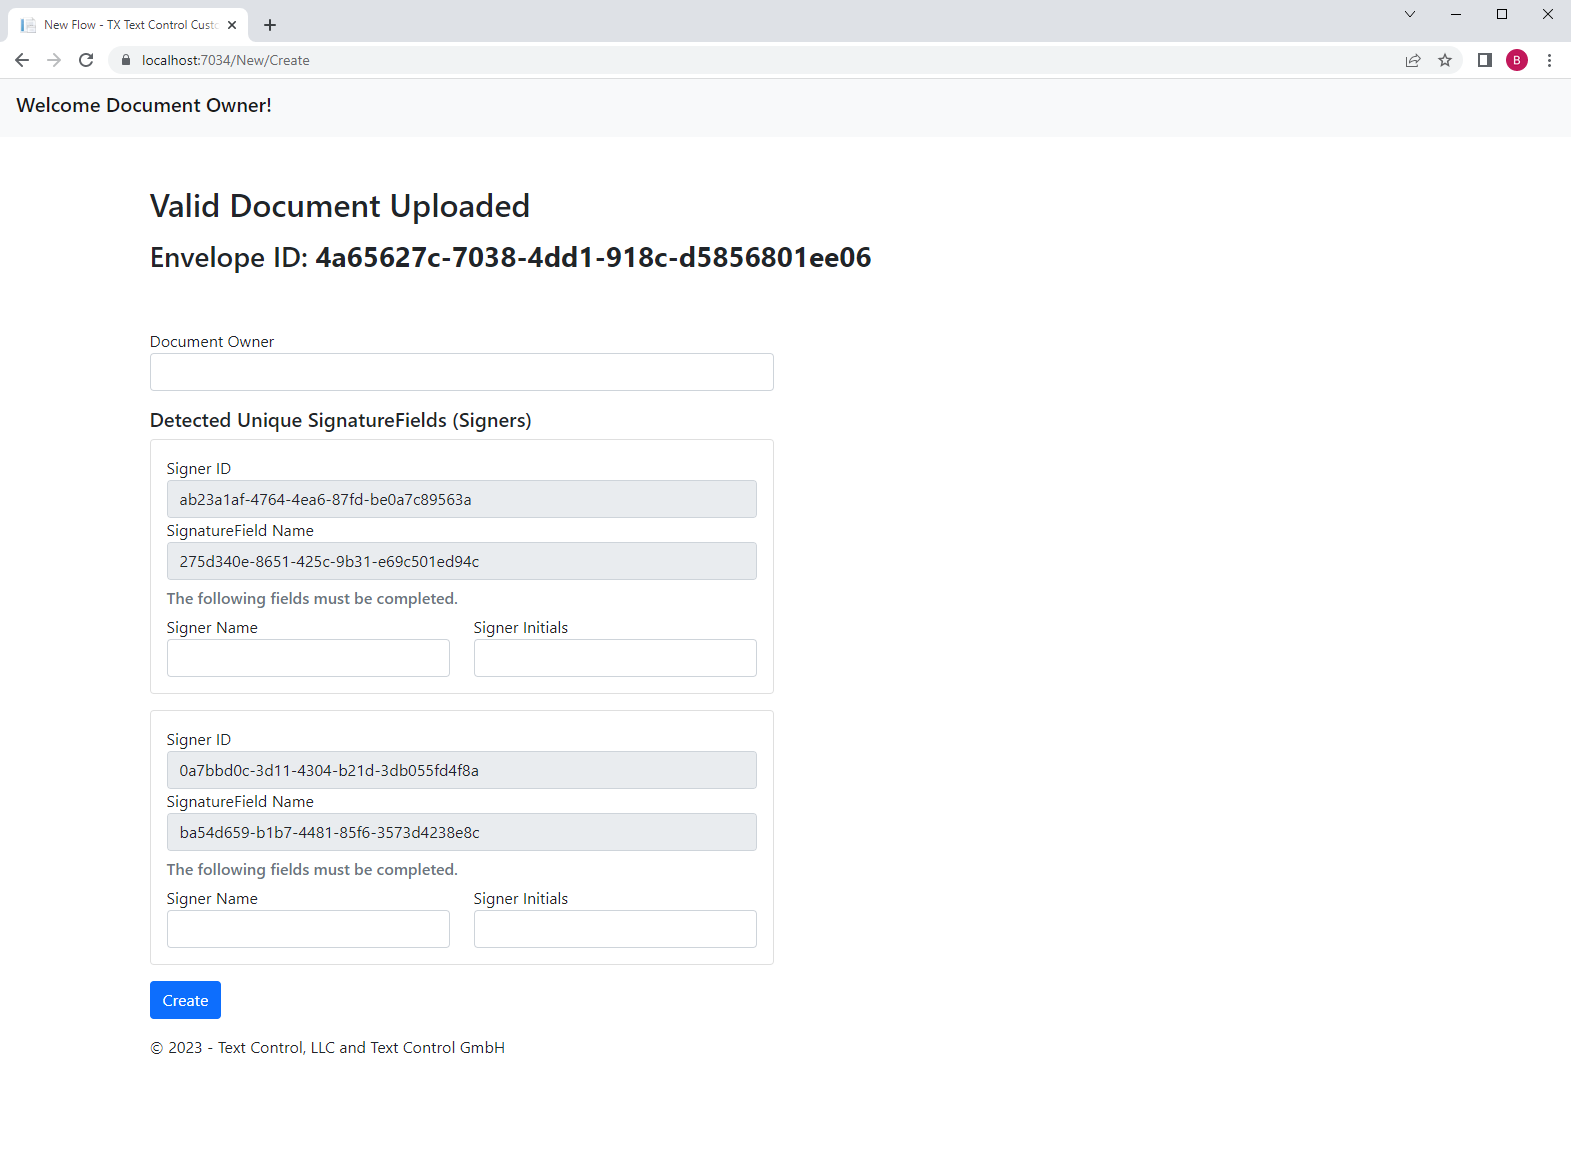
As the document owner, you can complete the form data for each signature field and create the document flow by clicking the button Create:
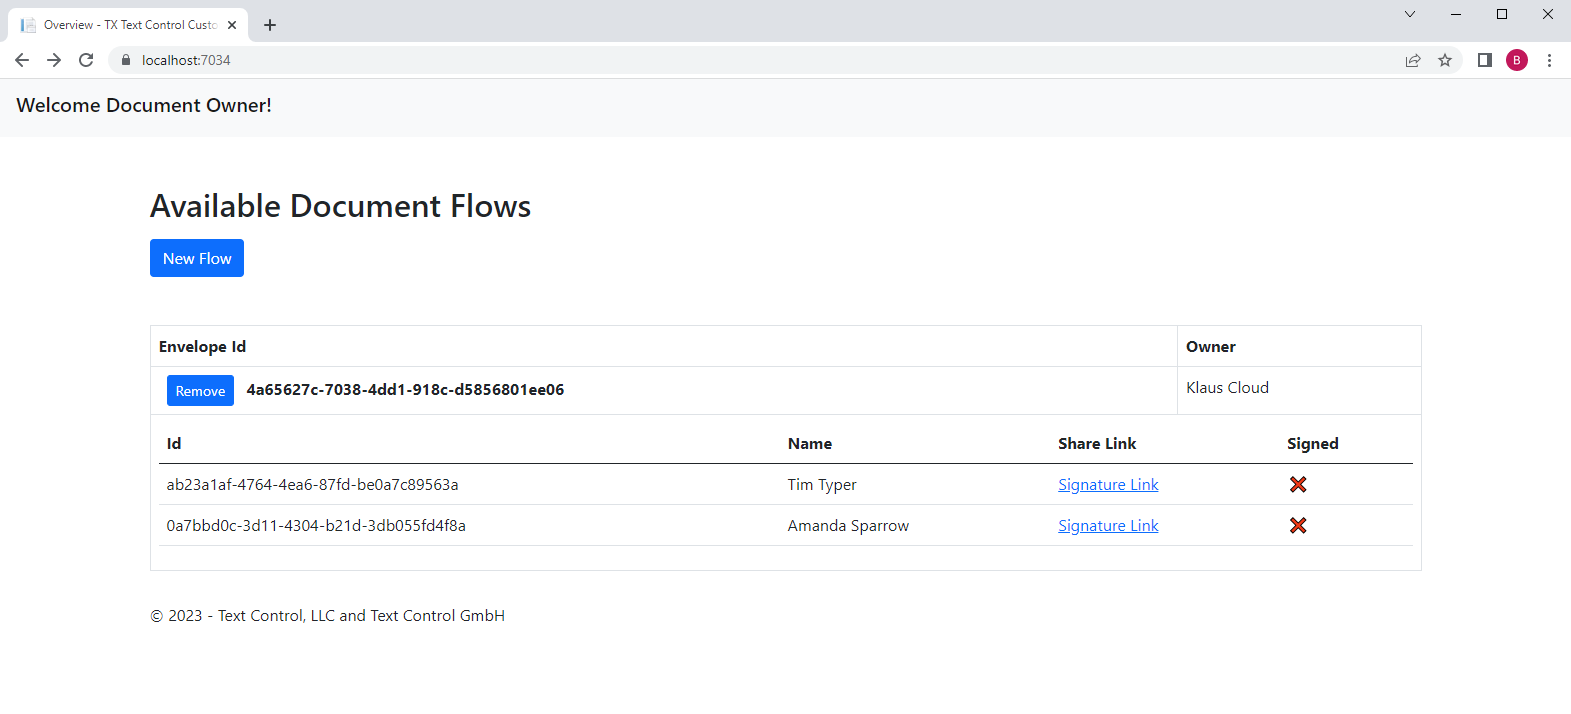
The overview list contains the created signature flow including links for the signers to request the signatures. In real-world applications, this link would be shared by e-mail or other ways. For demo purposes, you can now click on this link to complete the signatures:
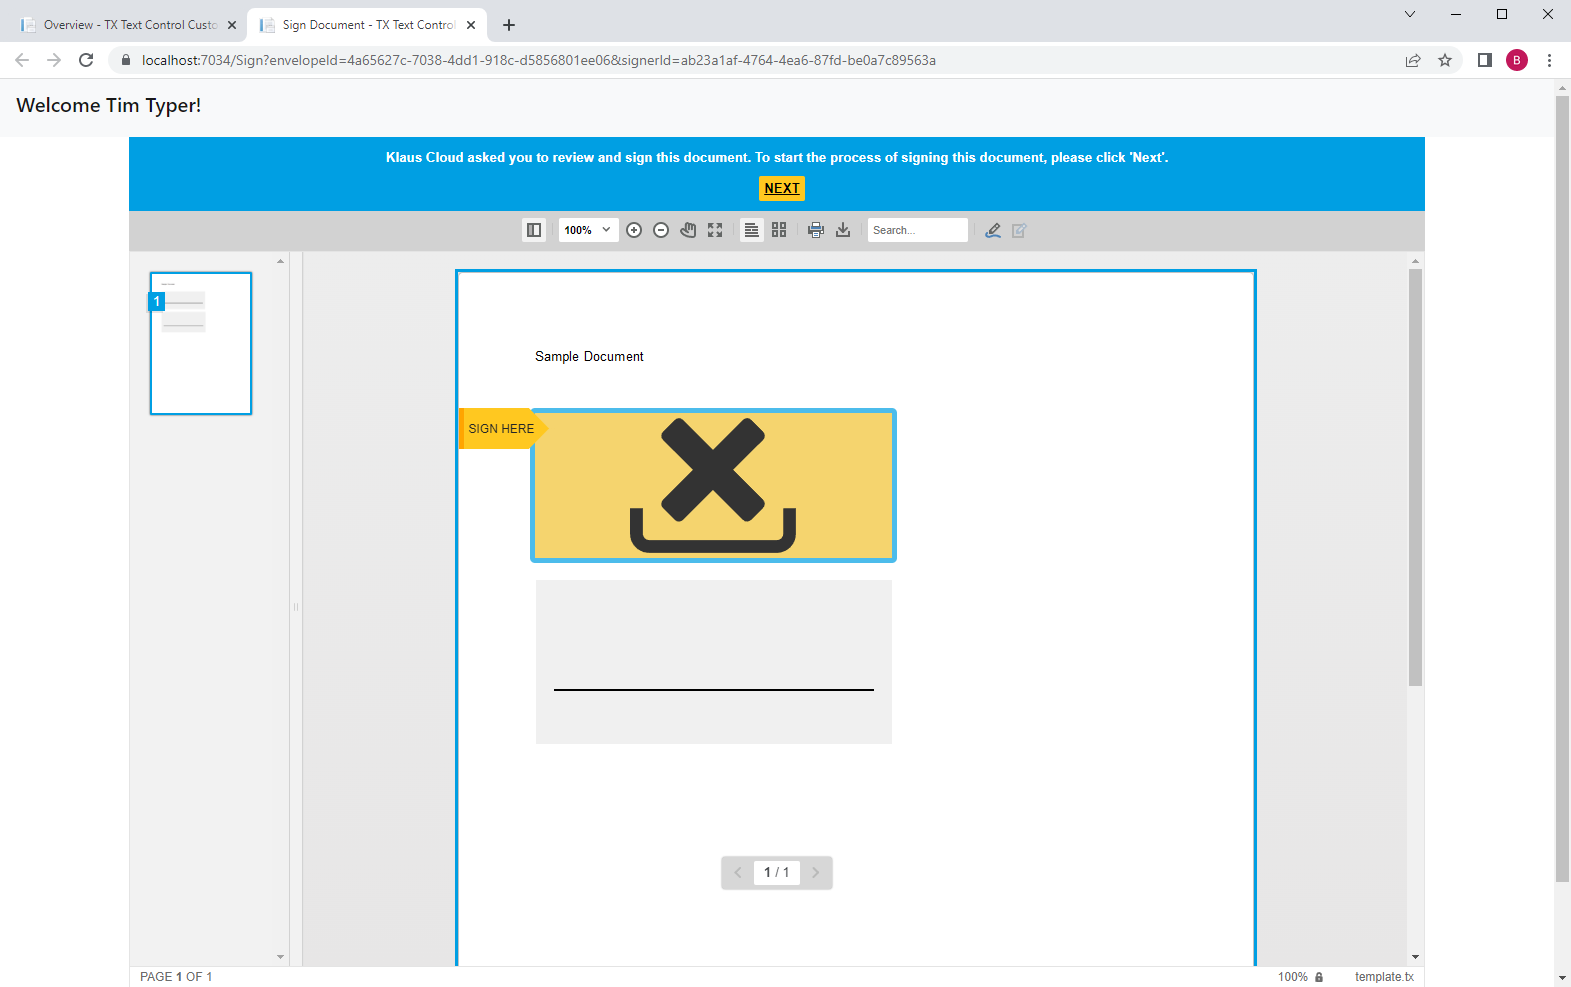
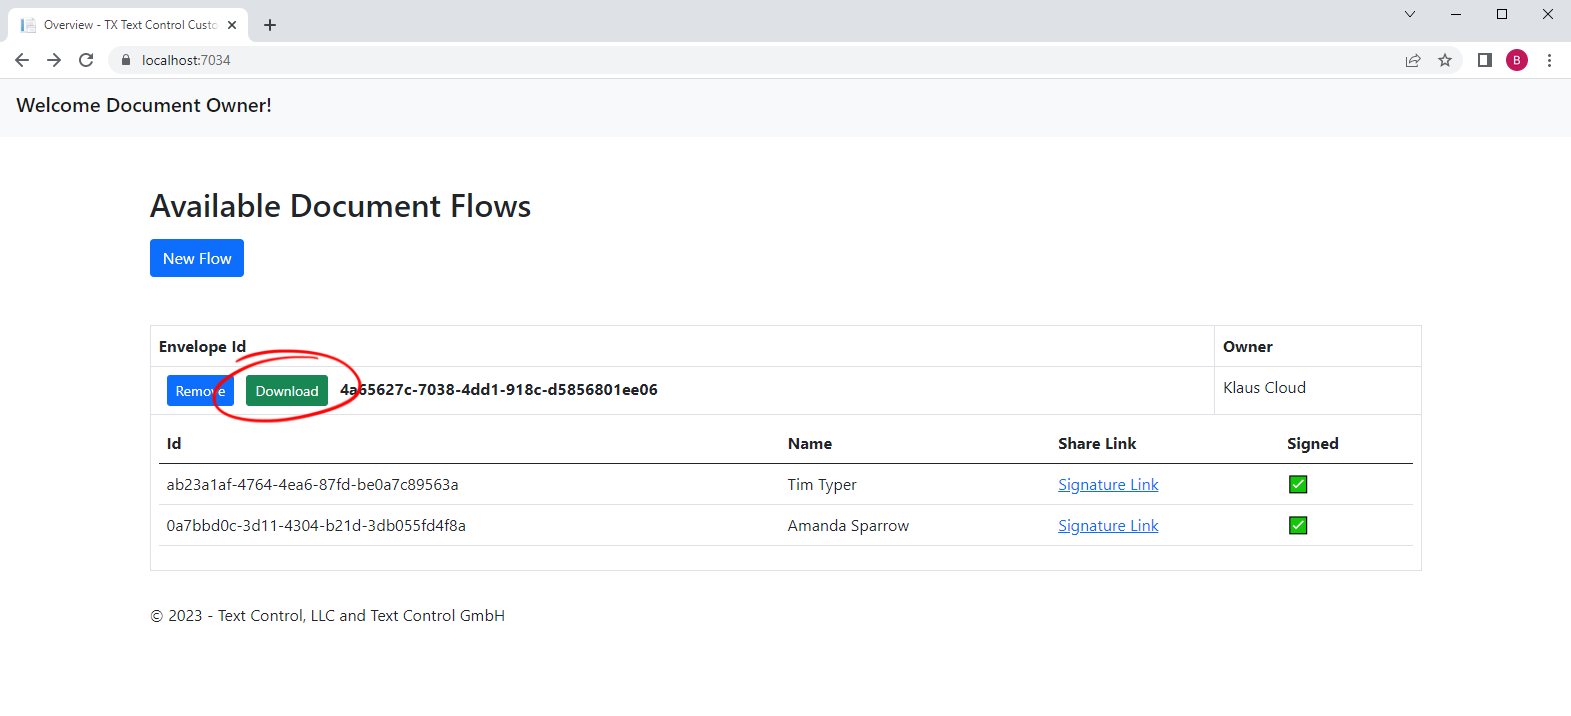
After all parties have signed the document, the document is finalized and will be available for download in the overview:
You can clone the sample and test this workflow on your own. This sample is meant to be as a framework for your own workflows. The major advantage of the electronic signatures created with TX Text Control is the flexibility and the customization options.


