Prerequisites
There are two ways to evaluate the TX Text Control Document Editor. You can either host your own backend by downloading the trial version of TX Text Control .NET Server for ASP.NET, or by creating a trial access token to use a hosted backend, valid for 30 days:
- Download Trial Version
Setup download and installation required.- Create Trial Access Token
No download and local installation required.
Creating the Application
Make sure that you downloaded the latest version of Visual Studio 2022 that comes with the .NET 6 SDK.
-
In Visual Studio 2022, create a new project by choosing Create a new project.
-
Select ASP.NET Core Web App (Model-View-Controller) as the project template and confirm with Next.
-
Choose a name for your project and confirm with Next.
-
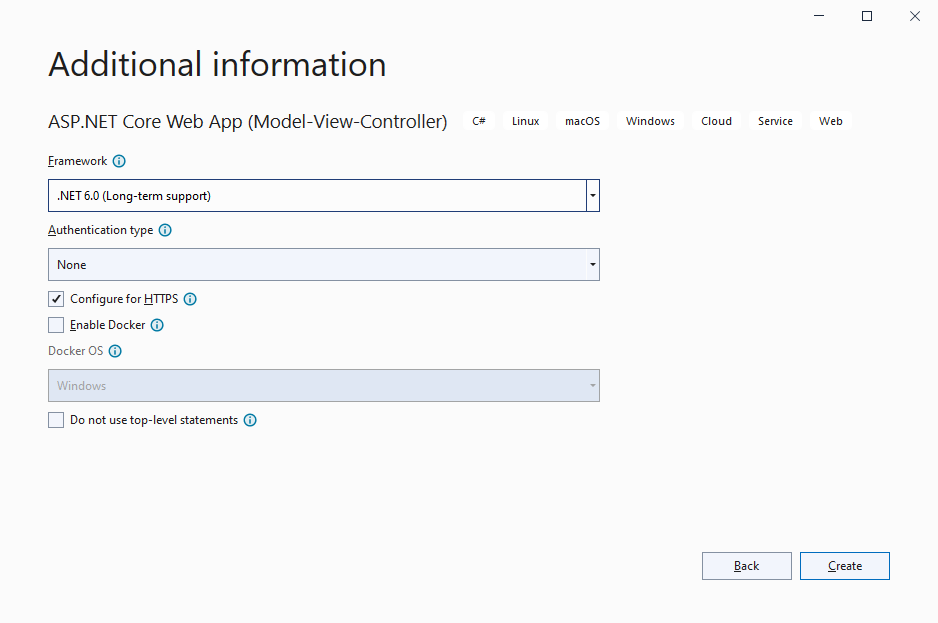
In the next dialog, choose .NET 6 (Long-term support) as the Framework and confirm with Create.

Adding the NuGet Package
-
In the Solution Explorer, select your created project and choose Manage NuGet Packages... from the Project main menu.
Package Source
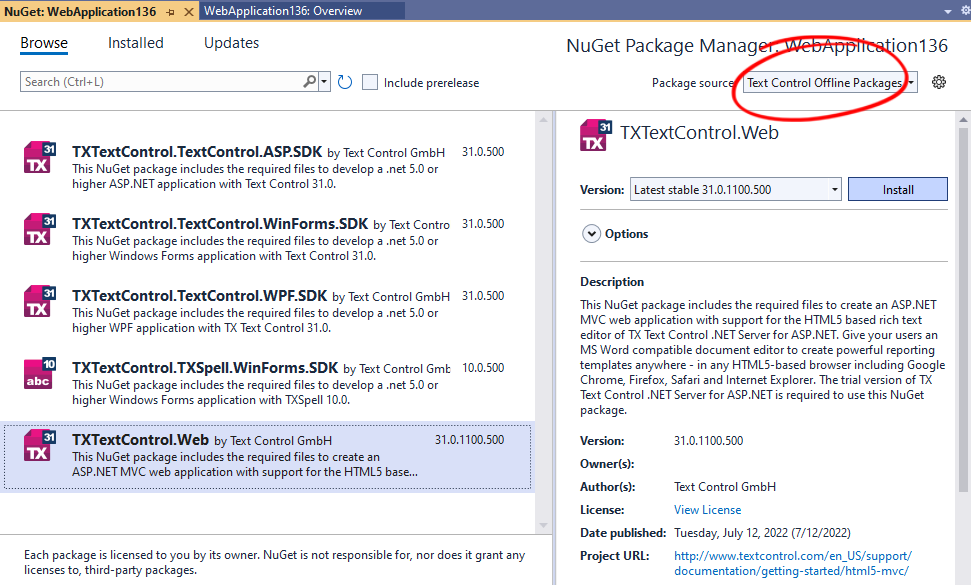
Select either Text Control Offline Packages or nuget.org as the Package source. Packages in the official Text Control NuGet profile are frequently updated.
In case you are using a Trial Access Token, please choose nuget.org.
Browse for txtextcontrol.web and Install the latest version of the TXTextControl.Web package.

Configure the Application
Trial Access Token Users
In case you are using a Trial Access Token, skip step 6 and continue with step 7.
-
Open the Program.cs file located in the project's root folder. Add the following code after the entry
app.UseStaticFiles();:This file contains bidirectional Unicode text that may be interpreted or compiled differently than what appears below. To review, open the file in an editor that reveals hidden Unicode characters. Learn more about bidirectional Unicode characters// serve static linked files (JavaScript and CSS for the editor) app.UseStaticFiles(new StaticFileOptions { FileProvider = new Microsoft.Extensions.FileProviders.PhysicalFileProvider( System.IO.Path.Combine(System.IO.Path.GetDirectoryName( System.Reflection.Assembly.GetEntryAssembly().Location), "TXTextControl.Web")), RequestPath = "/TXTextControl.Web" }); // enable Web Sockets app.UseWebSockets(); // attach the Text Control WebSocketHandler middleware app.UseMiddleware<TXTextControl.Web.WebSocketMiddleware>();
Adding the Control to the View
-
Find the Index.cshtml file in the Views -> Home folder. Replace the complete content with the following code to add the document editor to the view:
This file contains bidirectional Unicode text that may be interpreted or compiled differently than what appears below. To review, open the file in an editor that reveals hidden Unicode characters. Learn more about bidirectional Unicode characters@using TXTextControl.Web.MVC @{ var sDocument = "<html><body><p>Welcome to <strong>Text Control</strong></p></body></html>"; } @Html.TXTextControl().TextControl(settings => { settings.UserNames = new string[] { "Tim Typer" }; }).LoadText(sDocument, TXTextControl.Web.StringStreamType.HTMLFormat).Render() <input type="button" onclick="insertTable()" value="Insert Table" /> <script> function insertTable() { TXTextControl.tables.add(5, 5, 10, function(e) { if (e === true) { // if added TXTextControl.tables.getItem(function(table) { table.cells.forEach(function(cell) { cell.setText("Cell text"); }); }, null, 10); } }) } </script> Trial Access Token Users
In case you are using a Trial Access Token, replace the content with the following code.
This file contains bidirectional Unicode text that may be interpreted or compiled differently than what appears below. To review, open the file in an editor that reveals hidden Unicode characters. Learn more about bidirectional Unicode characters@using TXTextControl.Web.MVC @Html.TXTextControl().TextControl(settings => { settings.WebSocketURL = "wss://backend.textcontrol.com?access-token=addYourTokenHere" }).Render() Replace addYourTokenHere with your actual Trial Access Token.
Compile and start the application.


