The Angular version of TX Text Control is supposed to be used in combination with the Node.js WebSocketHandler. But basically, any WebSocketHandler can be used with the Angular component. This sample shows how to use the Angular version within an ASP.NET MVC application and how to connect the Angular component with the MVC WebSocketHandler within the ASP.NET application running on IIS.
Create the ASP.NET MVC Application
The ASP.NET application is the hosting application that contains the pre-compiled Angular project created in a later step in this tutorial.
- Open Visual Studio 2019 and create a new ASP.NET Web Application (.NET Framework).
-
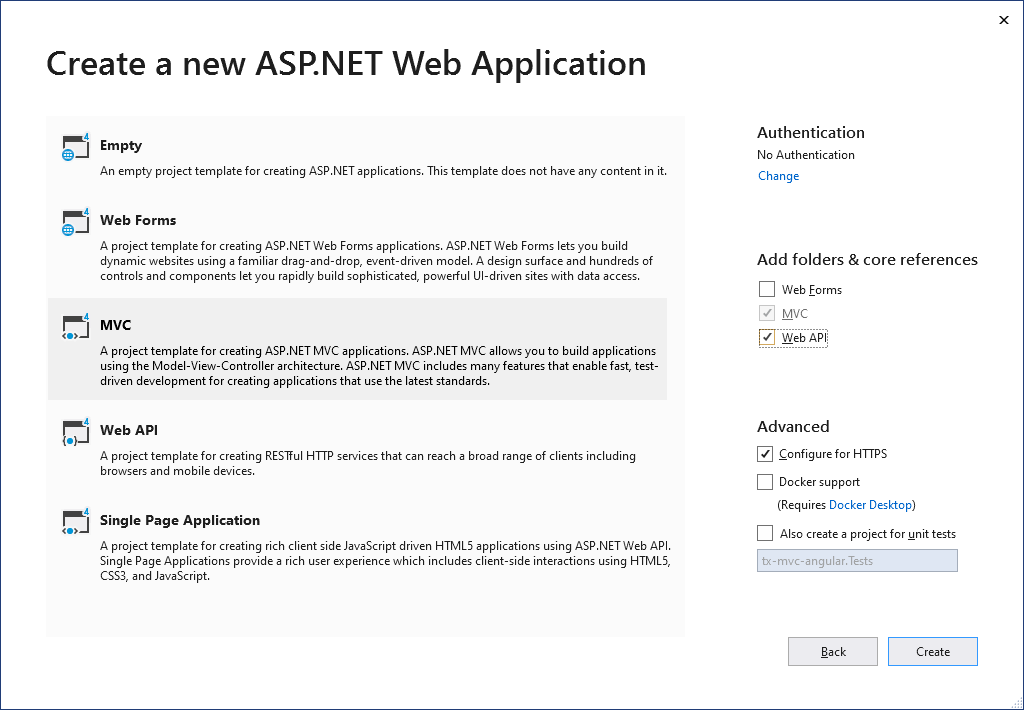
Select MVC as the project type and check MVC and Web API as Add folders & core references options:

Confirm this step with Create.
-
Click Manage NuGet Packages... from the Project main menu. Select nuget.org from the Online package source panel. In the upper right corner, search for TXTextControl.Web. Find the latest version and click on Install.
-
Find the file WebApiConfig.cs in the App_Start folder and change the API route to the following:
This file contains bidirectional Unicode text that may be interpreted or compiled differently than what appears below. To review, open the file in an editor that reveals hidden Unicode characters. Learn more about bidirectional Unicode characterspublic static class WebApiConfig { public static void Register(HttpConfiguration config) { // Web API configuration and services // Web API routes config.MapHttpAttributeRoutes(); config.Routes.MapHttpRoute( name: "DefaultApi", routeTemplate: "{id}/api/{controller}", defaults: new { id = RouteParameter.Optional } ); } } You want to change this route based on your purposes. The Angular component is trying to connect to the port number plus the value of the webSocketPath parameter. The API route should match, so that the WebSocketHandler can be found.
Create the Angular Application
This Angular project is created and compiled separately, but hosted in the previously created ASP.NET MVC application. For demo purposes, this Angular application is pre-compiled using CLI and will not be included to the Visual Studio solution for TypeScript compiling.
-
Open a command prompt and install the latest Angular CLI by entering the following command:
npm install -g @angular/cli -
Navigate to the root folder of your MVC project, open the command prompt there and enter the following command:
ng new Angular --skip-tests --style=scss
Answer with 'No' for the question whether to add Angular routing to the project.
-
Install the TX Text Control document editor package by typing in the following command:
ng add @txtextcontrol/tx-ng-document-editor -
Open the file src -> app -> app.component.html, add the following code and save it:
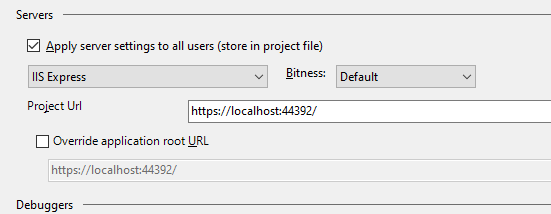
This file contains bidirectional Unicode text that may be interpreted or compiled differently than what appears below. To review, open the file in an editor that reveals hidden Unicode characters. Learn more about bidirectional Unicode characters<tx-document-editor width="1024" height="800" webSocketURL="ws://localhost:44392/api/TXWebSocket"> </tx-document-editor> Make sure that the value for the port number matches the port number of the ASP.NET MVC application. If you deploy your application to production, this should be 80 or 443. When using IIS Express, this is typically a 5-digit port number. You can find this number in the project settings in the Web tab:

-
Now, build the Angular output by opening a command prompt in the root folder of the created Angular project and typing in the following command:
ng build --extractCss --watch
Set Up the Angular Application for ASP.NET MVC
-
Inside the Angular folder, find the file angular.json and open it using your preferred editor and the the outputPath setting:
This file contains bidirectional Unicode text that may be interpreted or compiled differently than what appears below. To review, open the file in an editor that reveals hidden Unicode characters. Learn more about bidirectional Unicode characters"outputPath": "../Bundles/AngularOutput", -
In the ASP.NET MVC application, find the BundleConfig.cs file inside of App_Start folder and add the following code to the end of the RegisterBundles function:
This file contains bidirectional Unicode text that may be interpreted or compiled differently than what appears below. To review, open the file in an editor that reveals hidden Unicode characters. Learn more about bidirectional Unicode characters// Angular bundles bundles.Add(new Bundle("~/bundles/Angular") .Include( "~/bundles/AngularOutput/inline.*", "~/bundles/AngularOutput/polyfills.*", "~/bundles/AngularOutput/scripts.*", "~/bundles/AngularOutput/vendor.*", "~/bundles/AngularOutput/runtime.*", "~/bundles/AngularOutput/main.*")); bundles.Add(new Bundle("~/Content/Angular") .Include("~/bundles/AngularOutput/styles.*")); -
In the Solution Explorer, right-click Controllers and choose Add > Controller... from the context menu. Select an MVC 5 Controller, name it AngularDataController and confirm with Add. The controller code should look similar to this:
This file contains bidirectional Unicode text that may be interpreted or compiled differently than what appears below. To review, open the file in an editor that reveals hidden Unicode characters. Learn more about bidirectional Unicode characterspublic class AngularDataController : Controller { // GET: AngularData public ActionResult Index() { return View(); } } -
In the Solution Explorer, right-click AngularData in the Views folder and select Add > View..., name it Index and confirm with Add. Add the following code to the view:
This file contains bidirectional Unicode text that may be interpreted or compiled differently than what appears below. To review, open the file in an editor that reveals hidden Unicode characters. Learn more about bidirectional Unicode characters@{ ViewBag.Title = "Index"; } @Styles.Render("~/Content/Angular") <app-root></app-root> @Scripts.Render("~/bundles/Angular")
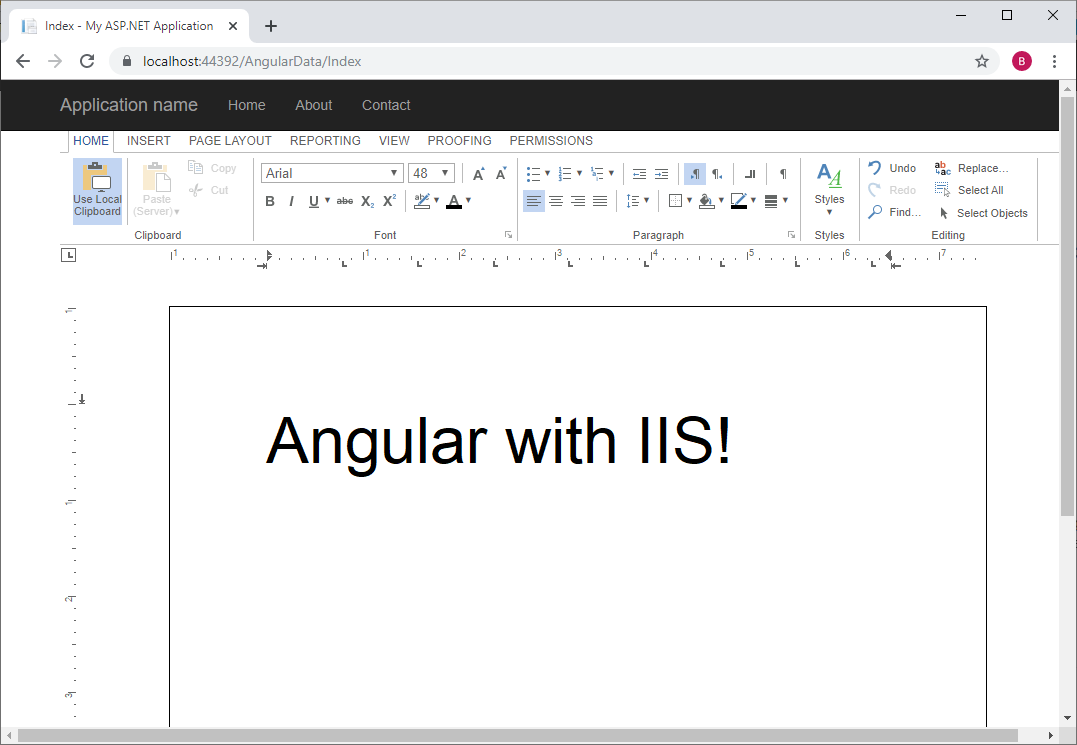
Compile and start the web application and browse to the AngularData/Index endpoint:
https://localhost:44392/AngularData/Index


