We just published an ASP.NET Core MVC Web Application that shows how to use the ReportingCloud Web API and the ReportingCloud Editor Widget to edit templates in any browser. This project is targeting .NET Core, is cross-platform and therefore, can be deployed to Windows, macOS, and Linux
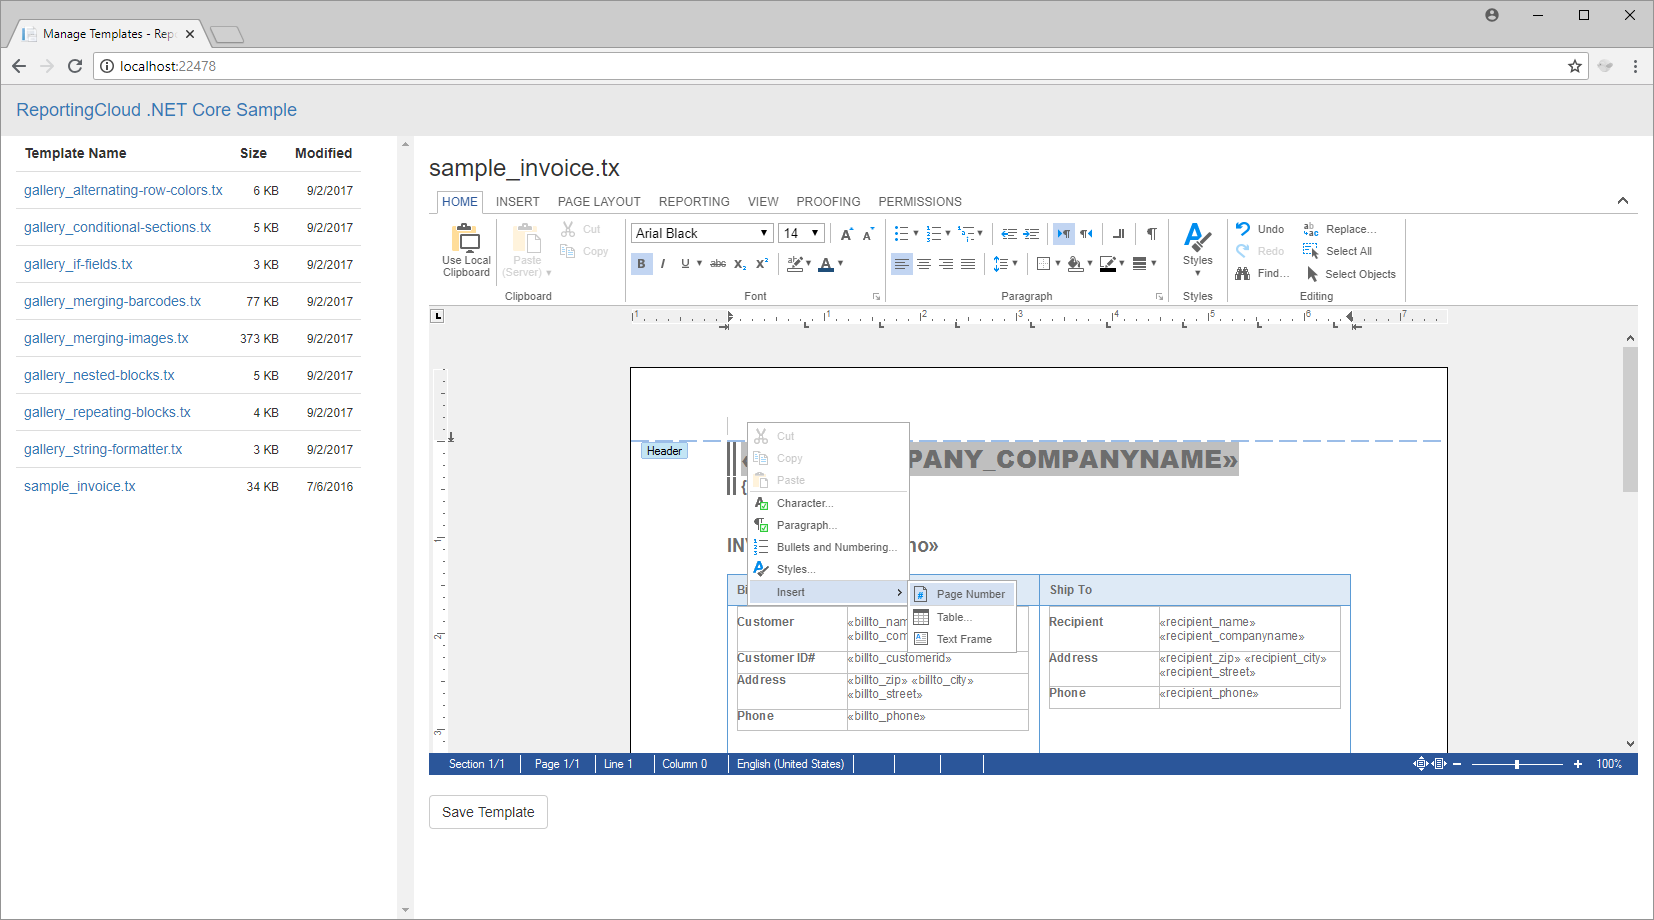
The following screenshot shows this demo project:

This very basic sample lists all templates located in your ReportingCloud template storage. When clicking on a template name, the template is loaded into the editor and saved back to your template storage when pressing the Save Template button.
How Does It Work?
The project uses TXTextControl.ReportingCloud.Core, the Microsoft .NET Core wrapper classes for Text Control ReportingCloud.
The Index action of the HomeController uses ReportingCloud to retrieve all templates using the Templates/List endpoint and returns this list to the view.
| public IActionResult Index() | |
| { | |
| // create a ReportingCloud object with stored API-Key | |
| ReportingCloud rc = new ReportingCloud(RCSettings.APIKey); | |
| // return a list of templates | |
| return View(rc.ListTemplates()); | |
| } |
In the view, a table is created based on the templates:
| @model List<TXTextControl.ReportingCloud.Template> | |
| ... | |
| @foreach (var template in Model) | |
| { | |
| <tr> | |
| <td><a onclick="LoadDocument('@template.TemplateName')">@template.TemplateName</a></td> | |
| <td class="text-right"><small>@(template.Size / 1024) KB</small></td> | |
| <td class="text-right"><small>@String.Format("{0:d}", template.Modified)</small></td> | |
| </tr> | |
| } |
When clicking on a template file name, the following JavaScript calls a controller method to load the selected template from the ReportingCloud template storage. The returned document is then loaded into the editor widget.
| function LoadDocument(template) { | |
| var serviceURL = "/ReportingCloud/Template?TemplateName=" + template; | |
| // call the "GET Template" controller method with a template name | |
| $.ajax({ | |
| type: "GET", | |
| url: serviceURL, | |
| contentType: 'application/json', | |
| success: successFunc, | |
| error: errorFunc | |
| }); | |
| function successFunc(data, status) { | |
| streamType = TXTextControl.StreamType.InternalUnicodeFormat; | |
| // create the proper StreamType based on the extension | |
| if (template.endsWith("docx")) { | |
| streamType = TXTextControl.StreamType.WordprocessingML; | |
| } | |
| else if (template.endsWith("doc")) { | |
| streamType = TXTextControl.StreamType.MSWord; | |
| } | |
| else if (template.endsWith("rtf")) { | |
| streamType = TXTextControl.StreamType.RichTextFormat; | |
| } | |
| // load the document into the widget | |
| textControl1.loadDocument(streamType, data); | |
| // enable the save button and set heading | |
| $("#saveBtn").removeAttr("disabled"); | |
| loadedDocument = template; | |
| $("#documentName").text(loadedDocument); | |
| } | |
| function errorFunc(data, success) { | |
| console.log(data); | |
| } | |
| } |
The controller method Template uses the ReportingCloud Web API to retrieve the template and returns it as a Base64 encoded string that can be loaded into the editor.
| [HttpGet] | |
| public IActionResult Template([FromQuery] TemplateRequest templateRequest) | |
| { | |
| // create a ReportingCloud object with stored API-Key | |
| ReportingCloud rc = new ReportingCloud(RCSettings.APIKey); | |
| // download document from ReportingCloud template storage | |
| byte[] document = rc.DownloadTemplate(templateRequest.TemplateName); | |
| // return Base64 string version | |
| return new OkObjectResult(Convert.ToBase64String(document)); | |
| } |
This project doesn't use any references to TX Text Control and uses only ReportingCloud functionality - completely cross-platform.
How to Use the Sample?
In order to use the sample project, you will need to perform some easy steps including the creation of a ReportingCloud account:
-
Create a ReportingCloud account here:
-
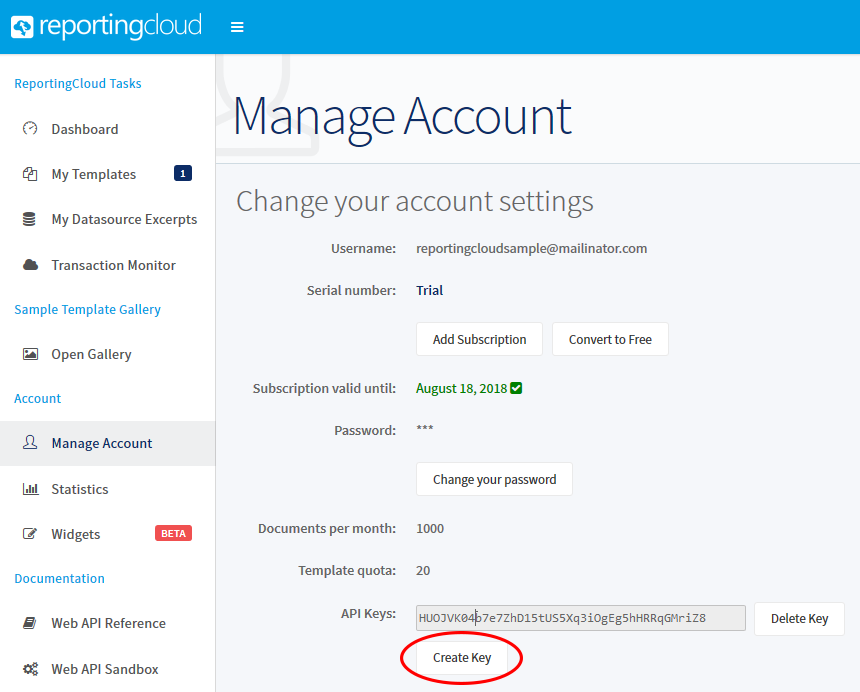
In your Manage Account area, create an API Key:

-
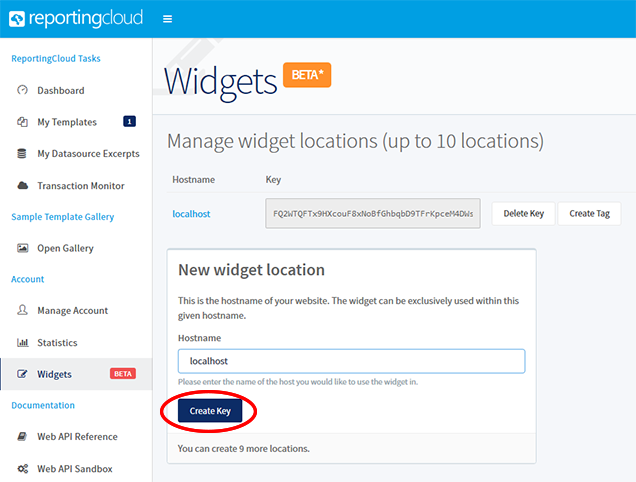
In the Widgets area, create a new widget location. If you are testing the sample project on your local machine from within Visual Studio, use localhost as the hostname:

-
Click on Create Tag to create a customized JavaScript tag.
-
Download the Visual Studio project from GitHub and open it in Visual Studio.
-
Find the file appsettings.json, open it and add your API Key to the APIKey value. In our sample, this JSON looks like this:
This file contains bidirectional Unicode text that may be interpreted or compiled differently than what appears below. To review, open the file in an editor that reveals hidden Unicode characters. Learn more about bidirectional Unicode characters{ "ReportingCloudSettings": { "APIKey": "HUOJVK04b7e7ZhD15tUS5Xq3iOgEg5hHRRqGMriZ8" }, "Logging": { "IncludeScopes": false, "LogLevel": { "Default": "Warning" } } } -
Find the file Index.cshtml in the Views -> Home folder, open it and add replace the JavaScript tag in line 7 with your created JavaScript tag:
This file contains bidirectional Unicode text that may be interpreted or compiled differently than what appears below. To review, open the file in an editor that reveals hidden Unicode characters. Learn more about bidirectional Unicode characters<script src="https://portal.reporting.cloud/Widget/Script/FQ2WTQFTx9HXcouF8xNoBfGhbqbD9TFrKpceM4DWs"></script> -
Compile and start the application.
We would love to hear your feedback about ReportingCloud and this cross-platform widget. Contact us to join the conversation.

