









How to Create Self-Signed Certificates on Windows to Sign PDFs in .NET C#

This article shows how to create self-signed certificates on Windows to sign PDF documents in .NET C#. The article explains how to create a self-signed certificate using PowerShell and how to sign a PDF document using the TX Text Control .NET Server component.

In document workflows, digital signatures provide authenticity and integrity. When working with PDF documents, a self-signed certificate can be used for testing or internal purposes before obtaining a trusted certificate from a Certificate Authority (CA). This blog post walks you through the process of creating a self-signed certificate using PowerShell, converting it to a PFX file, and using it to digitally sign a PDF.
Using PowerShell to Create a Self-Signed Certificate
Windows provides built-in PowerShell cmdlets to create and manage certificates. Open PowerShell as an administrator and run the following command:
$cert = New-SelfSignedCertificate `
  -Subject "CN=MyTXCert" `
  -CertStoreLocation "Cert:\CurrentUser\My" `
  -KeyExportPolicy Exportable `
  -KeySpec Signature `
  -FriendlyName "My PDF Signing Certificate" `
  -NotAfter (Get-Date).AddYears(5)
The command creates a self-signed certificate and stores it in the Personal certificate store of the current user. Here is a description of the parameters used:
| Parameter | Description |
|---|---|
| Subject | Common Name (CN) of the certificate. |
| CertStoreLocation | Certificate store location. The default value is "Cert:\CurrentUser\My". |
| KeyExportPolicy | Exportable: The private key can be exported. |
| KeySpec | Key specification. |
| FriendlyName | A readable name for the certificate. |
| NotAfter | Expiration date of the certificate (5 years in the example). |
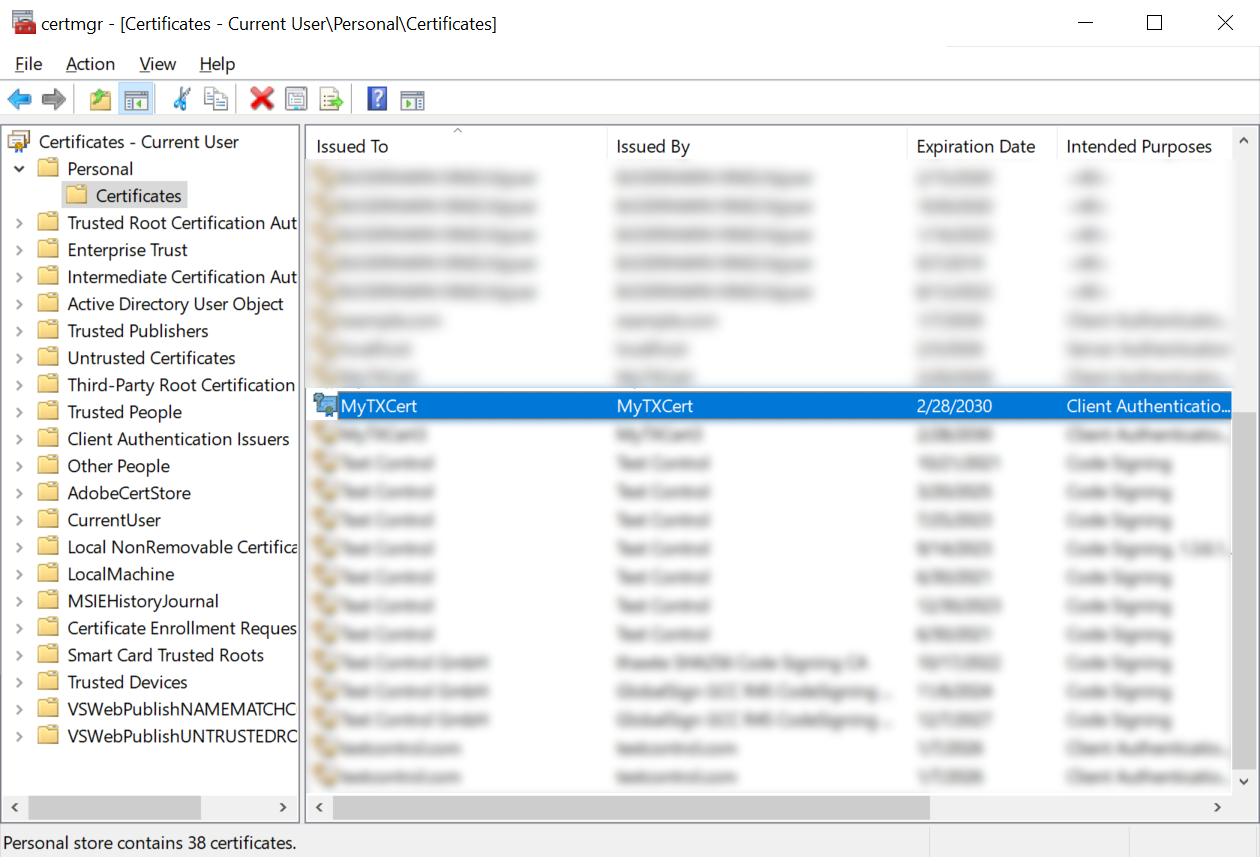
After you run the command, you can view the certificate in the Certificate Manager (certmgr.msc) under Personal > Certificates.
Exporting the Certificate to a PFX File
To use the certificate for digital signing, export it to a Personal Exchange Format (PFX) file. Run the following command in PowerShell:
$Password = ConvertTo-SecureString -String "123" -Force -AsPlainText

Export-PfxCertificate `
    -Cert "Cert:\CurrentUser\My\$($cert.Thumbprint)" `
    -FilePath "C:\Path\To\Certificate.pfx" `
    -Password $Password
This command exports the certificate to a PFX file. Here is a description of the parameters used:
| Parameter | Description |
|---|---|
| ConvertTo-SecureString | Securely defines the password for the PFX file. |
| Export-PfxCertificate | Exports the certificate with the private key. |
| FilePath | Path to the PFX file. |
| Password | Password to protect the PFX file. |
After you run the command, you can view the PFX file in the specified location.
Signing a PDF with the Certificate
Now that we have a PFX file, we can use it to sign a PDF document. In a .NET-based application, such as one that uses TX Text Control .NET, you can apply the digital signature using the Digital
The following code snippet shows how to sign a PDF document using a PFX file:
using System.Security.Cryptography.X509Certificates;
using TXTextControl;

// Define the certificate password and path
const string password = "123";
const string certificatePath = "certificate.pfx";

var cert = new X509Certificate2(certificatePath, password, X509KeyStorageFlags.Exportable);

// Initialize TXTextControl to create and save a document with the digital signature
using (var tx = new ServerTextControl())
{
    tx.Create();
    tx.Text = "Hello, World!";

    // Prepare the digital signature for the document
    var saveSettings = new SaveSettings
    {
        DigitalSignature = new DigitalSignature(cert, null)
    };

    // Save the document as a PDF with the digital signature
    tx.Save("result.pdf", StreamType.AdobePDF, saveSettings);
}
Conclusion
Creating a self-signed certificate is a simple process using PowerShell. This certificate can be used for testing or internal purposes before obtaining a trusted certificate from a CA. The certificate can be exported to a PFX file and used to digitally sign PDF documents in a .NET-based application.
ASP.NET
Integrate document processing into your applications to create documents such as PDFs and MS Word documents, including client-side document editing, viewing, and electronic signatures.





- Angular
- Blazor
- React
- JavaScript
- ASP.NET MVC, ASP.NET Core, and WebForms
Related Posts
Reliable Document AI in .NET: LLM Tool Calling vs. LLM-Generated Files
Reliable document AI needs a deterministic engine. With LLM tool calling, the LLM decides what the document should contain, and TX Text Control generates the file.
ASP.NETASP.NET CoreDocument Generation
Building a Production-Ready PDF Generation Pipeline in C# with ASP.NET Core
Learn how to build a reliable PDF generation pipeline with TX Text Control and ASP.NET Core. Use durable background jobs, idempotency, renewable leases, PDF validation, and private artifact…
ASP.NETASP.NET CoreDocument Viewer
Native PDF Annotation Support Is Coming to the TX Text Control Document Viewer
The next version of the TX Text Control Document Viewer will introduce an important enhancement to PDF workflows: native support for PDF-compatible annotations. Users will be able to add…
Building a Browser-Based PDF Workflow for Medical Billing using .NET C#
Learn how to create a browser-based PDF workflow for medical billing with .NET C# and TX Text Control. TX Text Control .NET Server offers different components optimized for the individual parts of…
AI Natural Language Document Generation with MCP and TX Text Control .NET
This article explains how AI agents can use natural language to create documents through an MCP server. Instead of letting a language model generate documents directly, the AI translates prompts…