The TX Text Control document editor for Angular can be used in ASP.NET Core Web Applications. The back-end Web API of the ASP.NET Core Web Application can be used to load data and to merge templates created using the online editor.
This article shows how to create a new ASP.NET Core back-end Web Application with an Angular front-end SPA.
Creating the Application
The following tutorial shows how to create an ASP.NET Core 3 Web Application that can be deployed to Windows machines.
-
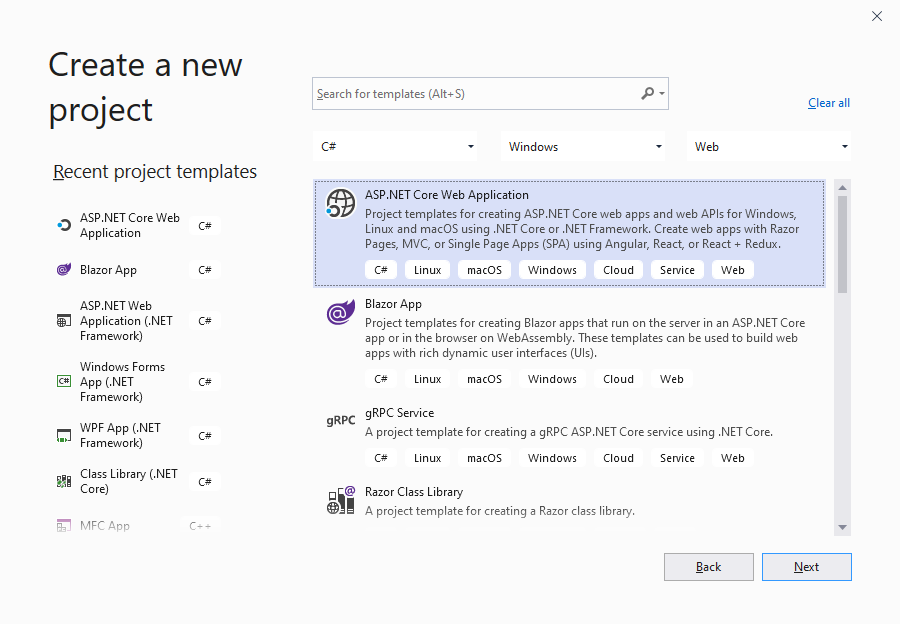
In Visual Studio 2019 (> 16.5.4), create a new project, select ASP.NET Core Web Application as the project template and continue with Next.
-
Select a project name, location and solution name in the next dialog and confirm with Create.
-
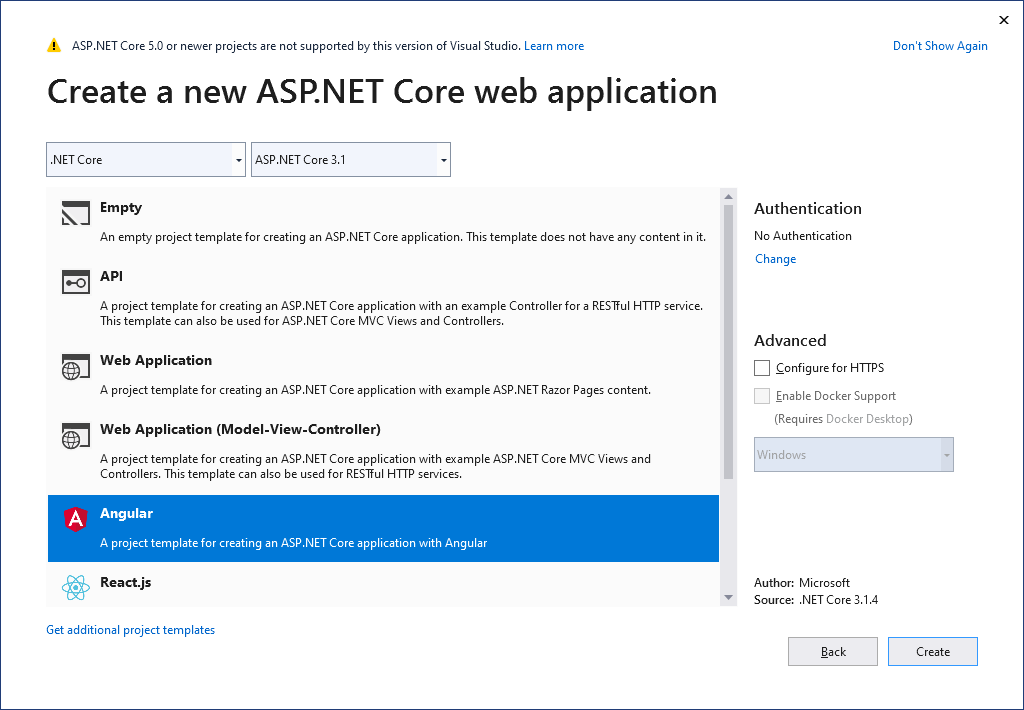
In the last dialog, select .NET Core and ASP.NET Core 3.1 as the project target, select Angular as the template and confirm with Create.
Adding TX Text Control Assemblies
-
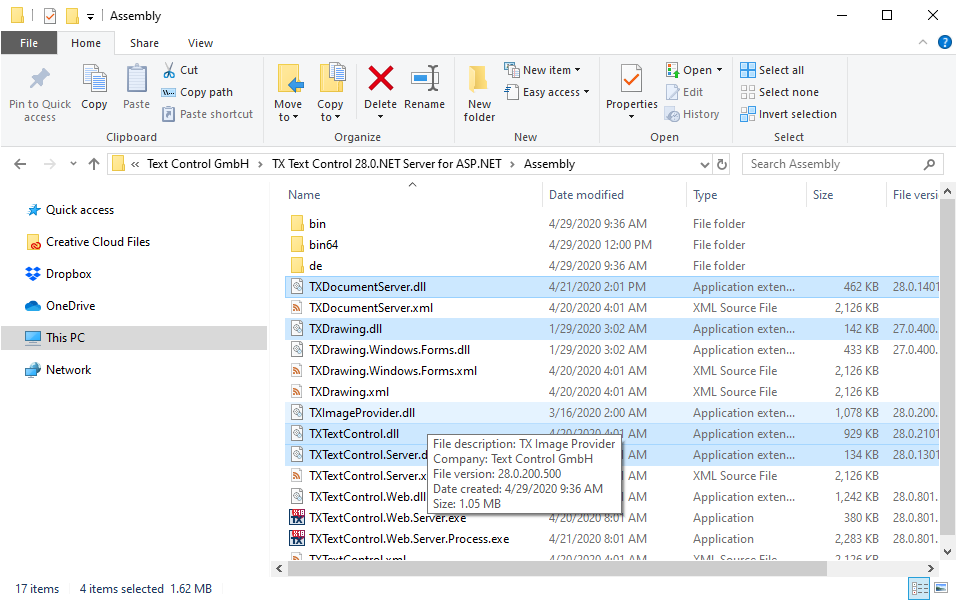
While the project is selected in the Solution Explorer, choose Project -> Add Reference... to open the Reference Manager. In the opened dialog, select Browse... to select the required TX Text Control assemblies. Navigate to the installation folder of TX Text Control and select the following assemblies from the Assembly folder:
- TXDocumentServer.dll
- TXTextControl.dll
- TXTextControl.Server.dll
- TXDrawing.dll
Repeat this step with the following assemblies from the Assembly/bin64 folder:
- txic.dll
- txkernel.dll
- txtools.dll
- txpdf.dll
After selecting these assemblies, close the Reference Manager by confirming with OK.
-
While the project is selected in the Solution Explorer, choose Project -> Add Existing Item.... Browse to the TX Text Control installation folder and select the following files from the Assembly/bin64:
- tx27_xml.dll
- tx27_css.dll
- tx27_doc.dll
- tx27_dox.dll
- tx27_htm.dll
- tx27_pdf.dll
- tx27_rtf.dll
- tx27_xlx.dll
-
Select the files from step 5 in the Solution Explorer and set the Copy to Output Directory to Copy always.
Adding the License
-
While the project is selected in the Solution Explorer, choose Project -> Add New Item.... Select Text File, name the file licenses.licx and close the dialog by clicking Add.
Open the newly added file and add the following content:
This file contains bidirectional Unicode text that may be interpreted or compiled differently than what appears below. To review, open the file in an editor that reveals hidden Unicode characters. Learn more about bidirectional Unicode charactersTXTextControl.ServerTextControl, TXTextControl.Server, Culture=neutral, PublicKeyToken=6b83fe9a75cfb638 Set the Build Action property to Embedded Resource.
In case, you are getting compile errors (MSB6003 The specified task executable "lc.exe" could not be run.), please refer to this article:
WebSocketHandler Middleware
-
In the Solution Explorer, select your created project and choose Manage NuGet Packages... from the Project main menu.
Browse for txtextcontrol.web and Install the latest version of the TXTextControl.Web package.

Adding the Middleware
-
Open the Startup.cs file located in the project's root folder. In the Configure method, add the following code before the app.UseSpa entry:
This file contains bidirectional Unicode text that may be interpreted or compiled differently than what appears below. To review, open the file in an editor that reveals hidden Unicode characters. Learn more about bidirectional Unicode characters// enable Web Sockets app.UseWebSockets(); // attach the Text Control WebSocketHandler middleware app.UseMiddleware<TXTextControl.Web.WebSocketMiddleware>();
Adding TX Text Control Angular
-
Select Command Line -> Developer Command Prompt from the Tools main menu. A command line is opened in the application's root folder. Switch to the ClientApp folder by typing the following command:
cd dotnetcoreangular\ClientApp -
Install the TX Text Control document editor package by typing in the following command:
ng add @txtextcontrol/tx-ng-document-editor -
Close the command line prompt after the packages are installed.
-
In Visual Studio, find the file ClientApp -> src -> app -> home -> home.component.html and replace the complete content with the following:
This file contains bidirectional Unicode text that may be interpreted or compiled differently than what appears below. To review, open the file in an editor that reveals hidden Unicode characters. Learn more about bidirectional Unicode characters<tx-document-editor width="1000px" height="500px" webSocketURL="ws://localhost:32760/"> </tx-document-editor> Replace the port number (32760) with the port number of your application. To find that port number, start the application and check the browser location bar.
Start the application by pressing F5. If you see an error, make sure that you replaced the port number in step 13.
Implementing a Web API
Using the above tutorial, you created an ASP.NET Core Web Application that provides the WebSocketHandler middleware connected to the Angular document editor. The following sample, that can be downloaded from GitHub, implements a backend Web API to merge templates created in the editor with data.
The ASP.NET Core Web Application implements two simple endpoints to merge templates with dummy data and an endpoint to return dummy excerpt data:
| [ApiController] | |
| [Route("[controller]")] | |
| public class TextControlController : ControllerBase | |
| { | |
| [HttpPost] | |
| [Route("MergeDocument")] | |
| public MergedDocument MergeDocument([FromBody] MergedDocument Document) | |
| { | |
| byte[] data; | |
| // create dummy merge data | |
| Customer customer = new Customer() { Firstname = "Klaus", Name = "Klaasen" }; | |
| // new ServerTextControl instance | |
| using (TXTextControl.ServerTextControl tx = new TXTextControl.ServerTextControl()) | |
| { | |
| tx.Create(); | |
| // load the document from the payload | |
| tx.Load(Convert.FromBase64String(Document.Document), | |
| TXTextControl.BinaryStreamType.InternalUnicodeFormat); | |
| TXTextControl.DocumentServer.MailMerge mm = | |
| new TXTextControl.DocumentServer.MailMerge(); | |
| mm.TextComponent = tx; | |
| mm.MergeObject(customer); // merge the data into template | |
| // save document into byte array | |
| tx.Save(out data, TXTextControl.BinaryStreamType.InternalUnicodeFormat); | |
| // return the document to the client | |
| return new MergedDocument() { Document = Convert.ToBase64String(data) }; | |
| } | |
| } | |
| [HttpGet] | |
| [Route("LoadData")] | |
| public Customer[] LoadData() | |
| { | |
| // return dummy excerpt data | |
| return new Customer[] { new Customer() { Firstname = "Klaus", Name = "Klaasen" } }; | |
| } | |
| } |
Loading Data
In the constructor of the home component (home.component.ts), the LoadData endpoint is called to get dummy data:
| constructor(http: HttpClient, @Inject('BASE_URL') baseUrl: string) { | |
| this._http = http; | |
| this._baseUrl = baseUrl; | |
| // get data source structure from Web API endpoint 'LoadData' | |
| http.get<any>(baseUrl + 'textcontrol/loaddata').subscribe(result => { | |
| // call JavaScript function from injected 'textcontrol.js' | |
| loadData(result); | |
| }, error => console.error(error)); | |
| } |
The loadData function is defined in the injected JavaScript that uses the TXTextControl JavaScript API:
| function loadData(JsonData) { | |
| TXTextControl.addEventListener("textControlLoaded", function () { | |
| TXTextControl.loadJsonData(JSON.stringify(JsonData)); | |
| }); | |
| } |
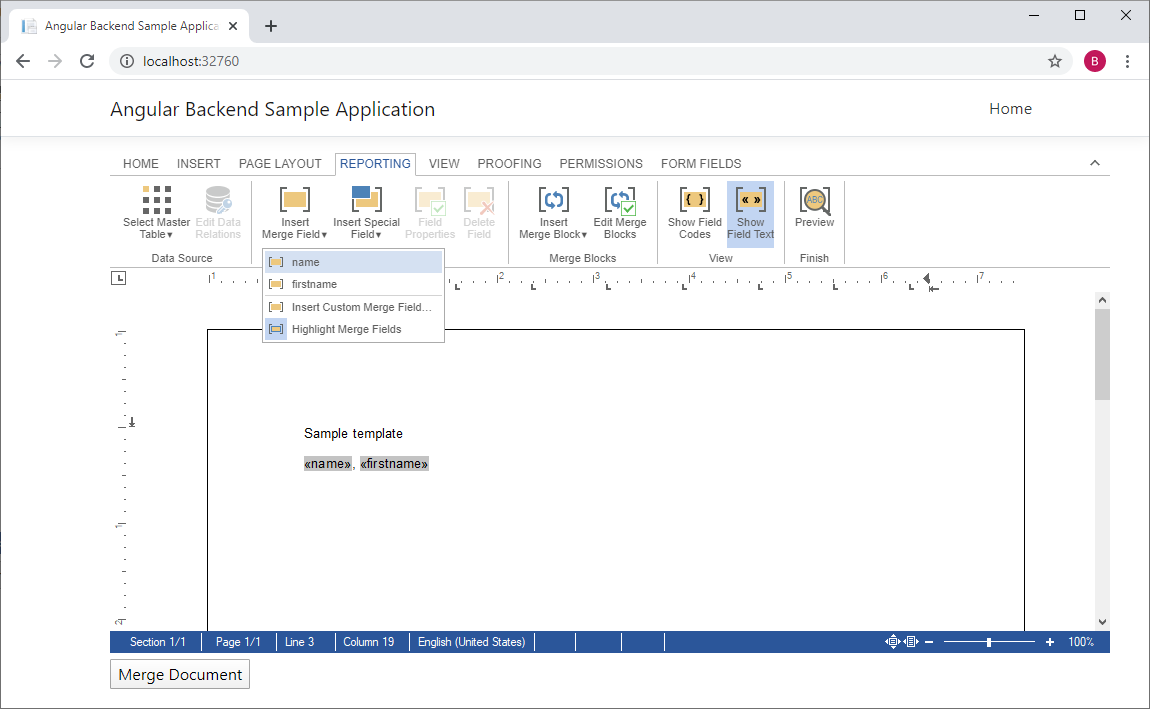
On starting the application, the Insert Merge Field drop-down is filled with the data loaded from the endpoint:
Merging Data
The view contains a button that calls the onClickMergeDocument event:
| <tx-document-editor width="1000px" | |
| height="500px" | |
| webSocketURL="ws://localhost:32760/"> | |
| </tx-document-editor> | |
| <input (click)="onClickMergeDocument()" type="button" value="Merge Document" /> |
In the TypeScript function onClickMergeDocument, the document is saved, posted to the endpoint MergeDocument and the result is loaded back into TX Text Control.
| async onClickMergeDocument() { | |
| // get the saved document from TXTextControl | |
| let postDocument: MergedDocument = { | |
| document: await saveDocument(), | |
| }; | |
| // post the document to endpoint 'MergeDocument' | |
| this._http.post<MergedDocument>(this._baseUrl + | |
| 'textcontrol/mergedocument', postDocument).subscribe(result => { | |
| // load the results into TXTextControl | |
| loadDocument(result.document); | |
| }, error => console.error(error)); | |
| } |
The 2 JavaScript functions saveDocument and loadDocument are defined in the injected JavaScript:
| function loadDocument(document) { | |
| TXTextControl.loadDocument(TXTextControl.streamType.InternalUnicodeFormat, document); | |
| } | |
| function saveDocument() { | |
| return new Promise(resolve => { | |
| TXTextControl.saveDocument(TXTextControl.streamType.InternalUnicodeFormat, function (e) { | |
| resolve(e.data); | |
| }); | |
| }); | |
| } |
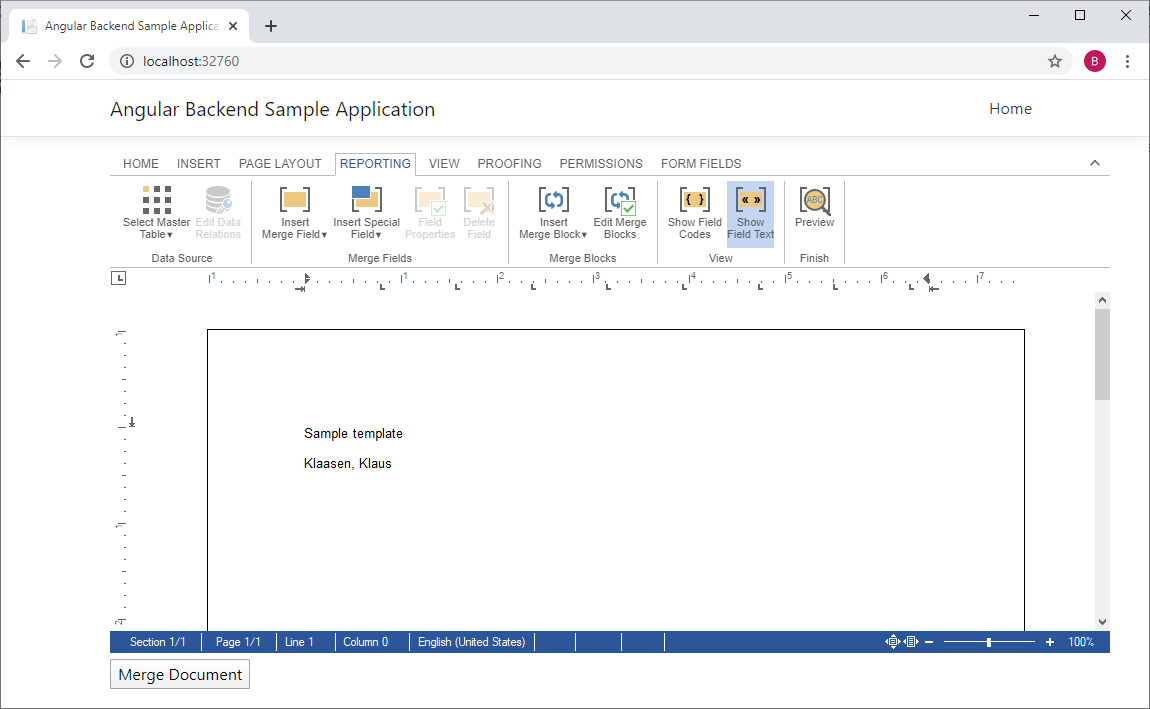
Download the sample and try this on your own.

