Getting Started: Creating an ASP.NET Core Web App with the Document Editor in Visual Studio Code (VS Code)
This article shows how to create an ASP.NET Core Web App with the Document Editor in Visual Studio Code (VS Code). The Document Editor is a powerful word processing component that can be used to create, edit, view, and print documents in various formats.

Visual Studio Code is a lightweight but powerful source code editor that runs on your desktop and is available for Windows, macOS, and Linux. It comes with built-in support for JavaScript, TypeScript, and Node.js and has a rich ecosystem of extensions for other languages (such as C++, C#, Python, PHP) and runtimes.
In this tutorial, we will show you how to create an ASP.NET Core Web App that uses the TX Text Control Document Editor in Visual Studio Code.
Prerequisites
There are two ways to evaluate the TX Text Control Document Editor. You can either host your own backend by downloading the trial version of TX Text Control .NET Server, or by creating a trial access token to use a hosted backend, valid for 30 days:
- Download Trial Version
Setup download and installation required.- Create Trial Access Token
No download and local installation required.Before you start, you need to have the following prerequisites:
Helpful Extensions
Visual Studio Code has a rich ecosystem of extensions that can be installed to add additional features to the editor. The following extensions are helpful when working with ASP.NET C#:
Creating the Application
-
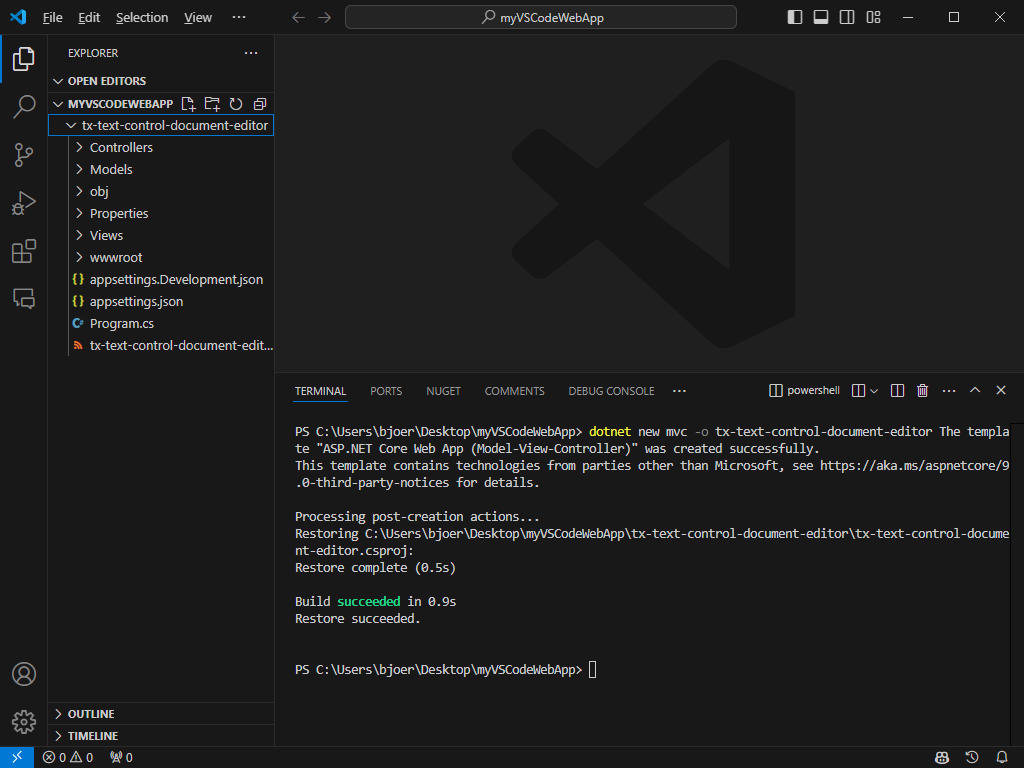
Open Visual Studio Code and open a folder where you want to create the application. Open the terminal and execute the following command:
dotnet new mvc -o tx-text-control-document-editorThis command creates a new ASP.NET Core Web App (MVC) project in a new folder called tx-text-control-document-editor.

Adding the NuGet Package
-
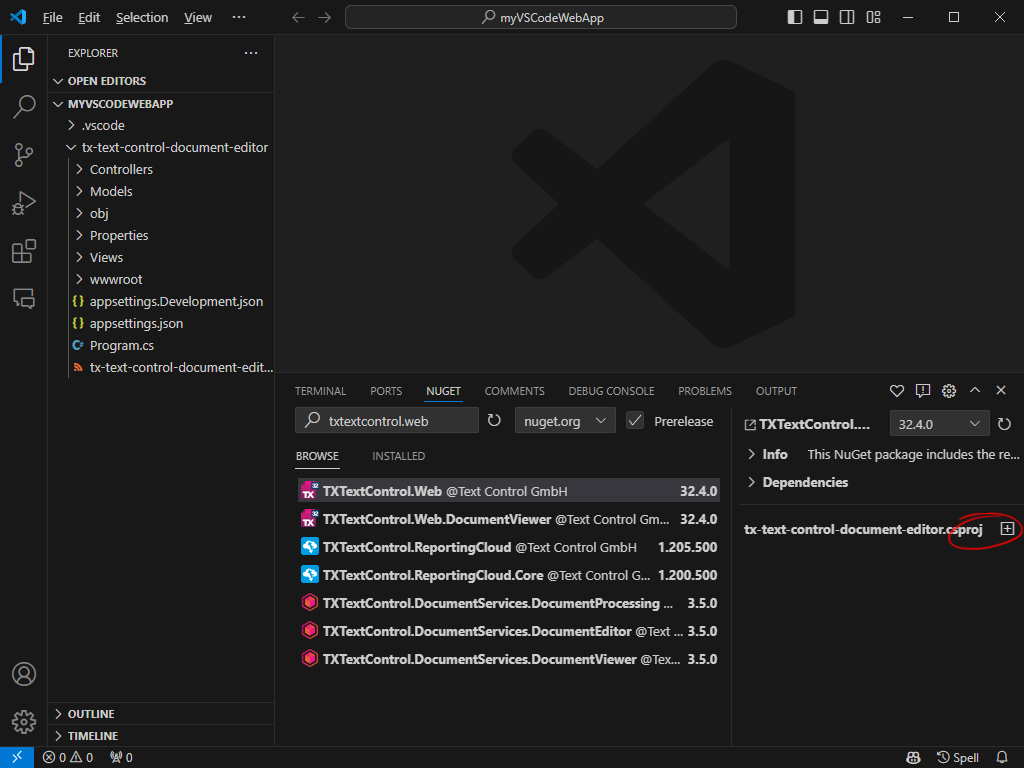
In the same terminal window find the tab NUGET and open it. Search for TXTextControl.Web and install the package.

Configure the Application
Trial Access Token Users
In case you are using a Trial Access Token, skip this complete step.
-
Open the Program.cs file located in the project's root folder.
At the very top of the file, insert the following code:
using TXTextControl.Web;Add the following code after the entry app.UseStaticFiles();:
// enable Web Sockets
app.UseWebSockets();

// attach the Text Control WebSocketHandler middleware
app.UseTXWebSocketMiddleware();
Adding the Document Editor
-
Find the Index.cshtml file in the Views -> Home folder. Replace the complete content with the following code to add the document editor to the view:
@using TXTextControl.Web.MVC

@{
    var sDocument = "<html><body><p>Welcome to <strong>Text Control</strong></p></body></html>";
}

@Html.TXTextControl().TextControl(settings => {
    settings.UserNames = new string[] { "Tim Typer" };
}).LoadText(sDocument, TXTextControl.Web.StringStreamType.HTMLFormat).Render()

<input type="button" onclick="insertTable()" value="Insert Table" />

<script>
    function insertTable() {
        TXTextControl.tables.add(5, 5, 10, function(e) {
          if (e === true) { // if added
            TXTextControl.tables.getItem(function(table) {
              table.cells.forEach(function(cell) {
                cell.setText("Cell text");
              });
            }, null, 10);
          }
        })
    }
</script>
@bjoerntx
Comment
Trial Access Token Users
In case you are using a Trial Access Token, replace the content with the following code.
@using TXTextControl.Web.MVC

@Html.TXTextControl().TextControl(settings => {
        settings.WebSocketURL = "wss://backend.textcontrol.com/api/TXWebSocket?access-token=addYourTokenHere"
}).Render()
Replace addYourTokenHere with your actual Trial Access Token.
Run the Application
-
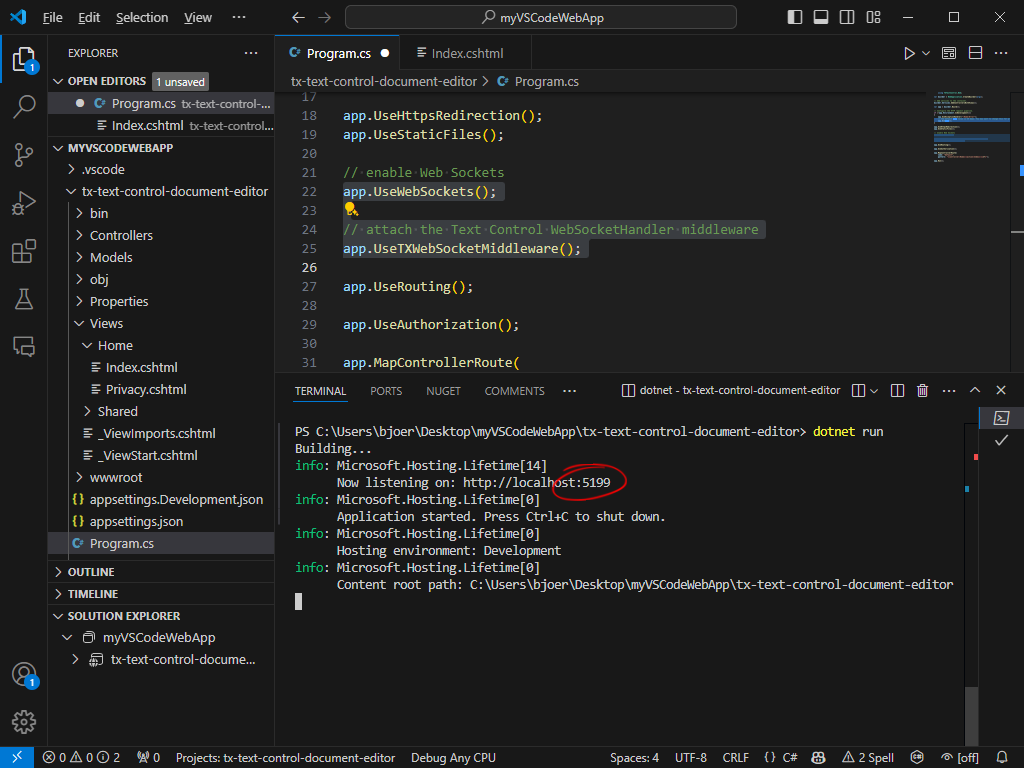
Open the terminal, navigate to the project's root folder and execute the following command:
dotnet run
-
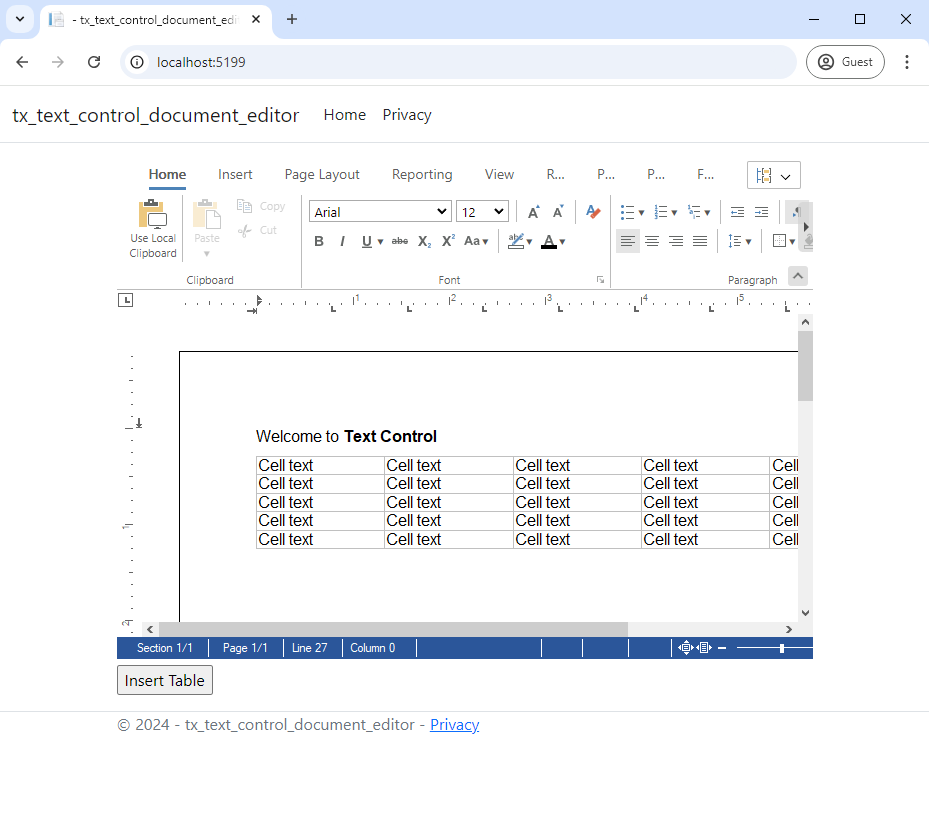
Open a browser and navigate to the URL that is displayed in the terminal.

Conclusion
That's it. You have successfully created an ASP.NET Core Web App that uses the TX Text Control Document Editor in Visual Studio Code. You can now use the editor to create, edit, and save documents in your application.
ASP.NET
Integrate document processing into your applications to create documents such as PDFs and MS Word documents, including client-side document editing, viewing, and electronic signatures.
- Angular
- Blazor
- React
- JavaScript
- ASP.NET MVC, ASP.NET Core, and WebForms
Related Posts
ASP.NETASP.NET CoreDocument Automation
Why Document Processing Libraries Require a Document Editor
A document processing library alone cannot guarantee reliable and predictable results. Users need a true WYSIWYG document editor to design and adjust templates to appear exactly as they will after…
ASP.NETASP.NET CoreDocument Editor
Getting Started Video Tutorial: Document Editor in ASP.NET Core C# on Linux
This video tutorial shows how to use the Document Editor in an ASP.NET Core application using C# and deploy on Linux using Docker. This tutorial is part of the TX Text Control Getting Started…
ASP.NETApp ServicesASP.NET Core
Deploying the TX Text Control Document Editor in an ASP.NET Core Web App to…
This tutorial shows how to deploy the TX Text Control Document Editor to Azure App Services using an ASP.NET Core Web App. The Document Editor is a powerful word processing component that can be…
Building an ASP.NET Core Backend (Linux and Windows) for the Document Editor…
This article shows how to create a backend for the Document Editor and Viewer using ASP.NET Core. The backend can be hosted on Windows and Linux and can be used in Blazor, Angular, JavaScript, and…
TX Text Control for Blazor: Mail Merge Integration Tutorial
This tutorial shows how to integrate the TX Text Control MailMerge component into a Blazor application using the TX Text Control .NET Server.


