TX Text Control provides all the necessary components to create and deploy documents in various formats, including MS Word DOCX, to capture electronic signatures and digitally sign these finished documents. To sign a document, a valid certificate is required that can be obtained by trust centers or certificate authorities. The certificate is used to sign the document and to verify the signature. The signature is embedded in the document and can be verified by any recipient of the document.
Self-Signed Certificates
For testing purposes, you can create a self-signed certificate using the following PowerShell command in Windows:
| New-SelfSignedCertificate -Type Custom -Subject "CN=Text Control, O=Text Control, C=US" -KeyUsage DigitalSignature -FriendlyName "TextControlSelf" -CertStoreLocation "Cert:\CurrentUser\My" -TextExtension @("2.5.29.37={text}1.3.6.1.5.5.7.3.3", "2.5.29.19={text}") |
If you are interested in learning more about this, the whole process is explained in another article.
Learn More
TX Text Control can be used to digitally sign PDF and PDF/A documents with X.509 certificates. This article describes how to create a self-signed certificate and how to use it to sign documents.
Digitally Sign PDF/A Documents with Self-Signed Certificates
Adobe Digital IDs
This article focuses on using Adobe digital IDs to sign documents that can be viewed as valid when opened in Acrobat Reader. A digital ID is a unique identifier that is used to sign documents. It is a digital certificate that includes a private key and a public key. The private key is used to sign the document and the public key is used to verify the signature. The digital ID is stored in a file with the extension *.pfx which can be directly used in TX Text Control to sign documents.
Creating a Digital ID
Adobe Acrobat can be used to create a digital ID.
- Open Acrobat Reader and choose Preferences from the main menu.
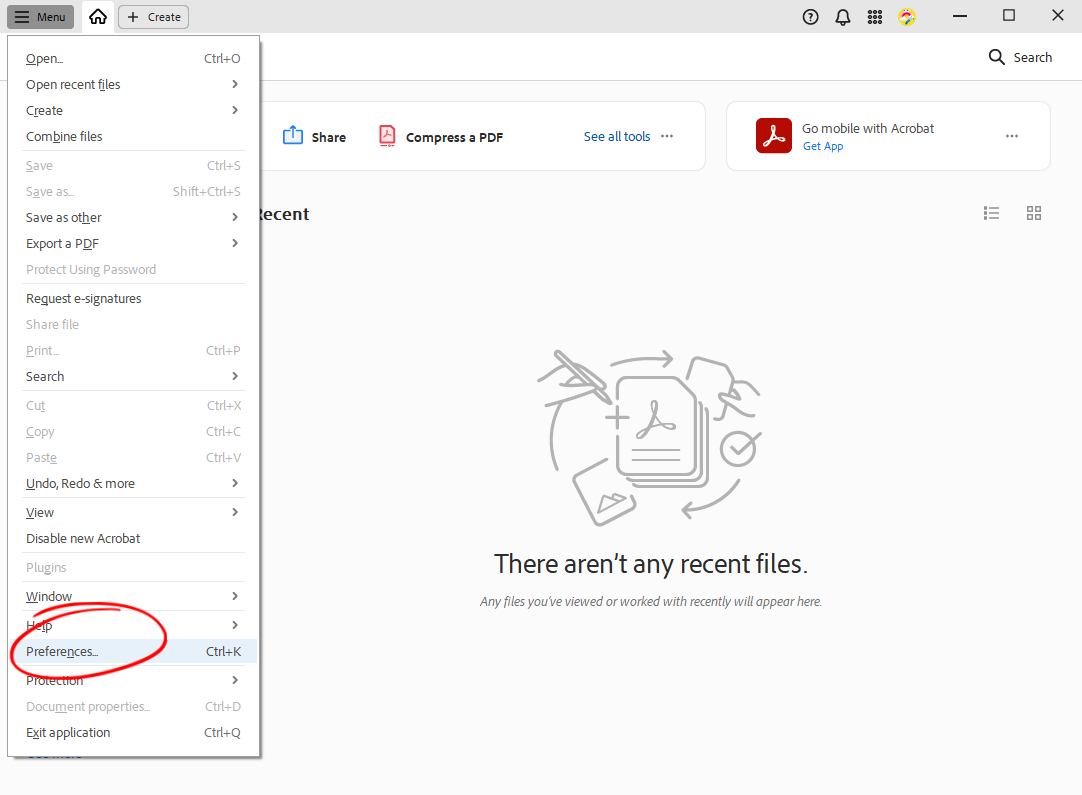
- In the Preferences dialog, choose Signatures and click on More... in the Identities & Trusted Certificates section.
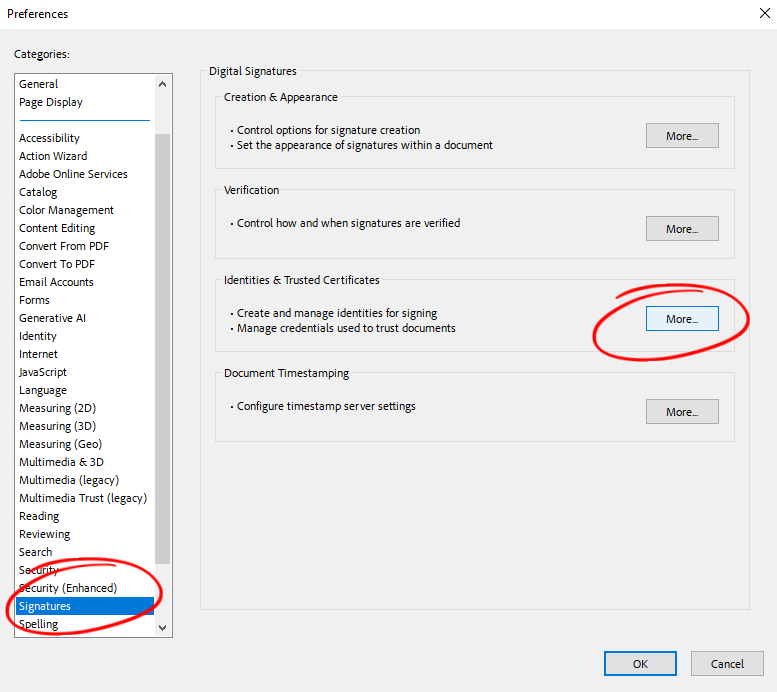
- In the Identities & Trusted Certificates dialog, click the Add icon to create a new digital ID.
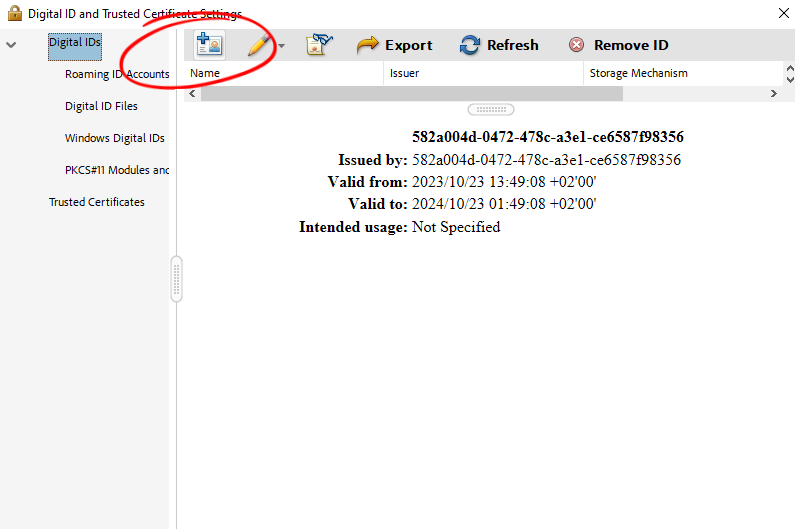
- Choose A new digital ID I want to create now and click Next.
- Choose New PKCS#12 digital ID file and click Next.
- Enter your personal information, choose Digital Signatures for Use digital ID for and click Next.
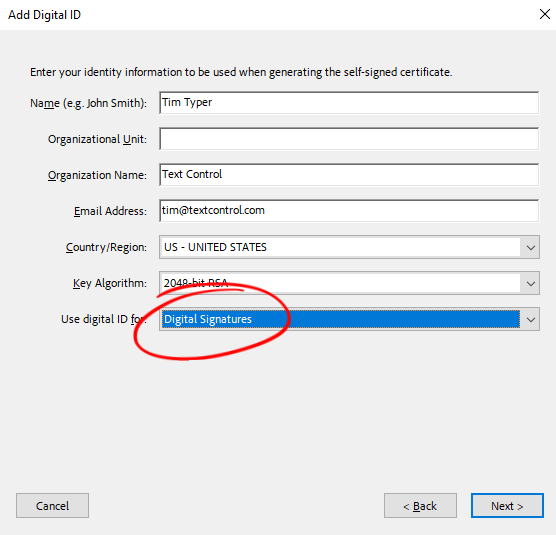
- Select the location where the digital ID should be saved and enter a password to protect the digital ID. Click Finish.
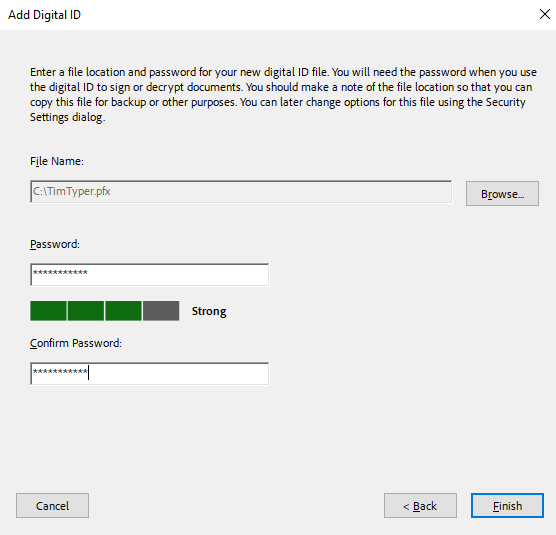
The *.pfx should have been created and saved to the specified location. This file can be used to sign documents in TX Text Control.
Signing a Document
A .NET 8 console application is created for the purposes of this demo.
Prerequisites
The following tutorial requires a trial version of TX Text Control .NET Server for ASP.NET.
Creating the Application
-
In Visual Studio, create a new Console App using .NET 8.
-
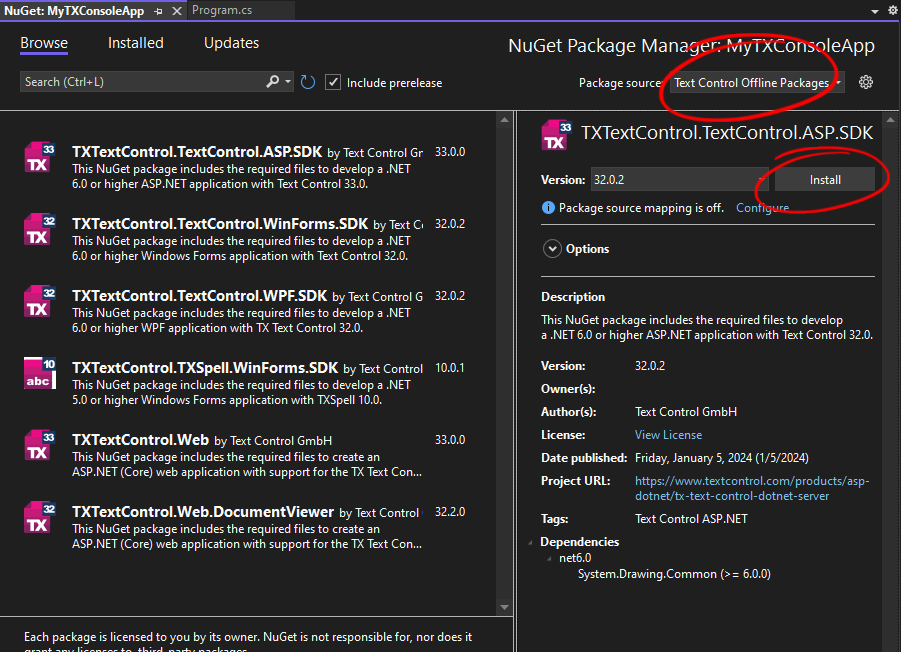
In the Solution Explorer, select your created project and choose Manage NuGet Packages... from the Project main menu.
Select Text Control Offline Packages from the Package source drop-down.
Install the latest versions of the following package:
- TXTextControl.TextControl.ASP.SDK
Adding the Code
- Create a new folder in your project called data and copy the *.pfx file into this folder.
- Copy any document that you want to sign into the data folder.
- Add the following code to your Program.cs file:
This file contains bidirectional Unicode text that may be interpreted or compiled differently than what appears below. To review, open the file in an editor that reveals hidden Unicode characters. Learn more about bidirectional Unicode characters
using System.Security.Cryptography.X509Certificates; using TXTextControl; using (ServerTextControl tx = new ServerTextControl()) { tx.Create(); // load the document tx.Load("data/document.docx", StreamType.WordprocessingML); SaveSettings saveSettings = new SaveSettings() { DigitalSignature = new DigitalSignature( new X509Certificate2("data/TimTyper.pfx", "TimTyper$TX"), null) }; tx.Save("data/signed.pdf", StreamType.AdobePDFA, saveSettings); }
Running the Application
Run the application and the signed document will be saved in the same folder as the original document. Opened in Acrobat Reader, the document will show the signature as valid.
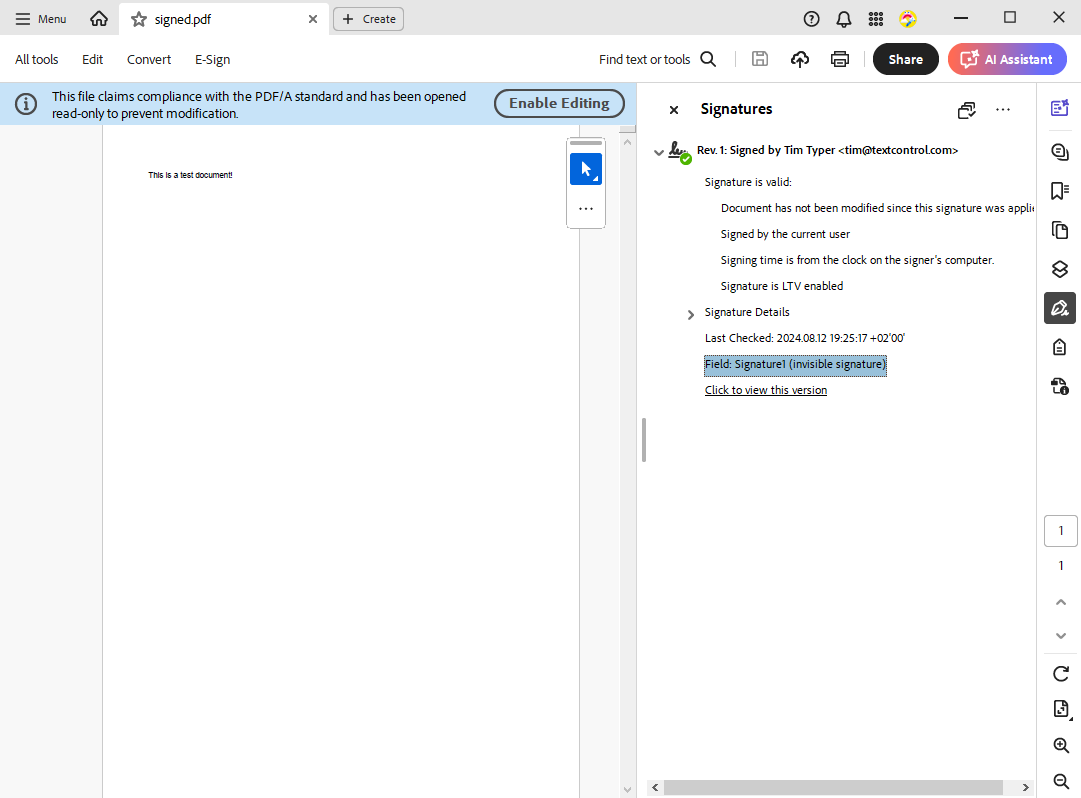
This code signs the complete document. It is also possible to sign individual signature fields in a document. This is explained in another article.
Learn More
With TX Text Control, adding digital and electronic signatures to documents is a simple task. This article shows how to sign the entire document with a digital certificate and how to sign individual signature fields.
Conclusion
Using Adobe digital IDs to sign documents is an easy and secure way to test the integration of digital signatures in your applications. TX Text Control provides a simple, but complete API to sign documents with digital certificates.


