TX Text Control can be used to digitally sign Adobe PDF and PDF/A documents with X.509 certificates. The certificate can be assigned in the Save
╰ TXTextControl Namespace
╰ SaveSettings Class
The SaveSettings class provides properties for advanced settings and information during save operations. class when saving document.
Creating Adobe PDFs
Consider the following Web API code that accepts a document in the internal TX Text Control format as a Base64 encoded string and returns a signed Adobe PDF document as a Base64 encoded string which is a typical practice for document APIs.
| [HttpPost] | |
| public string ExportPDF(string document) | |
| { | |
| byte[] bPDF; | |
| using (TXTextControl.ServerTextControl tx = new TXTextControl.ServerTextControl()) | |
| { | |
| tx.Create(); | |
| tx.Load(Convert.FromBase64String(document), | |
| TXTextControl.BinaryStreamType.InternalUnicodeFormat); | |
| X509Certificate2 cert = new X509Certificate2 | |
| (Server.MapPath("~/App_Data/textcontrolself.pfx"), | |
| "yourpassword"); | |
| TXTextControl.SaveSettings saveSettings = new TXTextControl.SaveSettings() | |
| { | |
| DigitalSignature = new TXTextControl.DigitalSignature(cert, null) | |
| }; | |
| // save the document as PDF | |
| tx.Save(out bPDF, TXTextControl.BinaryStreamType.AdobePDFA, saveSettings); | |
| } | |
| // return as Base64 encoded string | |
| return Convert.ToBase64String(bPDF); | |
| } |
In this case, a X509Certificate2 is created from the certificate file textcontrolself.pfx and the private key password.
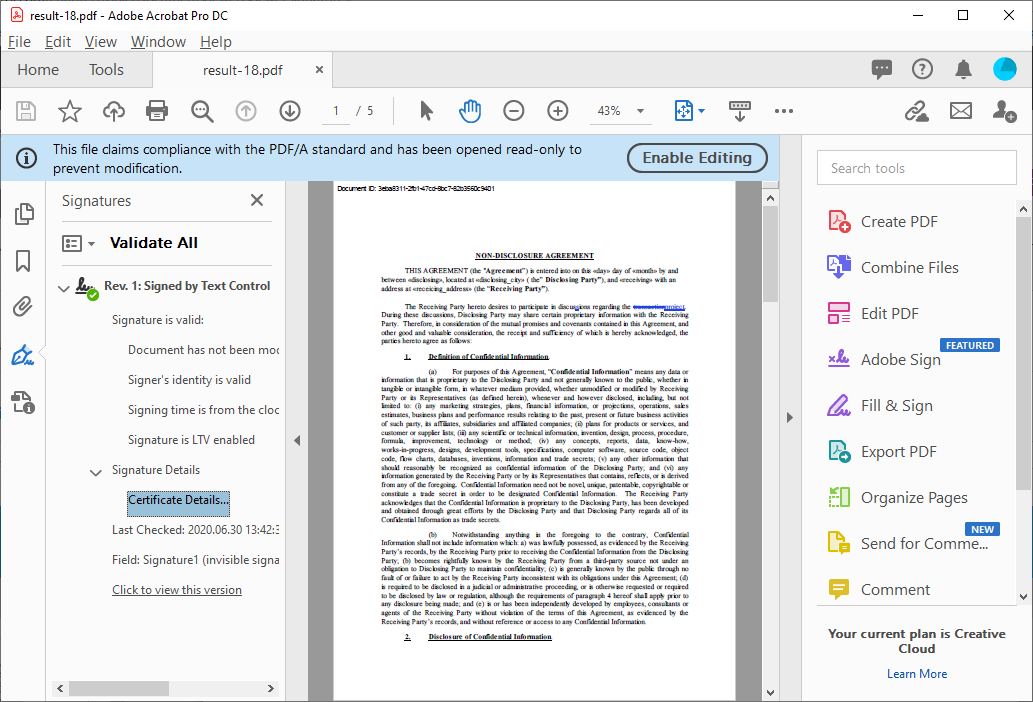
After the document has been created and is opened in Acrobat Reader, the valid signatures are shown in the Signatures sidebar:

Creating the Self-Signed Certificate
In the next steps, a self-signed certificate is created using Windows PowerShell.
-
Use the New-SelfSignedCertificate PowerShell cmdlet to create a self signed certificate. Open a PowerShell and type in the following command:
This file contains bidirectional Unicode text that may be interpreted or compiled differently than what appears below. To review, open the file in an editor that reveals hidden Unicode characters. Learn more about bidirectional Unicode charactersNew-SelfSignedCertificate -Type Custom -Subject "CN=Text Control, O=Text Control, C=US" -KeyUsage DigitalSignature -FriendlyName "TextControlSelf" -CertStoreLocation "Cert:\CurrentUser\My" -TextExtension @("2.5.29.37={text}1.3.6.1.5.5.7.3.3", "2.5.29.19={text}") After running this command, the certificate is added to the certificate store (specified in the "-CertStoreLocation" parameter). The output of the command shows the certificate's thumbprint.
This file contains bidirectional Unicode text that may be interpreted or compiled differently than what appears below. To review, open the file in an editor that reveals hidden Unicode characters. Learn more about bidirectional Unicode charactersPSParentPath: Microsoft.PowerShell.Security\Certificate::CurrentUser\My Thumbprint Subject ---------- ------- 6BA35B742656FB2EC48B09116ABAE5123082F116 CN=Text Control, O=Text Control, C=US -
Copy this thumbprint and insert it into the following command:
This file contains bidirectional Unicode text that may be interpreted or compiled differently than what appears below. To review, open the file in an editor that reveals hidden Unicode characters. Learn more about bidirectional Unicode characters$password = ConvertTo-SecureString -String yourpassword -Force -AsPlainText Export-PfxCertificate -cert "Cert:\CurrentUser\My\6BA35B742656FB2EC48B09116ABAE5123082F116" -FilePath textcontrolself.pfx -Password $password -
The file textcontrolself.pfx is created in the same folder. Copy this to your application's folder from where you want to load the certificate (App_Data in our Web API sample above).
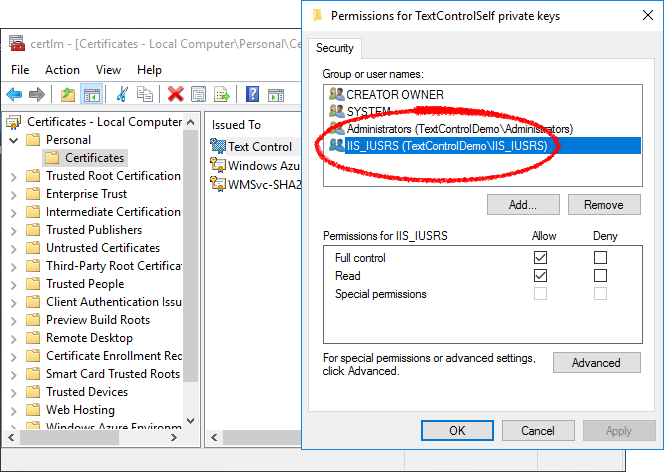
In real-world applications, the private key can be also accessed from the certificate store. In this case, make sure that the current user (IIS_IUSRS) has full access.


