Using the MVC DocumentViewer with a Separate Backend
The MVC DocumentViewer can be used with a separate backend running on another server. This tutorial shows how to setup such an environment.

The following tutorial shows how to setup a solution with two .NET 6 ASP.NET Core projects to simulate a separate backend running the required Document
Creating the Backend
Make sure that you downloaded the latest version of Visual Studio 2022 that comes with the .NET 6 SDK.
-
In Visual Studio 2022, create a new project by choosing Create a new project.
-
Select ASP.NET Core Web App (Model-View-Controller) as the project template and confirm with Next.
-
Choose a name (e.g. tx-documentviewer-backend) for your project and confirm with Next.
-
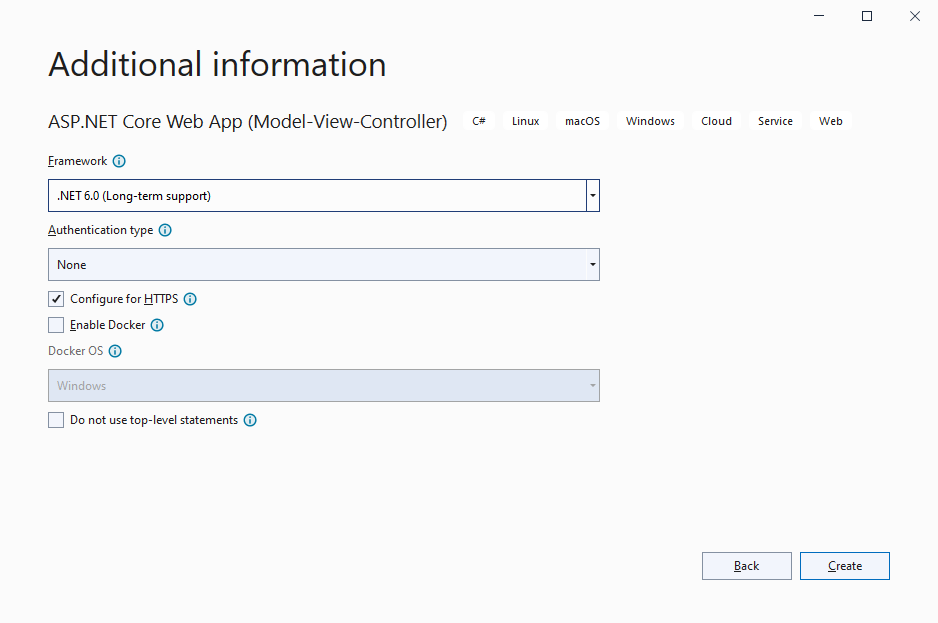
In the next dialog, choose .NET 6 (Long-term support) as the Framework and confirm with Create.
Adding the NuGet Packages
-
In the Solution Explorer, select your created project and choose Manage NuGet Packages... from the Project main menu.
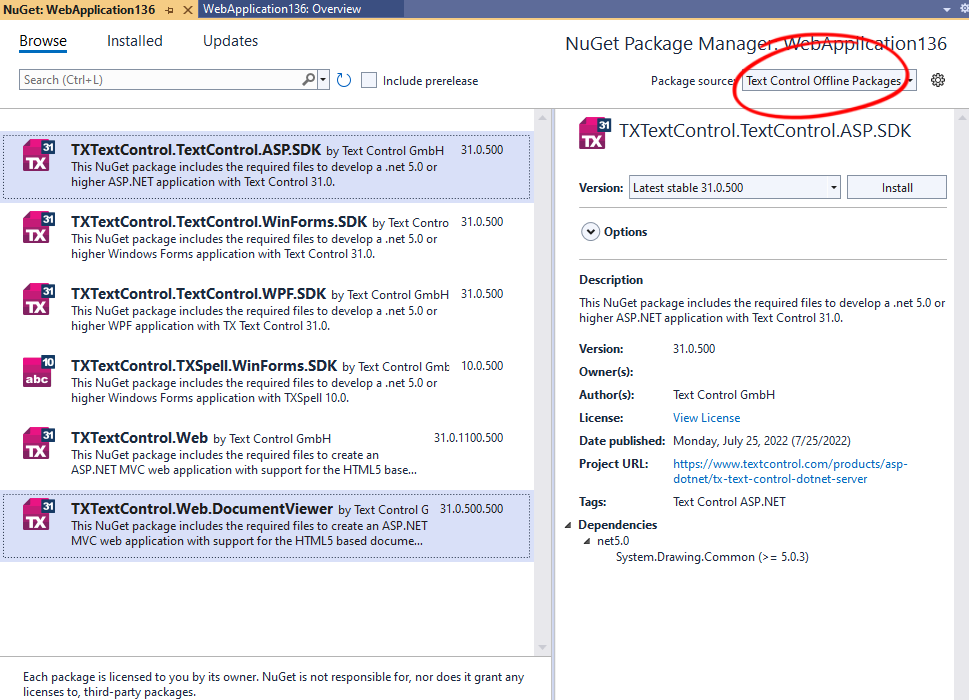
Select Text Control Offline Packages from the Package source drop-down.
Install the latest versions of the following packages:
- TXTextControl.Web.DocumentViewer
- TXTextControl.TextControl.ASP.SDK
Adding CORS
In order to access the backend, CORS (Cross-Origin Resource Sharing) must be added to Program.cs
-
Find the Program.cs in the Solution Explorer, open it and replace the content with the following content:
var builder = WebApplication.CreateBuilder(args);

// Add services to the container.
builder.Services.AddControllersWithViews();

builder.Services.AddCors(p => p.AddPolicy("corsapp", builder =>
{
        builder.WithOrigins("*").AllowAnyMethod().AllowAnyHeader();
}));

var app = builder.Build();

// Configure the HTTP request pipeline.
if (!app.Environment.IsDevelopment()) {
        app.UseExceptionHandler("/Home/Error");
        app.UseHsts();
}

app.UseHttpsRedirection();
app.UseStaticFiles();

app.UseCors("corsapp");

app.UseRouting();

app.UseAuthorization();

app.MapControllerRoute(
        name: "default",
        pattern: "{controller=Home}/{action=Index}/{id?}");

app.Run();
Creating the Client Application
-
Select the solution in the Solution Explorer and File -> Add -> New Project....
-
Select ASP.NET Core Web App (Model-View-Controller) as the project template and confirm with Next.
-
Choose a name (e.g. tx-documentviewer-client) for your project and confirm with Next.
-
In the next dialog, choose .NET 6 (Long-term support) as the Framework and confirm with Create.
Adding the NuGet Package
In the client project, both NuGet packages need to be added for compiling reasons. The actual work is done by the backend in this scenario.
-
In the Solution Explorer, select your created project and choose Manage NuGet Packages... from the Project main menu.
Select Text Control Offline Packages from the Package source drop-down.
Install the latest versions of the following packages:
- TXTextControl.Web.DocumentViewer
- TXTextControl.TextControl.ASP.SDK
Adding the Control to the View
-
In the Solution Explorer, open the Properties -> launchSettings.json file of the backend project and find the applicationUrl value.
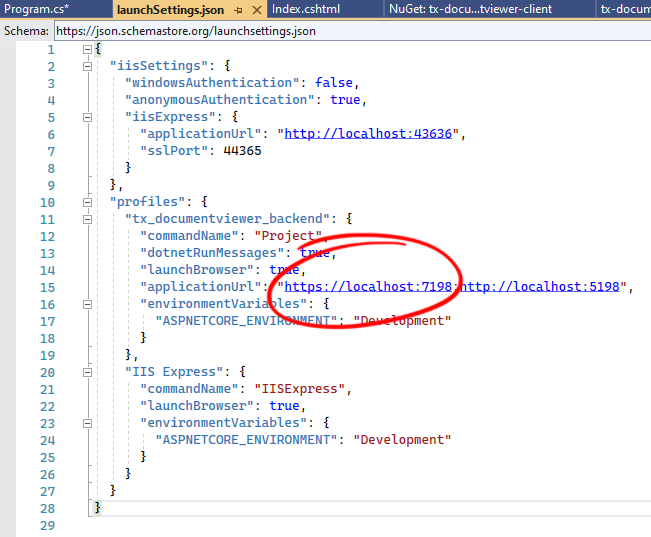
Copy that value into the clipboard.
-
Find the Index.cshtml file in the Views -> Home folder. Replace the complete content with the following code:
@using TXTextControl.Web.MVC.DocumentViewer
@using System.Text

<div style="width: 800px; height: 600px;">

@Html.TXTextControl().DocumentViewer(settings => {
        settings.BasePath = "https://localhost:7198";
        settings.DocumentData = Convert.ToBase64String(
            Encoding.ASCII.GetBytes("<strong>Sample Content</strong>"));
        settings.Dock = DocumentViewerSettings.DockStyle.Fill;
}).Render()

</div>

<script>

        var jsonAnnotations = '[[{"pen":{"type":"comment","objectWidth":32,"objectHeight":32},"user":"Unknown User","location":{"x":127,"y":50},"time":1658908087097,"comments":[{"comment":"Welcome to Text Control","user":"Unknown User","date":1658908100339,"id":"c8d818ce-ff1e-4c0c-b78c-6ba95a98dede","status":"none"}],"id":"feed80ff-1c94-4abf-9838-3e833faa4092","status":"Accepted"}]]';

        window.addEventListener("documentViewerLoaded", function () {
            TXDocumentViewer.annotations.showToolbar(true);
            TXDocumentViewer.annotations.load(jsonAnnotations);
        });

</script>
In line 7, replace the value of the BasePath property with the copied applicationUrl value from step 6.
Starting the Solution
-
Select the solution in the Solution Explorer and choose Project -> Properties from the main menu.
In the opened dialog, select Multiple startup projects and set both Actions to Start.
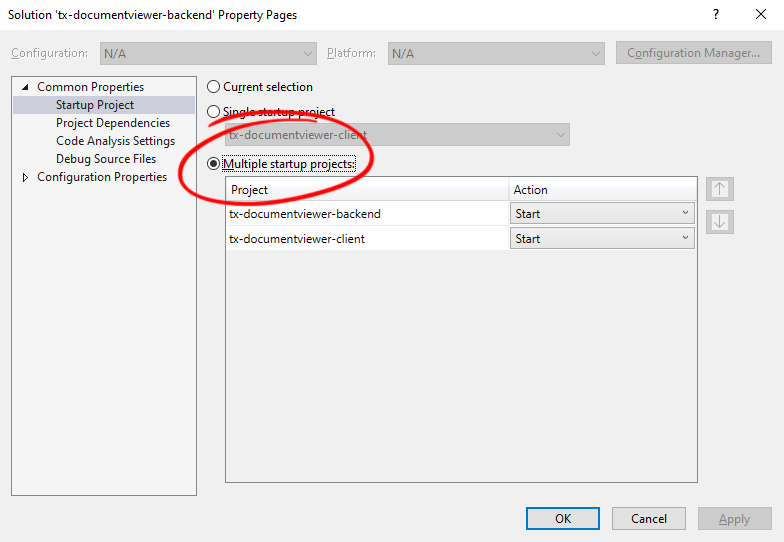
Confirm with OK.
-
Compile and start the application.
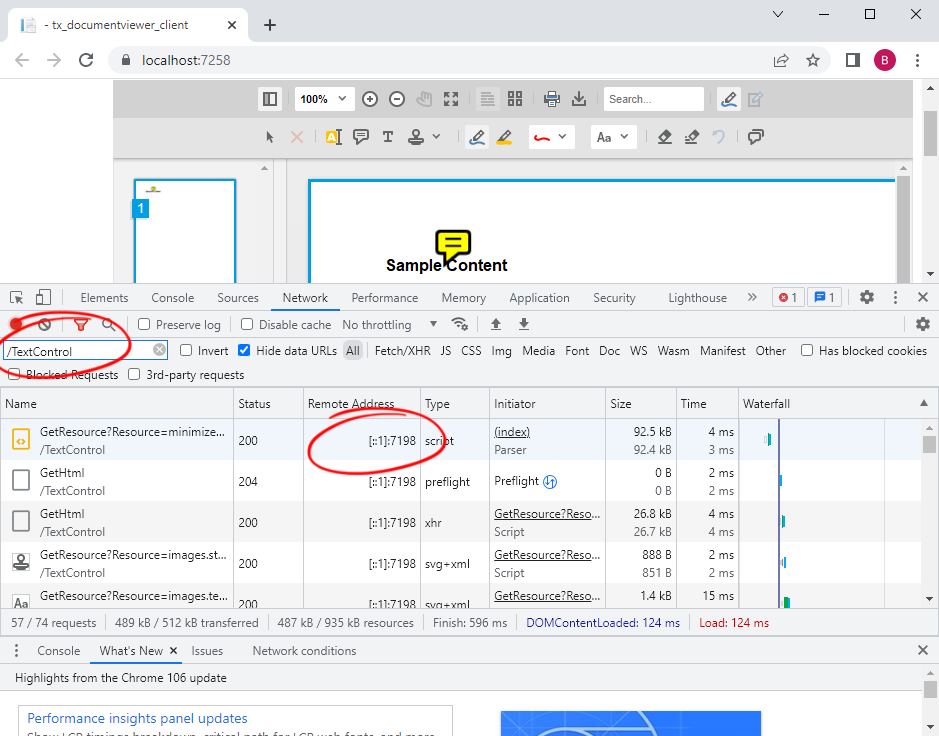
When checking the network traffic on the client application, you can see that all required calls to the backend (/TextControl) are routed to our backend project.
ASP.NET
Integrate document processing into your applications to create documents such as PDFs and MS Word documents, including client-side document editing, viewing, and electronic signatures.
- Angular
- Blazor
- React
- JavaScript
- ASP.NET MVC, ASP.NET Core, and WebForms
Related Posts
Deploying the TX Text Control Document Editor Backend Web Server in Docker
This article describes how to deploy the TX Text Control Document Editor backend web server in Docker. The backend web server is a .NET Core application that provides the required synchronization…
Configuring the TX Text Control Document Editor Backend Web Server,…
This article describes how to configure the TX Text Control Document Editor Backend Web Server, including port and logging settings.
Designing a Maintainable PDF Generation Web API in ASP.NET Core (Linux) C#…
This article shows how to create a PDF generation Web API in ASP.NET Core on Linux using TX Text Control .NET Server. The clean architecture is used to create a maintainable and testable solution.
Building an ASP.NET Core Backend Application to Host the Document Editor and…
This article explains how to create an ASP.NET Core backend application to host the Document Editor and Document Viewer. This backend application is required to provide the required functionality…
Load Balancing: Using Different TCP Service Locations using a Custom…
The Text Control online document editor requires a backend TCP service to synchronize the document rendering. This article explains how to route the synchronization traffic to different servers…


