Unlike the document editor, the document viewer doesn't require a TCP synchronization service to render the document. But it also requires an ASP.NET backend application that runs on a Windows Server instance. This article shows how to deploy the backend and how to connect the viewer to this backend.
When integrating the TX Text Control ASP.NET document viewer into an ASP.NET Core Web Application, the viewer requires two parts:
- MVC NuGet package or(!) pure JavaScript
The ASP.NET MVC NuGet package for the client-side components
- Backend: Integrated Web API controller
Server-side backend Web API controller to manage the viewer
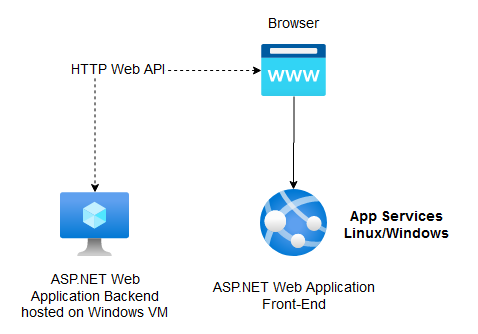
Both required components are part of the DocumentViewer NuGet package. When deploying your application to App Services or Linux, the document viewer can be initialized client-side using pure JavaScript by connecting it to a separate ASP.NET backend.
The following diagram shows this deployment architecture:

Creating the ASP.NET Backend Web Application
-
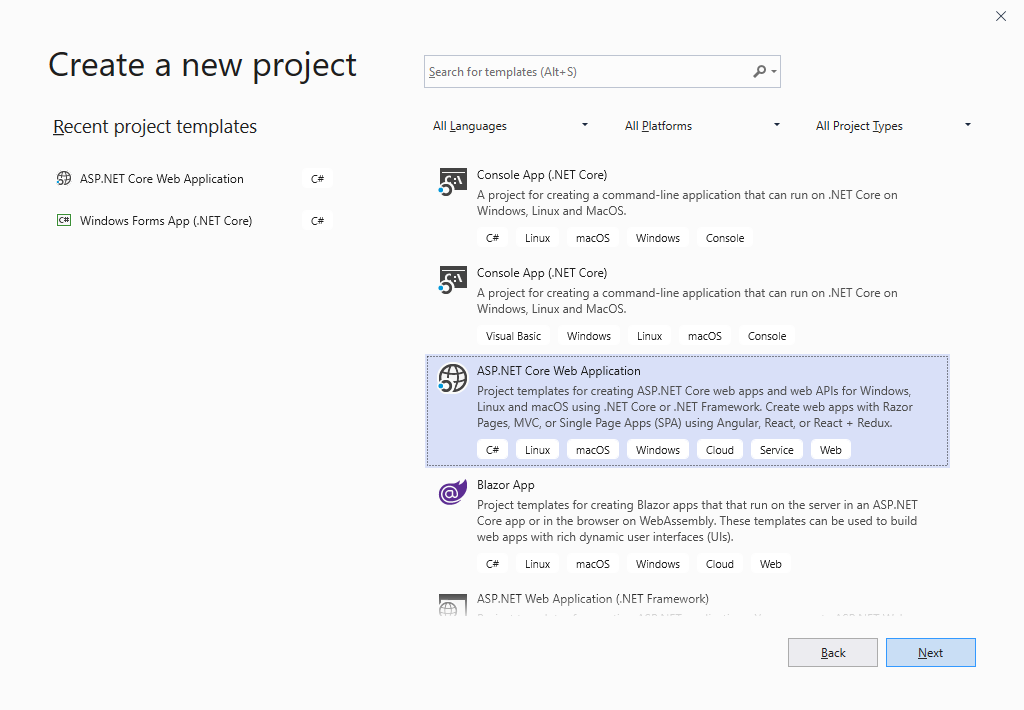
In Visual Studio 2019 (>= 16.5.4) or 2022, create a new project and select ASP.NET Core Web Application as the project template.

-
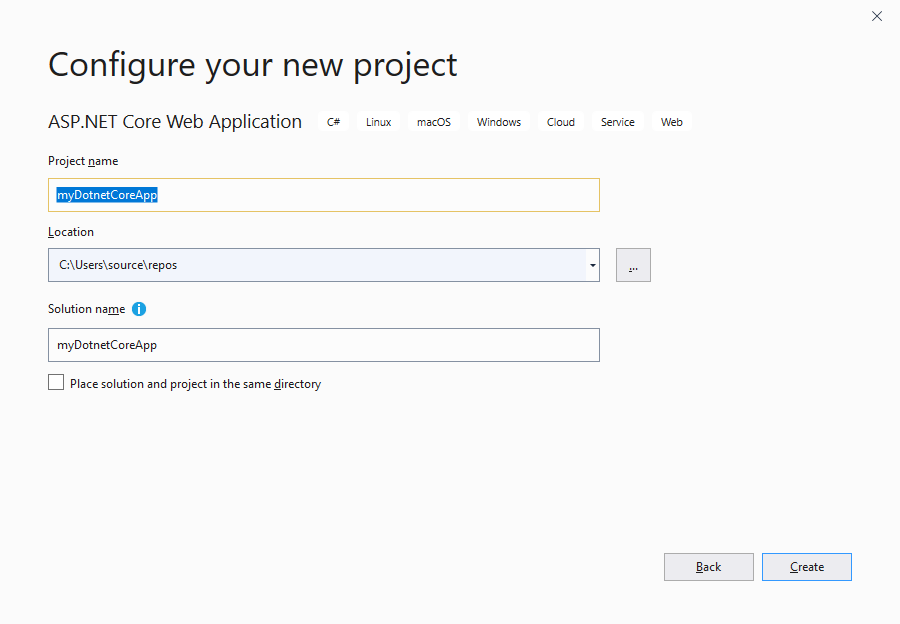
Select a project name, location and solution name in the next dialog and confirm with Create.

-
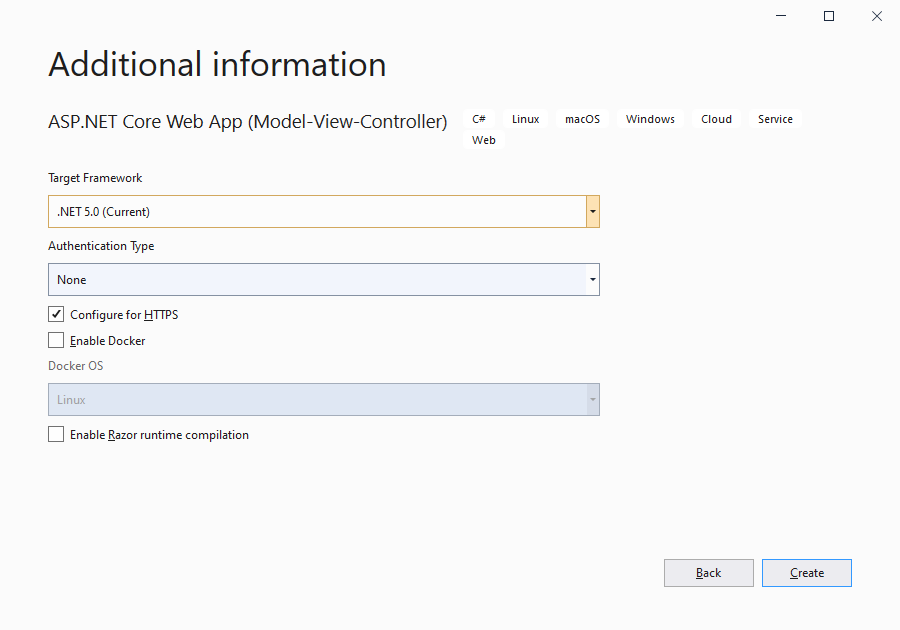
In the last dialog, select .NET 5 as the Target Framework and confirm with Create.

-
Open the Package Manager Console by choosing Package Manager Console from the Tools -> NuGet Package Manager main menu and type in the following command to install the TXTextControl.Web.DocumentViewer package:
PM> Install-Package TXTextControl.Web.DocumentViewer
-
While the project is selected in the Solution Explorer, choose Project -> Add Reference... to open the Reference Manager. In the opened dialog, select Browse... to select the required TX Text Control assemblies. Navigate to the installation folder of TX Text Control and select the following assemblies from the Assembly folder:
- TXDocumentServer.dll
- TXTextControl.dll
- TXTextControl.Server.dll
- TXDrawing.dll
Repeat this step with the following assemblies from the Assembly/bin64 folder:
- txic.dll
- txkernel.dll
- txtools.dll
- txpdf.dll
After selecting these assemblies, close the Reference Manager by confirming with OK.
-
While the project is selected in the Solution Explorer, choose Project -> Add Existing Item.... Browse to the TX Text Control installation folder and select the following files from the Assembly/bin64:
- tx29_xml.dll
- tx29_css.dll
- tx29_doc.dll
- tx29_dox.dll
- tx29_htm.dll
- tx29_pdf.dll
- tx29_rtf.dll
- tx29_xlx.dll
-
Select the files from step 6 in the Solution Explorer and set the Copy to Output Directory to Copy always.
-
While the project is selected in the Solution Explorer, choose Project -> Add New Item.... Select Text File, name the file licenses.licx and close the dialog by clicking Add.
Open the newly added file and add the following content:
This file contains bidirectional Unicode text that may be interpreted or compiled differently than what appears below. To review, open the file in an editor that reveals hidden Unicode characters. Learn more about bidirectional Unicode charactersTXTextControl.ServerTextControl, TXTextControl.Server, Culture=neutral, PublicKeyToken=6b83fe9a75cfb638 Set the Build Action property to Embedded Resource.
-
Find the Startup.cs file in the Solution Explorer and add the following code to the ConfigureServices method:
This file contains bidirectional Unicode text that may be interpreted or compiled differently than what appears below. To review, open the file in an editor that reveals hidden Unicode characters. Learn more about bidirectional Unicode charactersservices.AddCors(opt => { opt.AddPolicy(name: "CorsPolicy", builder => { builder.AllowAnyOrigin() .AllowAnyHeader() .AllowAnyMethod(); }); }); -
Add this policy to the Configure method after the app.UseRouting(); entry:
This file contains bidirectional Unicode text that may be interpreted or compiled differently than what appears below. To review, open the file in an editor that reveals hidden Unicode characters. Learn more about bidirectional Unicode charactersapp.UseCors("CorsPolicy"); Why CORS?
Enabling CORS is required as we are accessing the backend controller from another application.
-
Compile and start your application.
Adding the Document Viewer to your ASP.NET Core Web Application
Open your existing ASP.NET Core Web Application or create a new application where you would like to add the document viewer to.
-
Add the following script tag to one of your view files:
This file contains bidirectional Unicode text that may be interpreted or compiled differently than what appears below. To review, open the file in an editor that reveals hidden Unicode characters. Learn more about bidirectional Unicode characters<script src="https://localhost:44353/TextControl/GetResource?Resource=minimized.tx-viewer.min.js"></script> Replace 44353 with the port number of your created backend ASP.NET Core application you created in step 1.
Pro Tip
When deploying your backend to a production server, replace the complete location https://localhost:44353 with your actual URL.
-
Add a hosting element to your HTML:
This file contains bidirectional Unicode text that may be interpreted or compiled differently than what appears below. To review, open the file in an editor that reveals hidden Unicode characters. Learn more about bidirectional Unicode characters<div id="txViewerHost"></div> -
Add the following script tag to your HTML and set the id of the hosting element to the containerID property:
This file contains bidirectional Unicode text that may be interpreted or compiled differently than what appears below. To review, open the file in an editor that reveals hidden Unicode characters. Learn more about bidirectional Unicode characters<script> // create a new DocumentViewer TXDocumentViewer.init( { containerID: 'txViewerHost', viewerSettings: { toolbarDocked: true, dock: "Fill", isSelectionActivated: true, showThumbnailPane: true, basePath: 'https://localhost:44353', } }); </script> Also here, replace the basePath with your endpoint URL.
Deploying
The backend application created in step 1 must be deployed to a full Windows VM (or Azure App Services in container mode). Your application in step 2 can be deployed to any platform including Azure App Services or it can be deployed to Linux.

