Prerequisites
You need to download and install the trial version of TX Text Control .NET Server for ASP.NET.
- Download Trial Version
Setup download and installation required.
Introduction
This tutorial shows how to use Visual Studio 2022 to create an .NET 8 console application that uses the ServerTextControl and MailMerge classes from TX Text Control .NET Server for ASP.NET. The application is hosted in a Docker container using a Linux base image.
Creating the Application
Make sure that you downloaded the latest version of Visual Studio 2022 that comes with the .NET 8 SDK.
-
In Visual Studio 2022, create a new project by choosing Create a new project.
-
Select Console App as the project template and confirm with Next.
-
Enter a project name and choose a location to save the project. Confirm with Next.
-
Choose .NET 8.0 (Long Term Support) as the Framework.
-
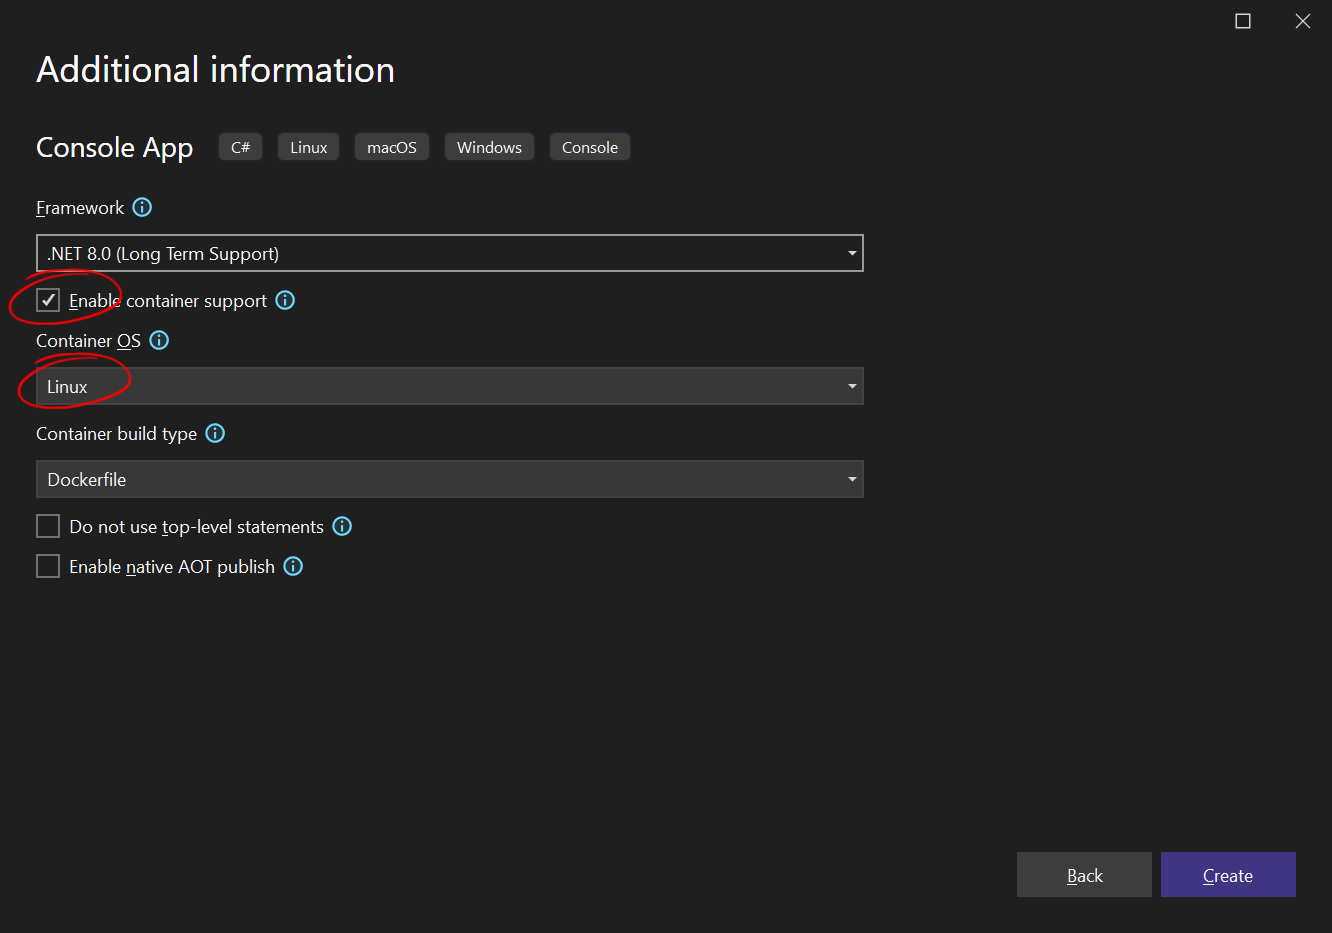
Enable the Enable container support checkbox and choose Linux as the Container OS.
-
Choose Dockerfile for the Container build type option and confirm with Create.

Adding the NuGet Packages
-
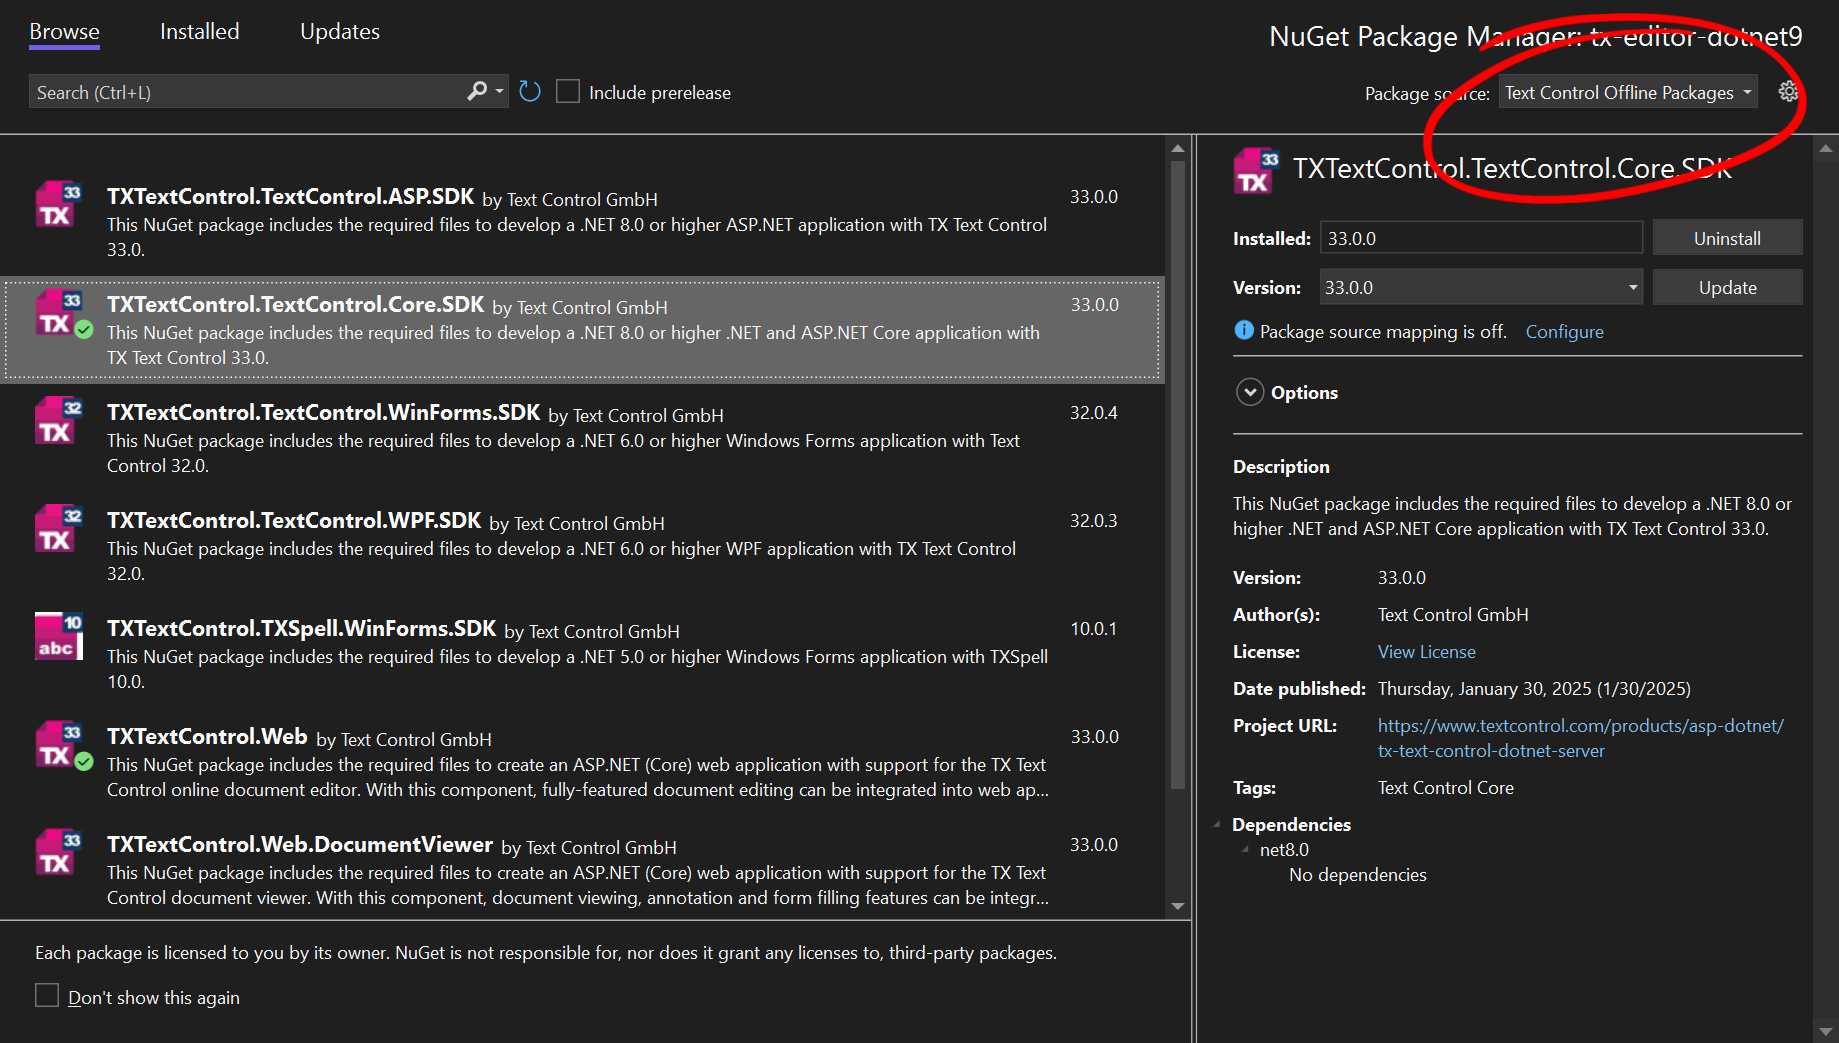
In the Solution Explorer, select your created project and choose Manage NuGet Packages... from the Project main menu. Select Text Control Offline Packages as the Package source.
Install the following package:
- TXTextControl.TextControl.Core.SDK

Using ServerTextControl and MailMerge
-
Find the Program.cs file in the Solution Explorer and replace the code with the following code snippet:
This file contains bidirectional Unicode text that may be interpreted or compiled differently than what appears below. To review, open the file in an editor that reveals hidden Unicode characters. Learn more about bidirectional Unicode charactersusing (TXTextControl.ServerTextControl tx = new TXTextControl.ServerTextControl()) { // Create a new ServerTextControl instance tx.Create(); // Adding static text with formatting TXTextControl.Selection sel = new TXTextControl.Selection { Text = "Welcome to Text Control\r\n", // Static welcome message Bold = true // Apply bold formatting }; tx.Selection = sel; // Adding a merge field for dynamic data insertion TXTextControl.DocumentServer.Fields.MergeField mergeField = new TXTextControl.DocumentServer.Fields.MergeField { Text = "{{company}}", // Placeholder text in the document Name = "company", // Internal name for the merge field TextBefore = "Company name: " // Prefix text before the field }; // Add the merge field to the document tx.ApplicationFields.Add(mergeField.ApplicationField); // ---- Optionally load a template ---- // If a predefined document template is available, uncomment the following lines /* TXTextControl.LoadSettings ls = new TXTextControl.LoadSettings { ApplicationFieldFormat = TXTextControl.ApplicationFieldFormat.MSWord // Preserve Word field format }; tx.Load("template.docx", TXTextControl.StreamType.WordprocessingML, ls); */ // Perform mail merge using JSON data using (TXTextControl.DocumentServer.MailMerge mailMerge = new TXTextControl.DocumentServer.MailMerge()) { mailMerge.TextComponent = tx; // Link MailMerge engine to the text component // JSON data to be merged into the document string jsonData = "[{\"company\": \"Text Control, LLC\" }]"; mailMerge.MergeJsonData(jsonData); // Merge the provided JSON data } tx.Save("results.pdf", TXTextControl.StreamType.AdobePDF); Console.WriteLine("Document created: results.pdf"); }
Run with Docker
-
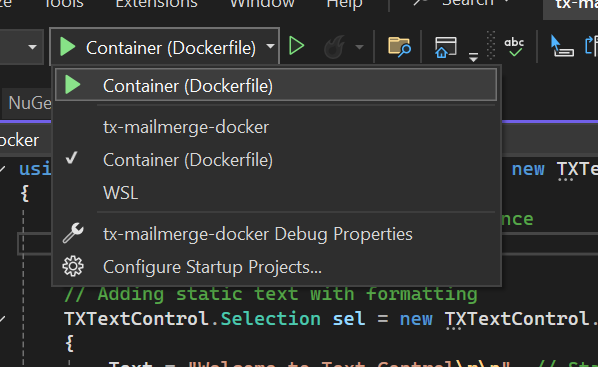
Select Container (Dockerfile) as the startup profile and start the application.

Run with WSL
For a faster development experience, you can run the application in WSL (Windows Subsystem for Linux).
-
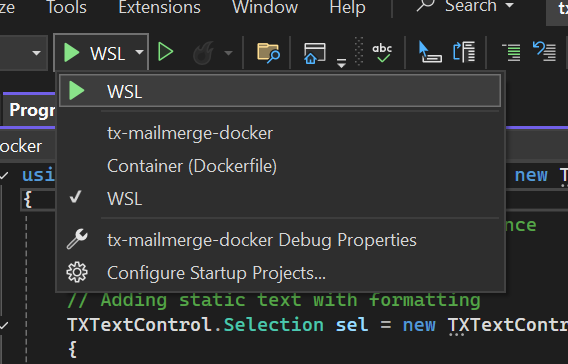
Select WSL as the startup profile and start the application.

Enable WSL (Windows Subsystem for Linux)
In case you haven't enabled WSL yet, follow these steps:
Enable WSL (Windows Subsystem for Linux)
Open PowerShell as an administrator.
Run the following command:
wsl --install
This installs the default Linux distribution (usually Ubuntu) and enables necessary features.
- After the installation, restart your computer.
Set WSL 2 as the Default Version
To set WSL 2 as the default version, follow these steps:
Open PowerShell as an administrator.
Run the following command:
wsl --set-default-version 2
If you haven't installed a Linux distribution yet, you can do so via:
wsl --install -d Ubuntu


