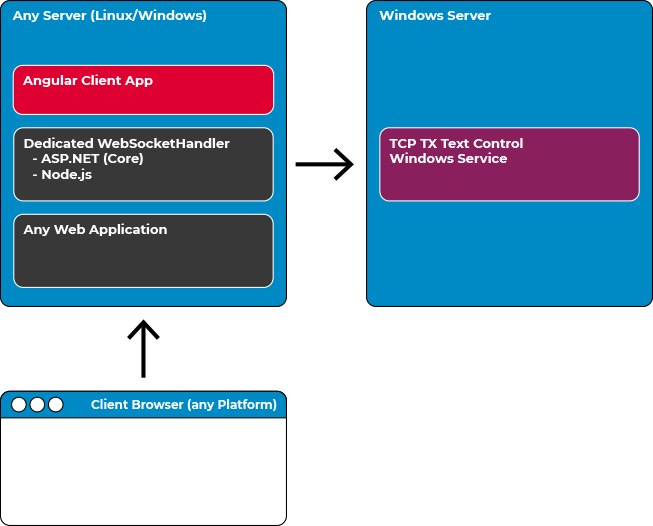
To synchronize the document in the document editor and provide true WYSIWYG rendering, the client-side component, such as the MVC helper or the Angular package, opens a WebSocket connection to the WebSocketHandler. The TCP synchronization service can be installed on the same machine or can be deployed separately to receive requests from multiple WebSocketHandler instances.
Heads up!
This article and the linked articles show how to deploy the applications using Windows, which is still required in the current version 32.0.
We are working on a full-featured Linux version that will make Windows optional.
In this article, you will learn how to create an instance of TXWebSocketHandler that connects to a TCP service located on another computer, instance, or IP address.
Learn More
The TX Text Control document editor requires a server-side backend to synchronize the edited documents. This article gives an overview of best practices deployment strategies.
Hosting the Synchronization Service
A full Windows server or VM (or containerized) is required to deploy the synchronization service because the TCP service runs as a Windows service. Assuming you already have a Windows server or have created a VM in your preferred cloud provider, such as Microsoft Azure, follow these steps to deploy the service.
-
On your development machine (where you have installed the TX Text Control developer setup), create a folder and copy all files from the following folders into the same folder
Pro Tip
Give the folder a name that includes the version number of TX Text Control. For example: TX Synchronization Service 32.0 SP4.
-
C:\Program Files\Text Control GmbH\TX Text Control 32.0.NET Server for ASP.NET\Assembly
-
C:\Program Files\Text Control GmbH\TX Text Control 32.0.NET Server for ASP.NET\Assembly\bin64
-
C:\Program Files\Text Control GmbH\TX Text Control 32.0.NET Server for ASP.NET\Tools
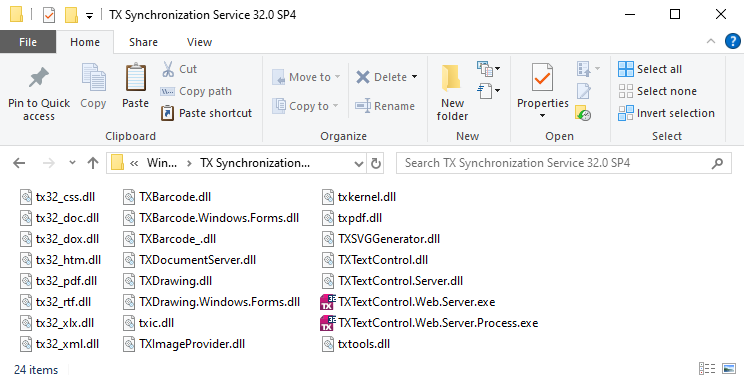
The following files should now be in your folder:
-
-
Copy this folder to a location of your choice on the dedicated Windows server or on your VM.
-
On the server, open a command prompt with administrator privileges and change to the directory where you copied the TX Text Control service files. Type and run the following command:
txregwebsvr.exe /i
Adjusting Firewalls
The ASP.NET Core Web App communicates with the previously installed service using pure TCP on the specified port number. TCP traffic must be allowed on this particular port.
-
Open a command prompt window on the server that hosts the synchronization service and type
wf.msc
-
In the left pane of the tree view, select Inbound Rules and create a new rule by clicking the New Rule... button.
-
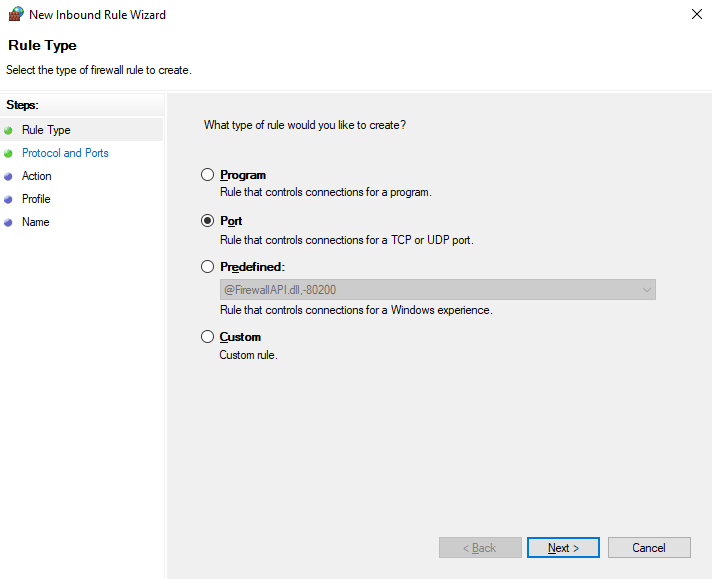
In the opened dialog, select Port and confirm with Next >.
-
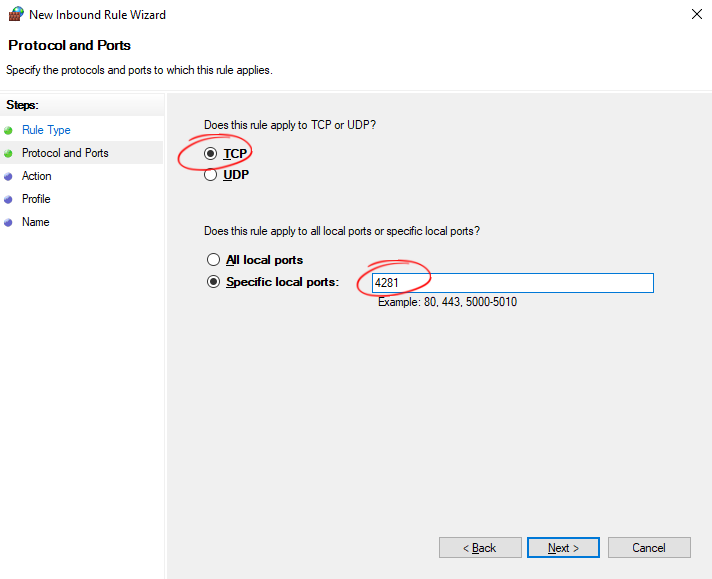
Select TCP and specify the port number and confirm with Next >.
-
Select Allow and confirm with Next >.
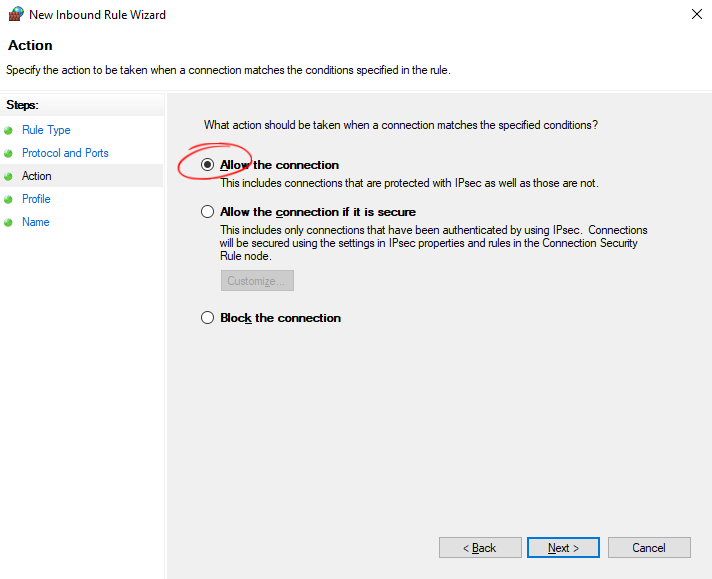
-
Select the preferred network areas (Domain, Private and Public).
-
Name the rule TX Service 32.0 and click Finish.
If you are using Microsoft Azure or another cloud service, you might also need to open this port for the VM. For Azure, follow the steps below.
-
In your Network security group, select Inbound security rules. Then select + Add to add a new rule.
-
Set the Destination port ranges to 4281, Protocol to TCP and Action to Allow. Confirm with Add.
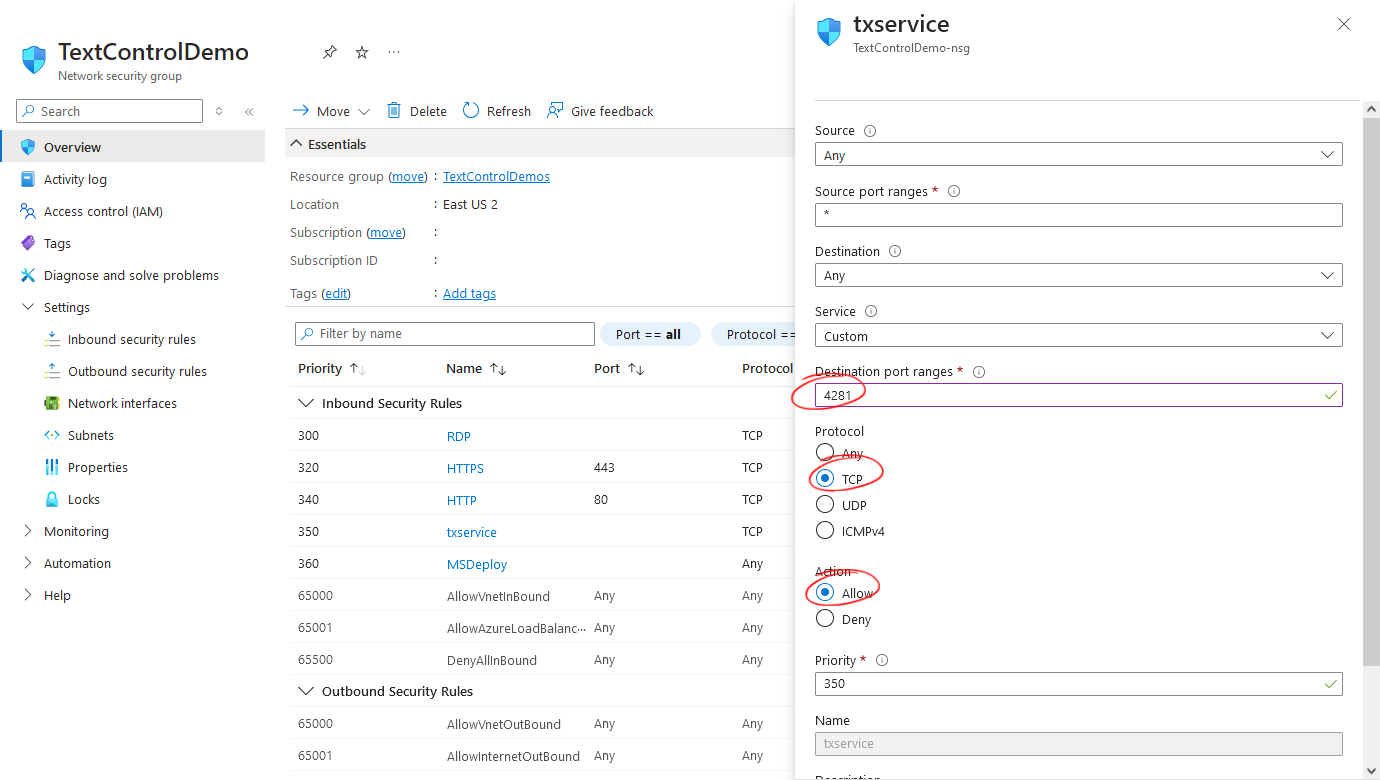
Creating the Application
Make sure that you downloaded the latest version of Visual Studio 2022 that comes with the .NET 6 SDK.
-
In Visual Studio 2022, create a new project by choosing Create a new project.
-
Select ASP.NET Core Web App (Model-View-Controller) as the project template and confirm with Next.
-
Choose a name for your project and confirm with Next.
-
In the next dialog, choose .NET 6 (Long-term support) or better as the Framework and confirm with Create.
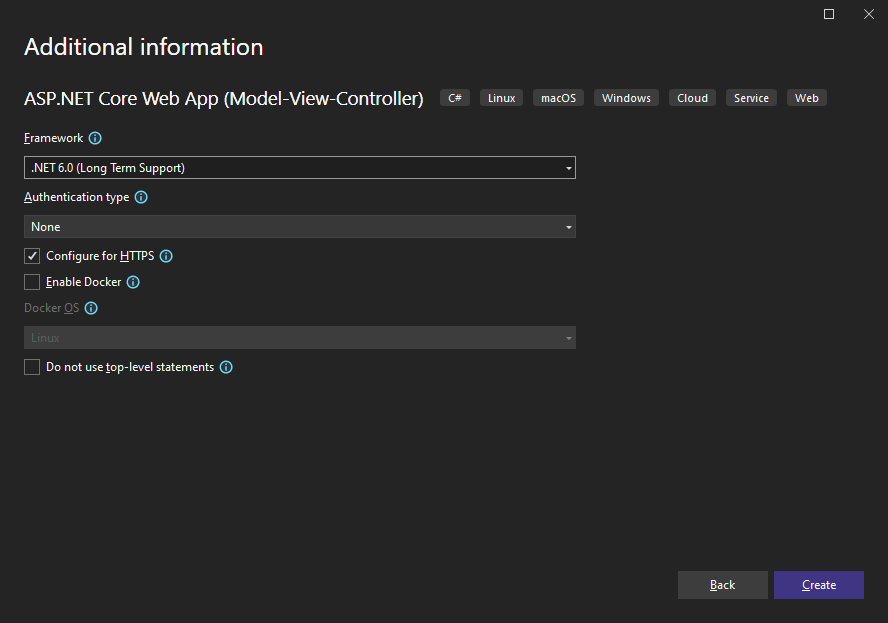
Adding the NuGet Package
-
In the Solution Explorer, select your created project and choose Manage NuGet Packages... from the Project main menu.
Package Source
Select either Text Control Offline Packages or nuget.org as the Package source. Packages in the official Text Control NuGet profile are frequently updated.
Browse for txtextcontrol.web and Install the latest version of the TXTextControl.Web package.
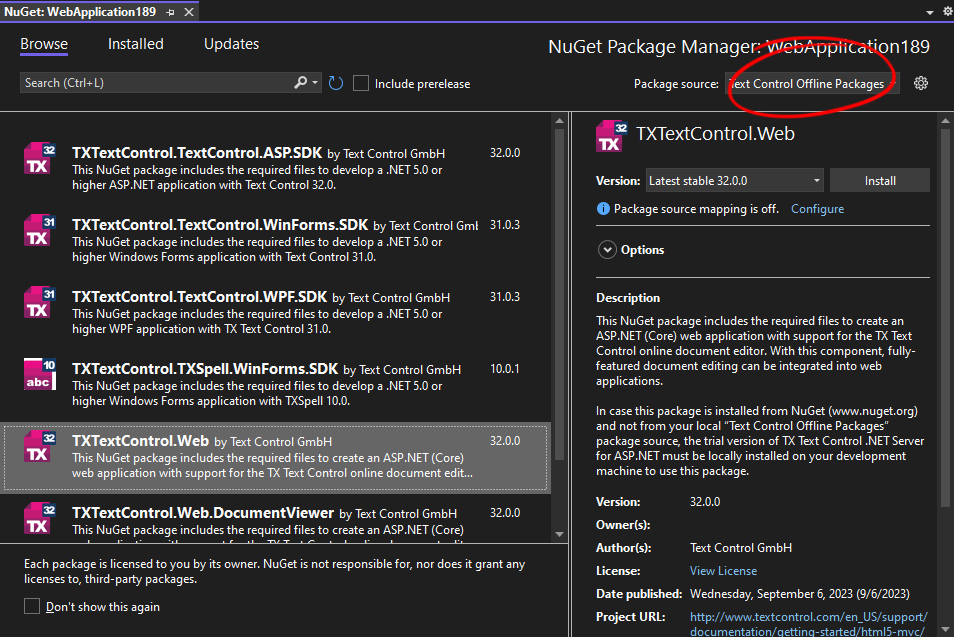
Configure the Application
-
Open the Program.cs file located in the project's root folder.
At the very top of the file, insert the following code:
This file contains bidirectional Unicode text that may be interpreted or compiled differently than what appears below. To review, open the file in an editor that reveals hidden Unicode characters. Learn more about bidirectional Unicode charactersusing TXTextControl.Web; Add the following code after the entry
app.UseStaticFiles();:This file contains bidirectional Unicode text that may be interpreted or compiled differently than what appears below. To review, open the file in an editor that reveals hidden Unicode characters. Learn more about bidirectional Unicode characters// enable Web Sockets app.UseWebSockets(); // attach the Text Control WebSocketHandler middleware app.UseTXWebSocketMiddleware(IPAddress.Parse("127.0.0.1")); -
Replace the IP address 127.0.0.1 with the IP address of the server where the synchronization service is running.
Adding the Control to the View
-
Find the Index.cshtml file in the Views -> Home folder. Replace the complete content with the following code to add the document editor to the view:
This file contains bidirectional Unicode text that may be interpreted or compiled differently than what appears below. To review, open the file in an editor that reveals hidden Unicode characters. Learn more about bidirectional Unicode characters@using TXTextControl.Web.MVC @Html.TXTextControl().TextControl().Render()
Run the application and navigate to the /Home route. The document editor should be displayed in the browser and connected to the synchronization service running on the Windows server.
Conclusion
By deploying the synchronization service to a dedicated Windows server or VM, the ASP.NET Core Web Application can be deployed to any container-based service such as Azure App Services or other cloud providers. The TCP service is required to synchronize the document in the document editor and to provide true WYSIWYG rendering.


