TX Text Control for Angular requires a backend for the document editor and viewer. This step-by-step walkthrough shows you how to create the ASP.NET Core backend.
Prerequisites
In order to create a backend application, TX Text Control .NET Server for ASP.NET must be installed on your machine. When deploying this backend application, refer to the documentation to learn how to install the required TCP Service:
Creating the Project
The following tutorial will show you how to create an ASP.NET Core with Angular application that includes the client-side npm package and the required backend middleware.
-
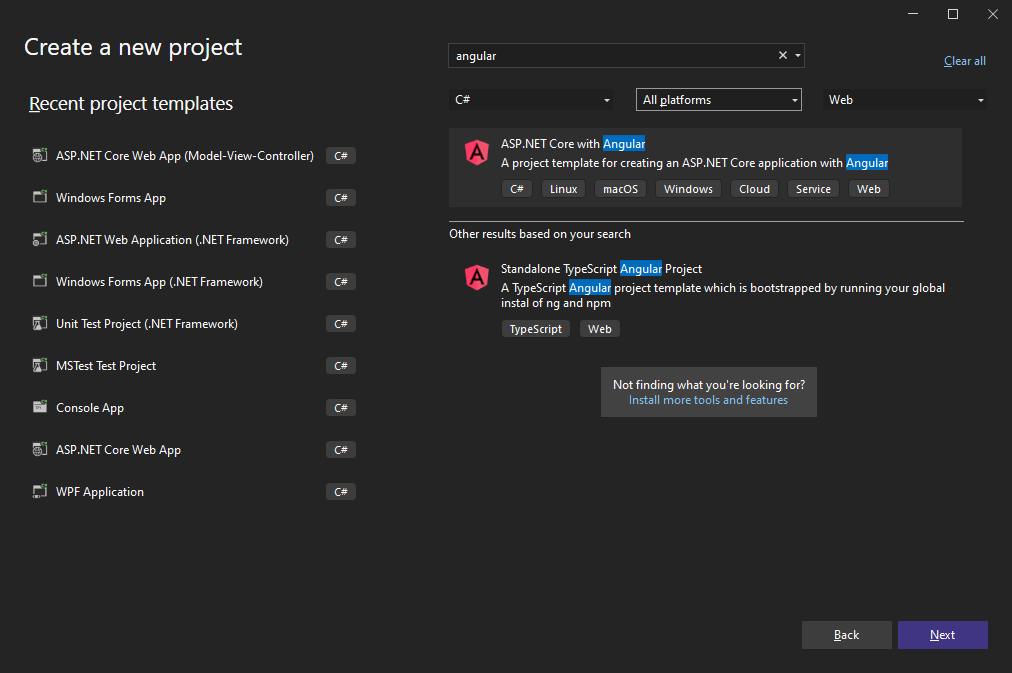
In Visual Studio 2022, create a new project, select ASP.NET Core with Angular as the project template and continue with Next.

-
Select a project name, location and solution name in the next dialog and confirm with Next.
-
In the last dialog, select .NET 6 (Long-term support) as the Framework and confirm with Create.
Adding NuGet Packages
-
In the Solution Explorer, select your created project and choose Manage NuGet Packages... from the Project main menu.
Select Text Control Offline Packages from the Package source drop-down.
Install the latest versions of the following packages:
- TXTextControl.TextControl.ASP.SDK
- TXTextControl.Web
- TXTextControl.Web.DocumentViewer

Adding the Middleware
-
Open the Program.cs file located in the project's root folder. Replace the content with the following code:
This file contains bidirectional Unicode text that may be interpreted or compiled differently than what appears below. To review, open the file in an editor that reveals hidden Unicode characters. Learn more about bidirectional Unicode charactersvar builder = WebApplication.CreateBuilder(args); // Add services to the container. builder.Services.AddControllersWithViews(); builder.Services.AddCors(p => p.AddPolicy("corsapp", builder => { builder.WithOrigins("*").AllowAnyMethod().AllowAnyHeader(); })); var app = builder.Build(); // Configure the HTTP request pipeline. if (!app.Environment.IsDevelopment()) { // The default HSTS value is 30 days. You may want to change this for production scenarios, see https://aka.ms/aspnetcore-hsts. app.UseHsts(); } app.UseHttpsRedirection(); app.UseStaticFiles(); app.UseRouting(); app.UseCors("corsapp"); // enable Web Sockets app.UseWebSockets(); // adding the TX Text Control WebSocket middleware app.UseTXWebSocketMiddleware(); // adding the viewer endpoint routing app.UseEndpoints(endpoints => { endpoints.MapControllerRoute( name: "default", pattern: "{controller=TextControl}/{action}"); }); app.MapControllerRoute( name: "default", pattern: "{controller}/{action=Index}/{id?}"); app.MapFallbackToFile("index.html"); ; app.Run();
Adding npm Packages
The Angular application has already been created by the Visual Studio project template and is available in the ClientApp folder in the Solution Explorer.
-
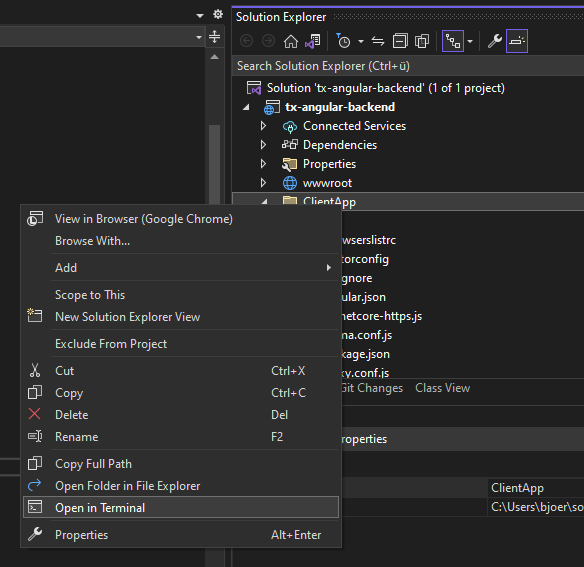
Find the ClientApp folder in the Solution Explorer and choose Open in Terminal from the right-click context menu.

-
Install the TX Text Control document editor package by typing in the following command:
ng add @txtextcontrol/tx-ng-document-editor -
Open the file src -> app -> home -> home.component.html, replace the complete file with the following code and save it:
This file contains bidirectional Unicode text that may be interpreted or compiled differently than what appears below. To review, open the file in an editor that reveals hidden Unicode characters. Learn more about bidirectional Unicode characters<div style="width: 100%; height: 800px;"> <tx-document-editor width="100%" height="100%" webSocketURL="wss://localhost:7282/api/TXWebSocket"> </tx-document-editor> </div> -
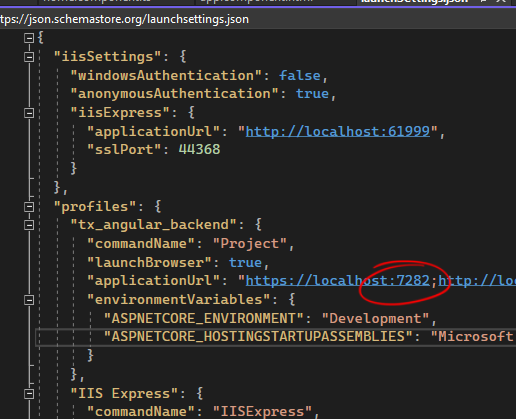
Be sure to replace the port number (7282 in this example) with the port number of your hosting application. You can find this port number in the launchSettings.json file.

-
Compile and start the application.

