Preview
This article covers a preview version of DS Server to show the functionality and features before it is available. DS Server is in a first closed beta phase, but we are getting a lot of requests about how this product will look like and how it is used. In this blog post series over the next couple days, we will show how the different modules are used in various applications.
This article shows how to setup a new project with DS Server and how to use the document editor NuGet package in an ASP.NET Core MVC web application.
DS Server Setup
In the DS Server admin portal, a new security profile needs to be added.
-
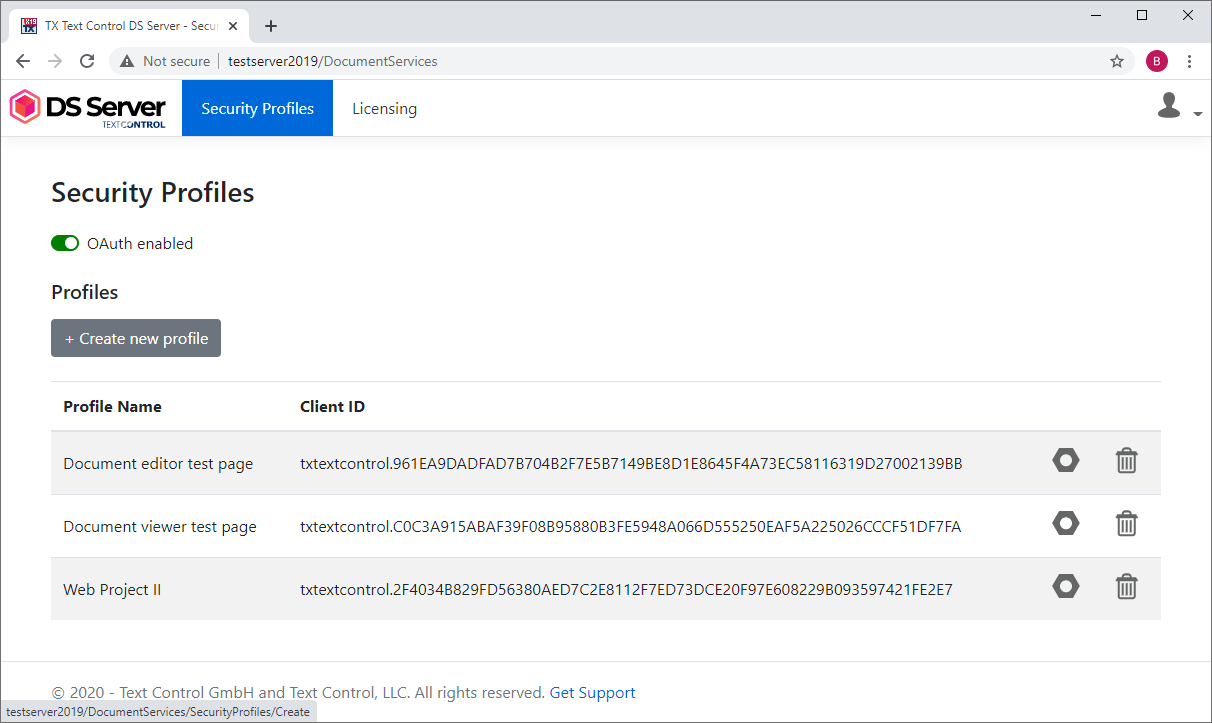
Select Security Profiles from the main menu to open the security profile overview. Click on Create new profile to create a new security profile:
-
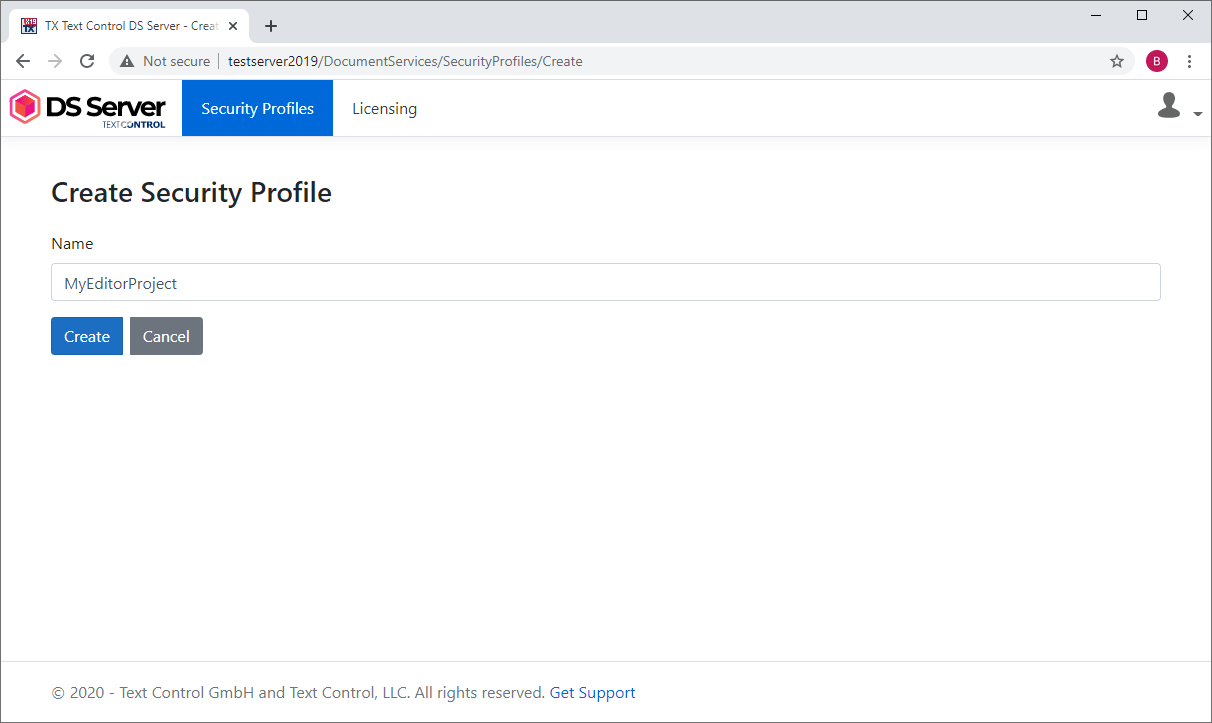
Type in a name and confirm with Create:
-
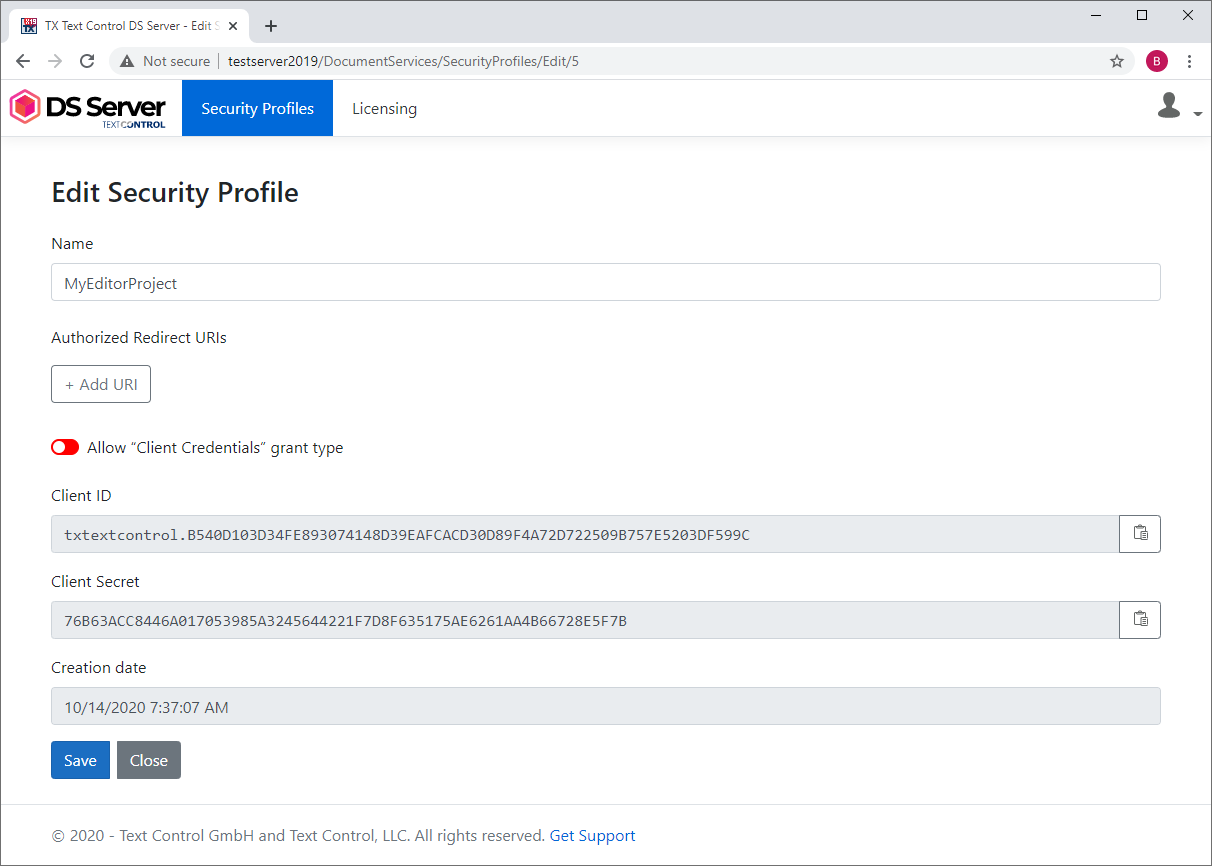
The profile details are shown including the Client ID and Client Secret values required for the OAuth authentication flow:
ASP.NET Core MVC Web Application
In the next step, a new ASP.NET Core MVC Web Appplication is created in Visual Studio 2019.
-
In Visual Studio 2019, create a new ASP.NET Core Web Application, choose a name and confirm with Create.
-
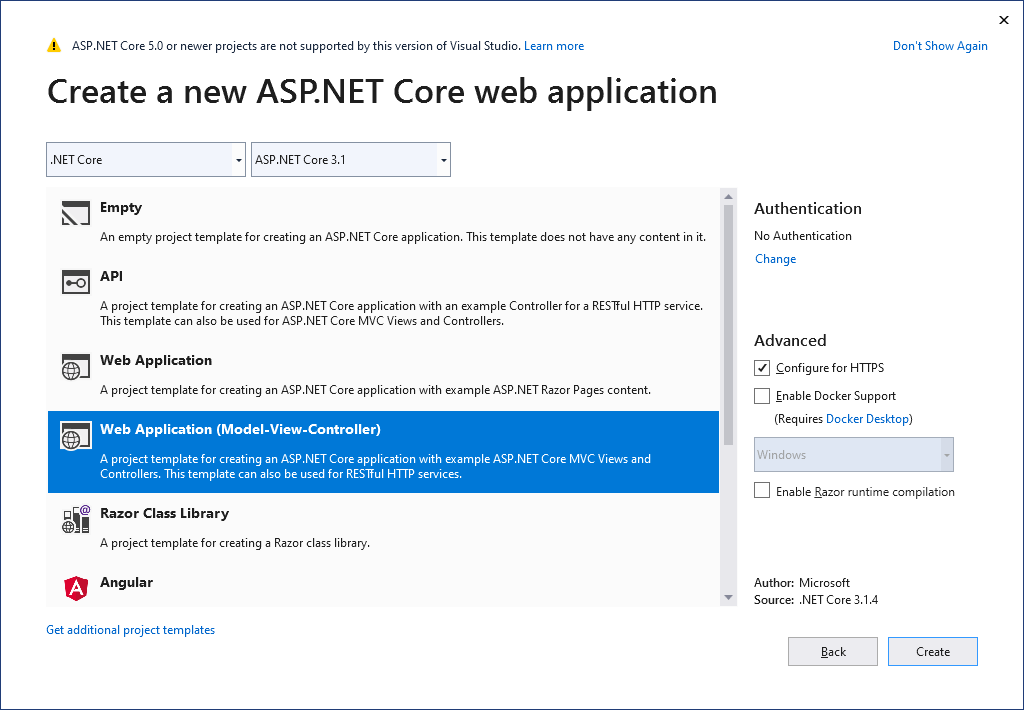
In the next dialog, choose Web Application (Model-View-Controller) and confirm with Create:
-
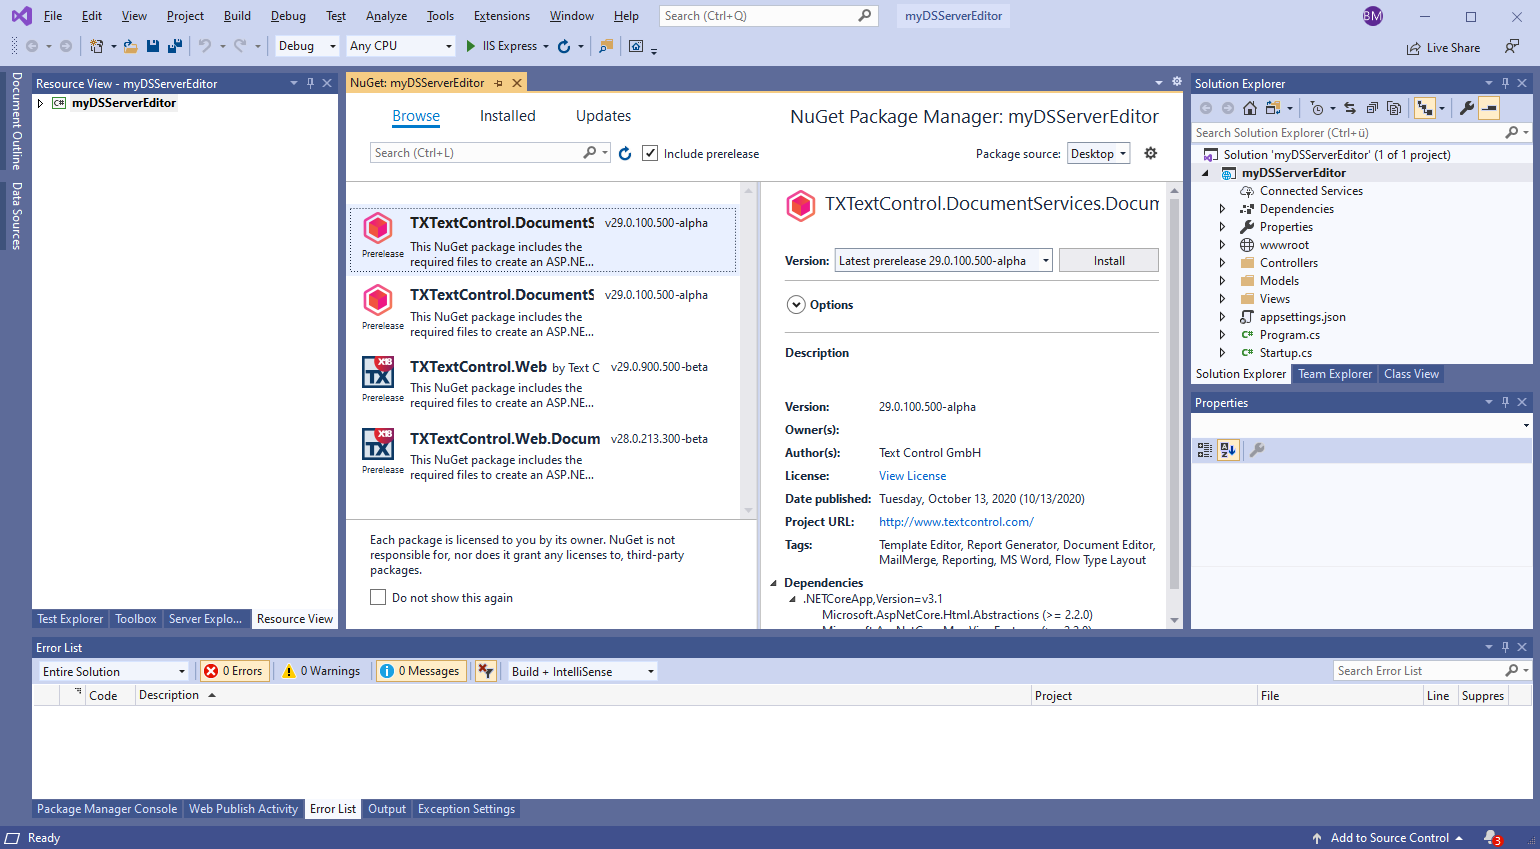
Select Manage NuGet Packages for Solution... from the NuGet Package Manager menu entry in the Tools main menu. Search for the package TXTextControl.DocumentServices.DocumentEditor and confirm with Install.
-
Open the Index.cshtml in the Views -> Home folder and replace the content with the following code:
This file contains bidirectional Unicode text that may be interpreted or compiled differently than what appears below. To review, open the file in an editor that reveals hidden Unicode characters. Learn more about bidirectional Unicode characters@using TXTextControl.DocumentServices.DocumentEditor @Html.TXTextControl().DocumentEditor(settings => { settings.ServiceUrl = "http://testserver2019/DocumentServices"; settings.OAuthSettings.ClientId = "txtextcontrol.B540D103D34FE893074148D39EAFCACD30D89F4A72D722509B757E5203DF599C"; settings.OAuthSettings.ClientSecret = "76B63ACC8446A017053985A3245644221F7D8F635175AE6261AA4B66728E5F7B"; settings.OAuthSettings.RedirectUri = string.Format("{0}://{1}{2}/{3}", Context.Request.Scheme, Context.Request.Host, Context.Request.PathBase, "textcontrol/documenteditor/auth/callback"); }).Render() The ServiceUrl property should point to your on-premise DS Server installation.
-
Compile and start the application. You should see the following error, because the required "authorized redirect URI" has not been specified in the security profile:
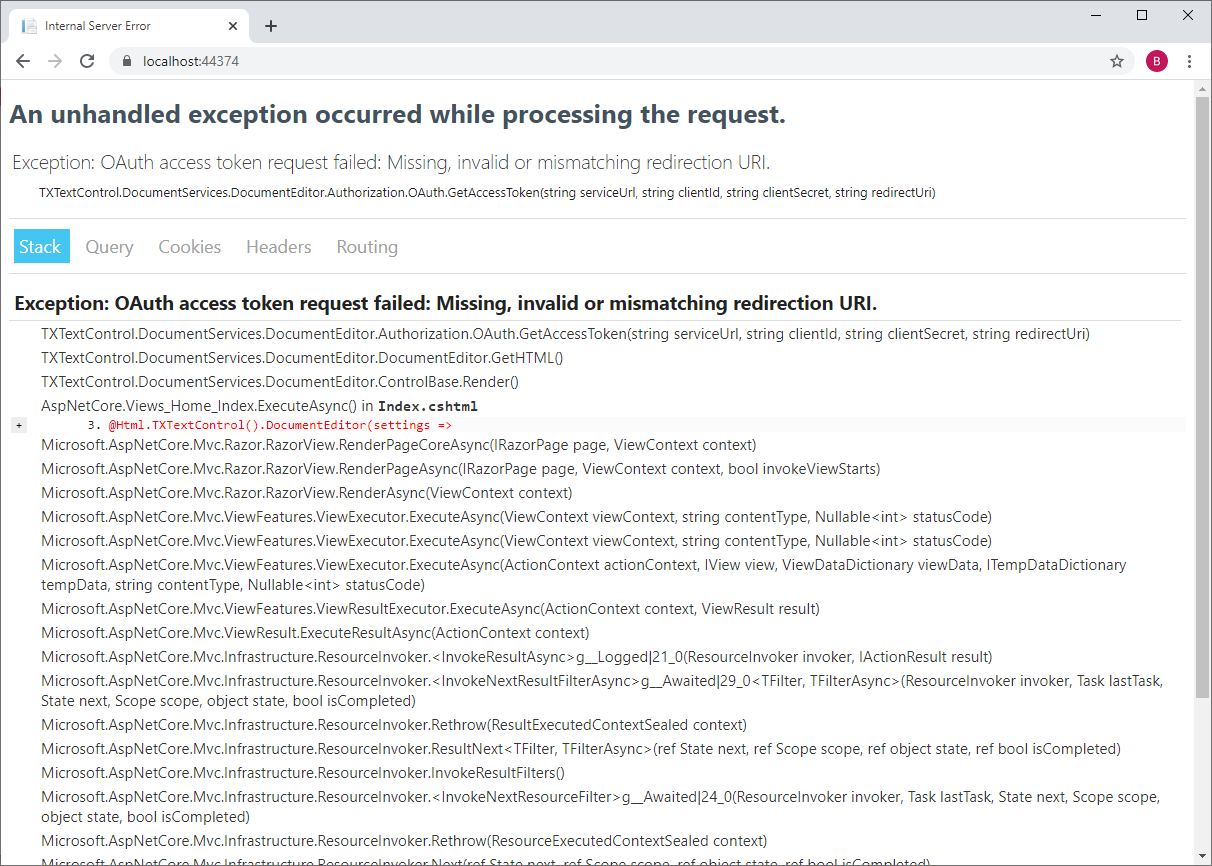
Copy the URL from the location bar (https://localhost:44374) into the clipboard or note it.
-
Back in the DS Server admin portal, open the created security profile and click Add URI. Paste the URL followed by the string /textcontrol/documenteditor/auth/callback. Add the following complete string to the "Authorized Redirect URI" text box:
https://localhost:44374/textcontrol/documenteditor/auth/callback
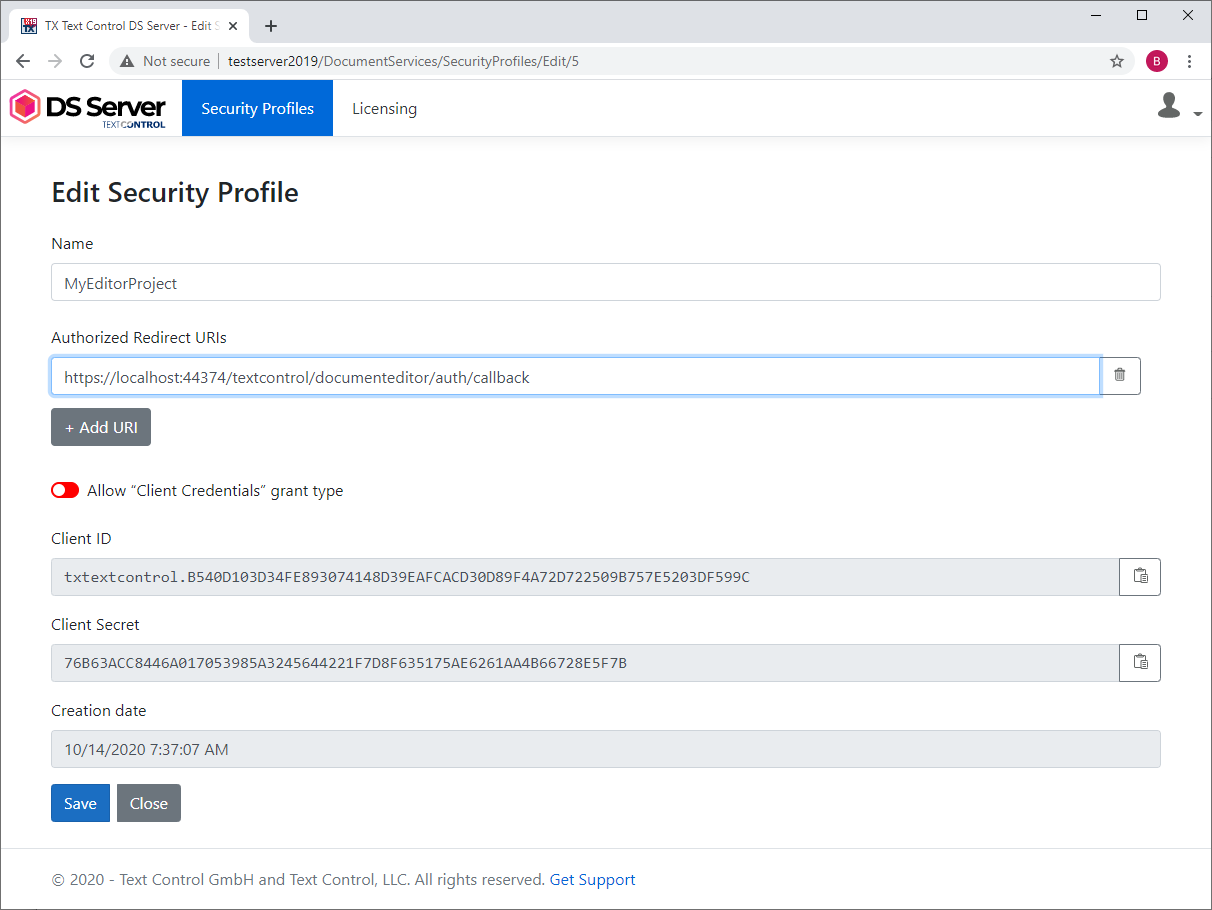
Confirm this step by clicking Save.
-
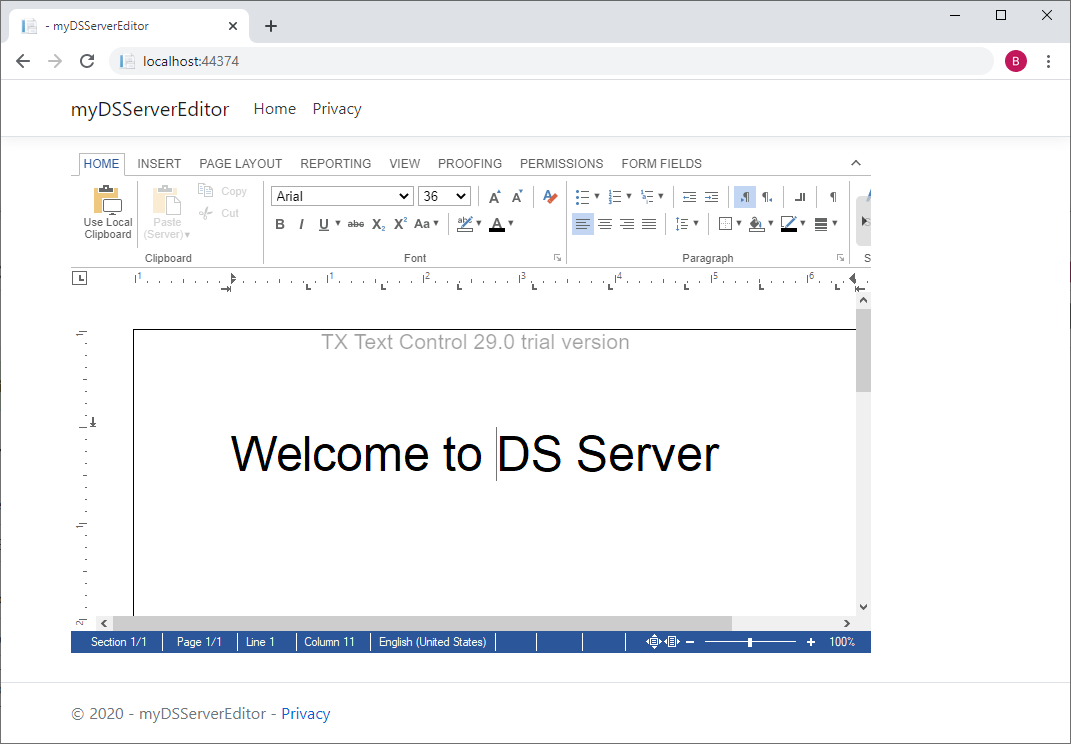
Restart the Visual Studio project or refresh the browser:
Stay tuned for further details about the new product DS Server!

