This tutorial shows how to create a new ASP.NET Core Web Application using the TX Text Control Document Editor TXTextControl.Web using Visual Studio 2019.
For this tutorial, the setup of TX Text Control .NET Server for ASP.NET must be installed.
Creating the Application
-
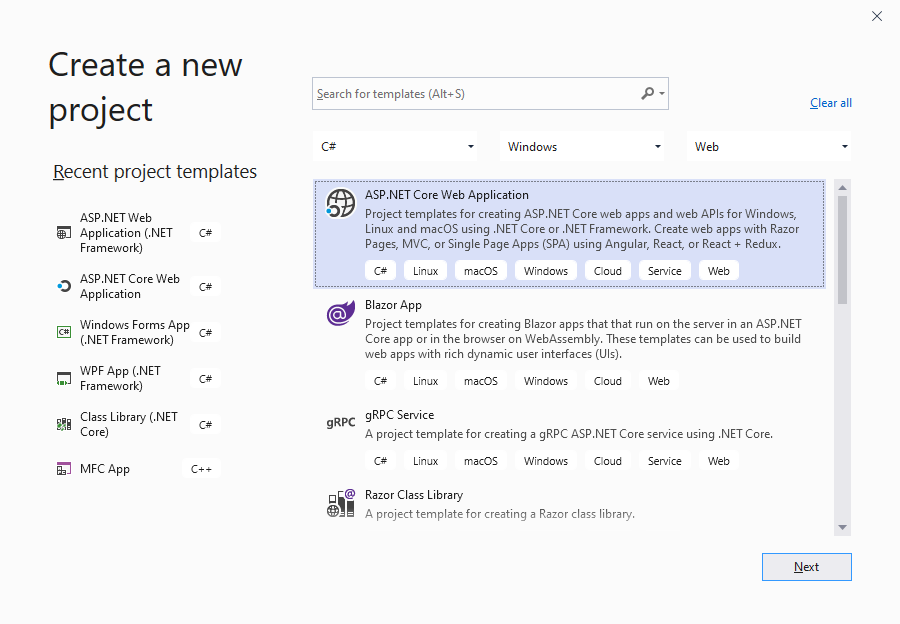
Open Visual Studio 2019, create a new project and select ASP.NET Core Web Application as the project template.

Confirm with Next.
-
In the next dialog, specify a project name and location and confirm with Create.
-
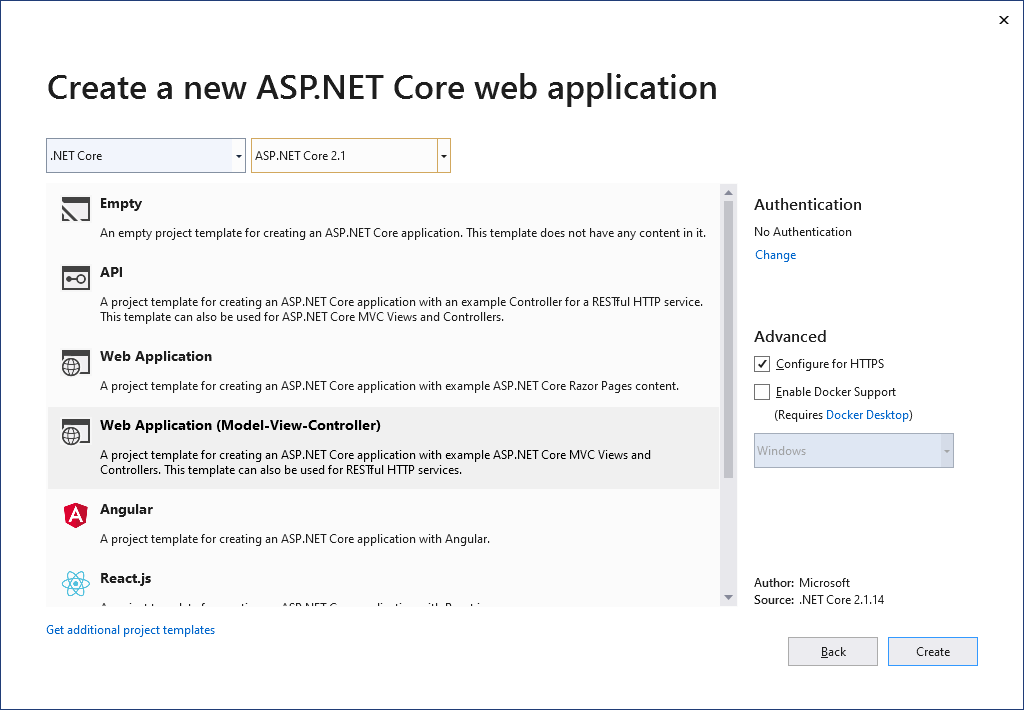
In the next dialog, select ASP.NET Core 2.1 or better from the available frameworks and choose Web Application (Model-View-Controller) as the project template.

Finalize with Create.
Adding the NuGet Package
-
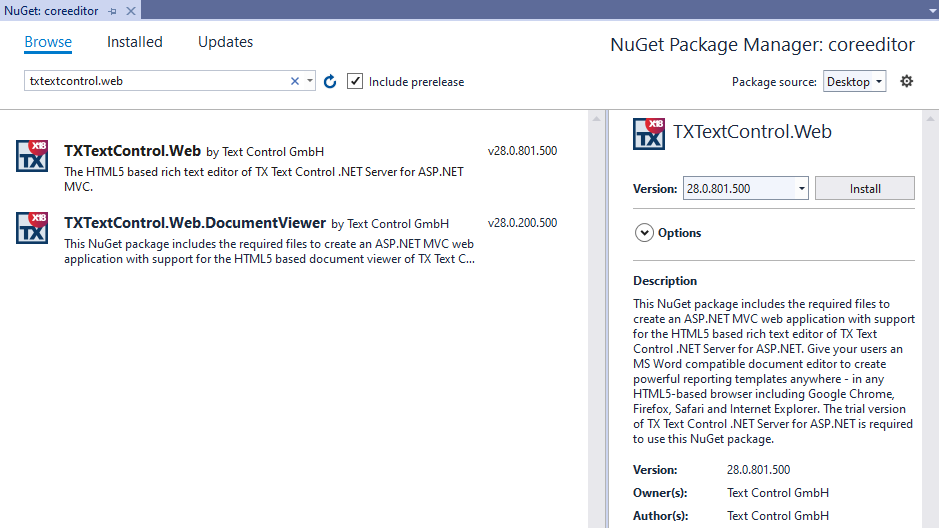
In the Solution Explorer, select your created project and choose Manage NuGet Packages... from the Project main menu.
Browse for txtextcontrol.web and Install the latest version of the TXTextControl.Web package.

Configure the Application
-
Open the Startup.cs file located in the project's root folder. In the Configure method, add the following code to the end of the method:
This file contains bidirectional Unicode text that may be interpreted or compiled differently than what appears below. To review, open the file in an editor that reveals hidden Unicode characters. Learn more about bidirectional Unicode characters// enable local 'App_Data' folder to access local documents AppDomain.CurrentDomain.SetData("DataDirectory", System.IO.Path.Combine(env.ContentRootPath, "App_Data")); // serve static linked files (JavaScript and CSS for the editor) app.UseStaticFiles(new StaticFileOptions { FileProvider = new Microsoft.Extensions.FileProviders.PhysicalFileProvider( System.IO.Path.Combine(System.IO.Path.GetDirectoryName( System.Reflection.Assembly.GetEntryAssembly().Location), "TXTextControl.Web")), RequestPath = "/TXTextControl.Web" }); // enable Web Sockets app.UseWebSockets(); // attach the Text Control WebSocketHandler middleware app.UseMiddleware<TXTextControl.Web.WebSocketMiddleware>(); -
Select the project in the Solution Explorer and create a new folder named App_Data by clicking New Folder from the Project main menu.
Select the newly created folder App_Data and click Add Existing Item... from the Project main menu.
Browse to the following TX Text Control installation folder:
C:\Program Files\Text Control GmbH\TX Text Control 28.0.NET Server for ASP.NET\Samples\Demo\
Select the file invoice.docx confirm with Add.
Adding the Control to the View
-
Find the Index.cshtml file in the Views -> Home folder. Replace the complete content with the following code:
This file contains bidirectional Unicode text that may be interpreted or compiled differently than what appears below. To review, open the file in an editor that reveals hidden Unicode characters. Learn more about bidirectional Unicode characters@using TXTextControl.Web @using TXTextControl.Web.MVC @Html.TXTextControl().TextControl(settings => { settings.Dock = DockStyle.Window; }).LoadText("App_Data/invoice.docx",StreamType.WordprocessingML).Render()
Compile and start the application.


