The following tutorial shows how to create an ASP.NET (Framework) web application that uses the Document Viewer 
╰ Web.MVC.DocumentViewer Namespace
╰ DocumentViewer Class
The DocumentViewer class represents an extension object implementing the TX Text Control DocumentViewer functionality. .
Creating the Application
Make sure that you downloaded the latest version of Visual Studio 2022.
-
In Visual Studio 2022, create a new project by choosing Create a new project.
-
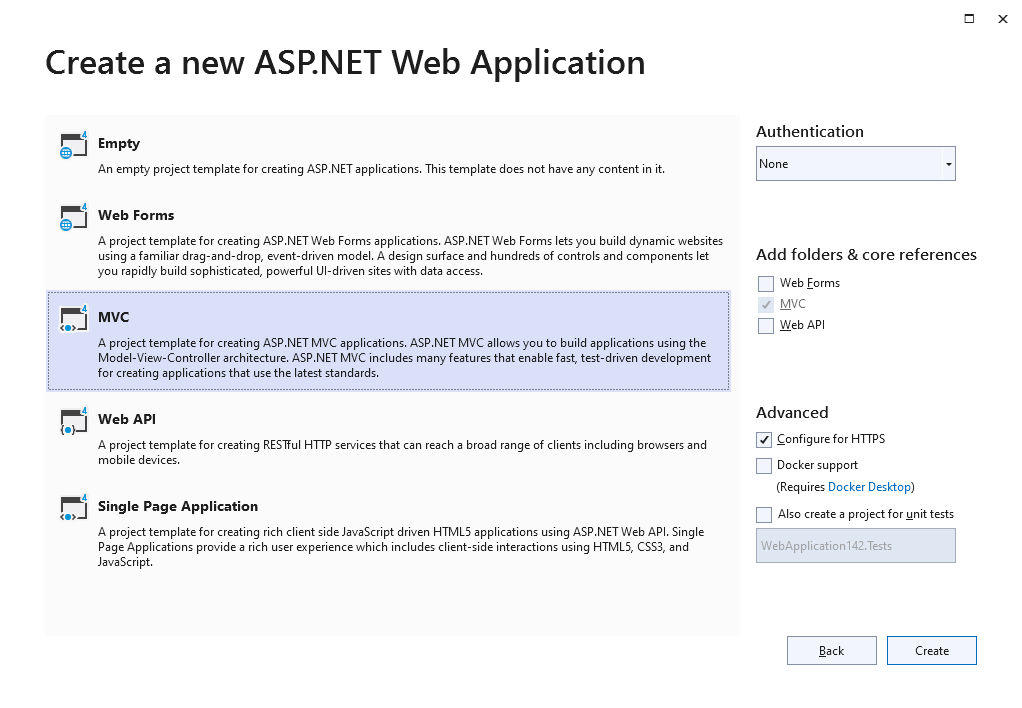
Select ASP.NET Web Application (.NET Framework) as the project template and confirm with Next.
-
Choose a name for your project, select .NET Framework 4.8 as the Framework and confirm with Create.
-
In the next dialog, choose MVC as the project template and confirm with Create.

Adding the NuGet Package
-
In the Solution Explorer, select your created project and choose Manage NuGet Packages... from the Project main menu.
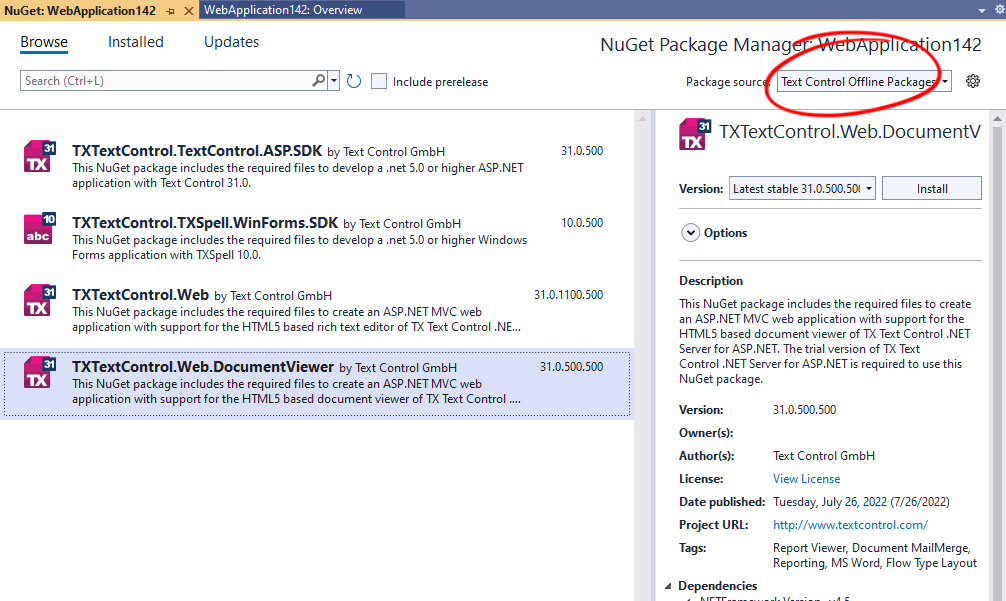
Package Source
Select either Text Control Offline Packages or nuget.org as the Package source. Packages in the official Text Control NuGet profile are frequently updated.
In case you are using a Trial Access Token, please choose nuget.org.
Browse for txtextcontrol.web.documentviewer and Install the latest version of the TXTextControl.Web.DocumentViewer package.

-
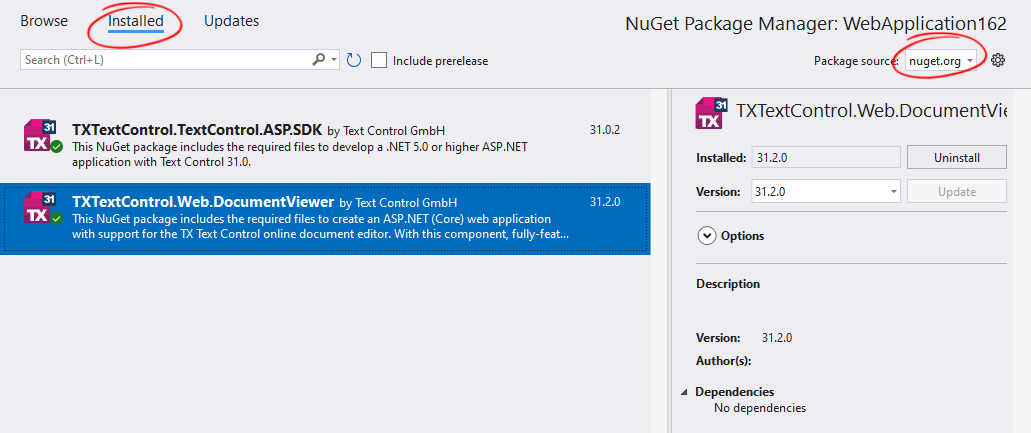
Switch the package source to nuget.org and choose Installed to check for available updates. Update the installed packages to the most current version.

Adding TX Text Control References
-
While the project is selected in the Solution Explorer, choose Project -> Add Project Reference... to open the Reference Manager. In the opened dialog, select Browse... to select the required TX Text Control assemblies. Navigate to the installation folder of TX Text Control and select the following assemblies from the Assembly folder:
- TXDocumentServer.dll
- TXTextControl.dll
- TXTextControl.Server.dll
Repeat this step with the following assemblies from the Assembly/bin64 folder:
- txic.dll
- txkernel.dll
- txtools.dll
After selecting these assemblies, close the Reference Manager by confirming with OK.
-
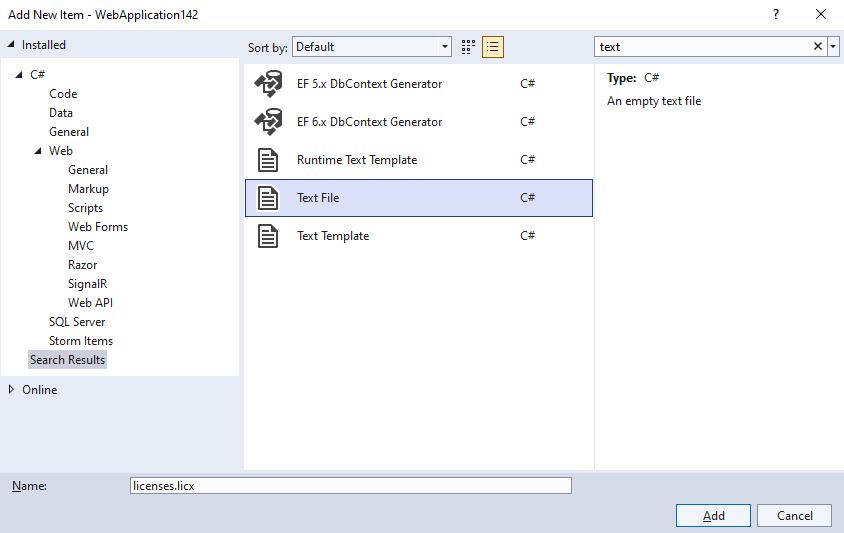
While the project is selected in the Solution Explorer, choose Project -> Add New Item.... Select Text File, name the file licenses.licx and close the dialog by clicking Add.

Open the newly added file and add the following content:
This file contains bidirectional Unicode text that may be interpreted or compiled differently than what appears below. To review, open the file in an editor that reveals hidden Unicode characters. Learn more about bidirectional Unicode charactersTXTextControl.ServerTextControl, TXTextControl.Server, Version=31.0.1600.500, Culture=neutral, PublicKeyToken=6b83fe9a75cfb638
Adding the Control to the View
-
Find the Index.cshtml file in the Views -> Home folder. Replace the complete content with the following code:
This file contains bidirectional Unicode text that may be interpreted or compiled differently than what appears below. To review, open the file in an editor that reveals hidden Unicode characters. Learn more about bidirectional Unicode characters@using TXTextControl.Web.MVC.DocumentViewer @using System.Text <div style="width: 800px; height: 600px;"> @Html.TXTextControl().DocumentViewer(settings => { settings.DocumentData = Convert.ToBase64String( Encoding.ASCII.GetBytes("<strong>Sample Content</strong>")); settings.Dock = DocumentViewerSettings.DockStyle.Fill; }).Render() </div> <script> var jsonAnnotations = '[[{"pen":{"type":"comment","objectWidth":32,"objectHeight":32},"user":"Unknown User","location":{"x":127,"y":50},"time":1658908087097,"comments":[{"comment":"Welcome to Text Control","user":"Unknown User","date":1658908100339,"id":"c8d818ce-ff1e-4c0c-b78c-6ba95a98dede","status":"none"}],"id":"feed80ff-1c94-4abf-9838-3e833faa4092","status":"Accepted"}]]'; window.addEventListener("documentViewerLoaded", function () { TXDocumentViewer.annotations.showToolbar(true); TXDocumentViewer.annotations.load(jsonAnnotations); }); </script>
Compile and start the application.


