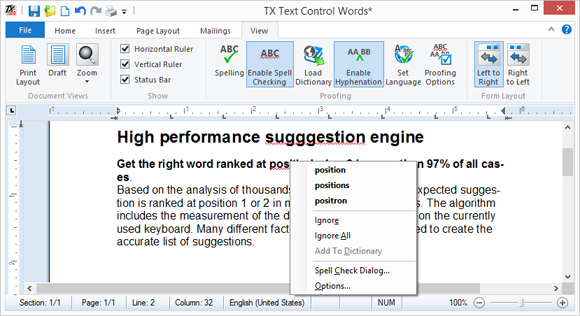
Adding spell checking and hyphenation to TX Text Control is very easy with TX Spell .NET. No code is required to connect the controls and if required, the available dictionaries are automatically chosen based on the input language.
The following procedure shows how create a simple TX Text Control based application with spell checking and automatic hyphenation.
-
Create a new Windows Forms application in Visual Studio. Find the TextControl in the toolbox and drag and drop it onto a form.
-
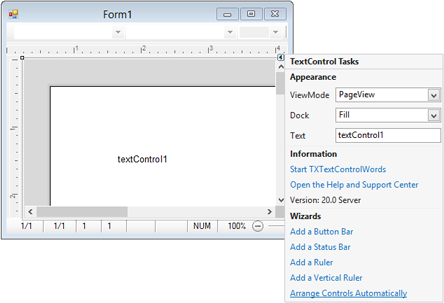
Open the SmartTag in the upper right corner of TextControl and visit each wizard link to add additional controls and to connect them.
-
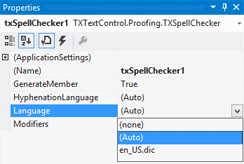
Now, find the TXSpellChecker in the toolbox and add it to the form. Looking at the Properties Window, you will see that the properties Language and HyphenationLanguage properties are set to (Auto) which means that the available dictionaries are automatically used based on the language at the current input position of the connected TextControl.
-
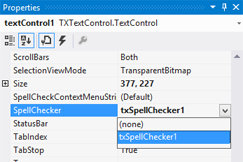
Select TextControl and find the SpellChecker property in the Properties Window. Set this property to the created TXSpellChecker instance.
-
Next, make sure that the IsSpellCheckingEnabled and IsHyphenationEnabled properties of TextControl are set to true.
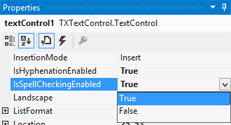
-
Compile and start the application and enjoy automatic spell-as-you-type support, a spell checking context menu on misspelled words, hyphenation at the end of the line and a ready-to-use spell check dialog box - all of this without writing a single line of code.

