In document workflows, digital signatures provide authenticity and integrity. When working with PDF documents, a self-signed certificate can be used for testing or internal purposes before obtaining a trusted certificate from a Certificate Authority (CA). This blog post walks you through the process of creating a self-signed certificate using PowerShell, converting it to a PFX file, and using it to digitally sign a PDF.
Using PowerShell to Create a Self-Signed Certificate
Windows provides built-in PowerShell cmdlets to create and manage certificates. Open PowerShell as an administrator and run the following command:
| $cert = New-SelfSignedCertificate ` | |
| -Subject "CN=MyTXCert" ` | |
| -CertStoreLocation "Cert:\CurrentUser\My" ` | |
| -KeyExportPolicy Exportable ` | |
| -KeySpec Signature ` | |
| -FriendlyName "My PDF Signing Certificate" ` | |
| -NotAfter (Get-Date).AddYears(5) |
The command creates a self-signed certificate and stores it in the Personal certificate store of the current user. Here is a description of the parameters used:
| Parameter | Description |
|---|---|
| Subject | Common Name (CN) of the certificate. |
| CertStoreLocation | Certificate store location. The default value is "Cert:\CurrentUser\My". |
| KeyExportPolicy | Exportable: The private key can be exported. |
| KeySpec | Key specification. |
| FriendlyName | A readable name for the certificate. |
| NotAfter | Expiration date of the certificate (5 years in the example). |
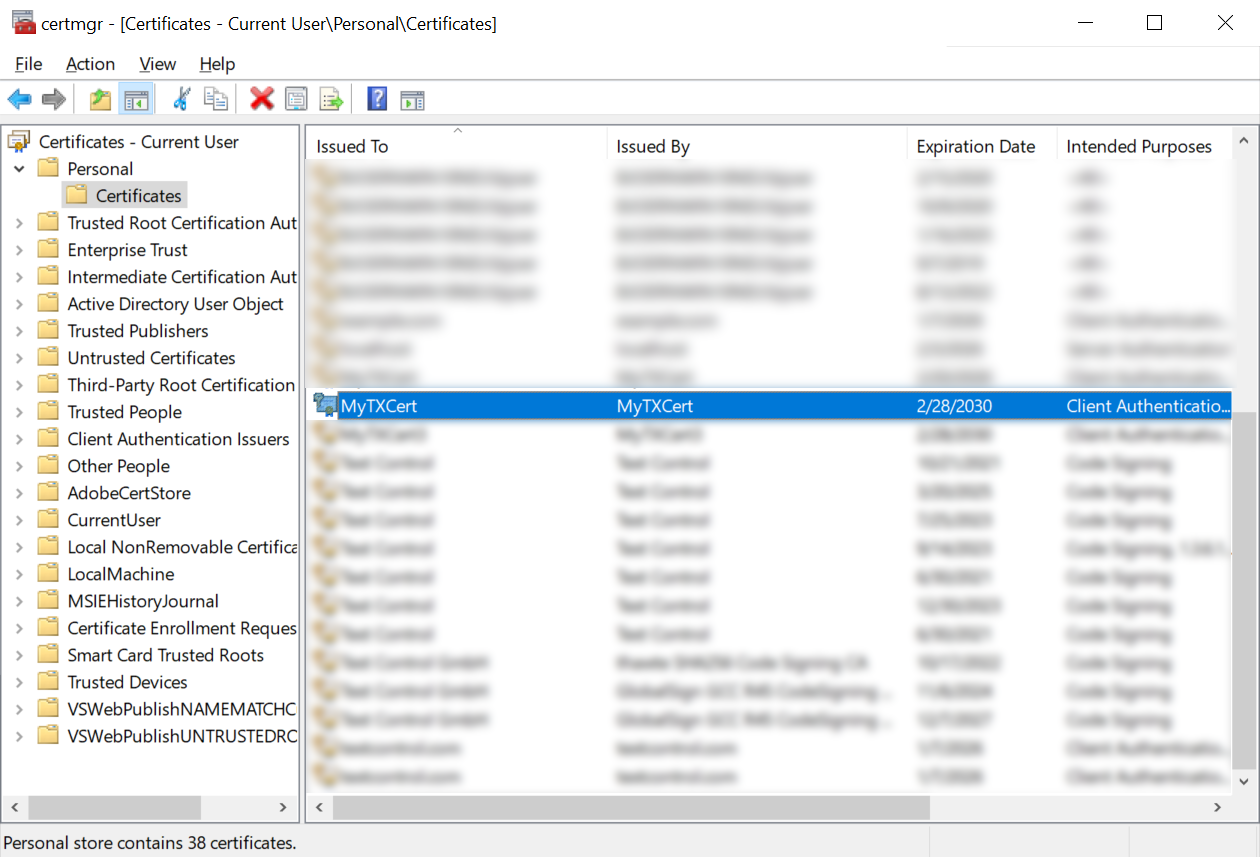
After you run the command, you can view the certificate in the Certificate Manager (certmgr.msc) under Personal > Certificates.

Exporting the Certificate to a PFX File
To use the certificate for digital signing, export it to a Personal Exchange Format (PFX) file. Run the following command in PowerShell:
| $Password = ConvertTo-SecureString -String "123" -Force -AsPlainText | |
| Export-PfxCertificate ` | |
| -Cert "Cert:\CurrentUser\My\$($cert.Thumbprint)" ` | |
| -FilePath "C:\Path\To\Certificate.pfx" ` | |
| -Password $Password |
This command exports the certificate to a PFX file. Here is a description of the parameters used:
| Parameter | Description |
|---|---|
| ConvertTo-SecureString | Securely defines the password for the PFX file. |
| Export-PfxCertificate | Exports the certificate with the private key. |
| FilePath | Path to the PFX file. |
| Password | Password to protect the PFX file. |
After you run the command, you can view the PFX file in the specified location.
Signing a PDF with the Certificate
Now that we have a PFX file, we can use it to sign a PDF document. In a .NET-based application, such as one that uses TX Text Control .NET, you can apply the digital signature using the Digital
╰ TXTextControl Namespace
╰ SaveSettings Class
╰ DigitalSignature Property
Specifies a DigitalSignature object, which defines an X.509 certificate. property.
The following code snippet shows how to sign a PDF document using a PFX file:
| using System.Security.Cryptography.X509Certificates; | |
| using TXTextControl; | |
| // Define the certificate password and path | |
| const string password = "123"; | |
| const string certificatePath = "certificate.pfx"; | |
| var cert = new X509Certificate2(certificatePath, password, X509KeyStorageFlags.Exportable); | |
| // Initialize TXTextControl to create and save a document with the digital signature | |
| using (var tx = new ServerTextControl()) | |
| { | |
| tx.Create(); | |
| tx.Text = "Hello, World!"; | |
| // Prepare the digital signature for the document | |
| var saveSettings = new SaveSettings | |
| { | |
| DigitalSignature = new DigitalSignature(cert, null) | |
| }; | |
| // Save the document as a PDF with the digital signature | |
| tx.Save("result.pdf", StreamType.AdobePDF, saveSettings); | |
| } |
Conclusion
Creating a self-signed certificate is a simple process using PowerShell. This certificate can be used for testing or internal purposes before obtaining a trusted certificate from a CA. The certificate can be exported to a PFX file and used to digitally sign PDF documents in a .NET-based application.


