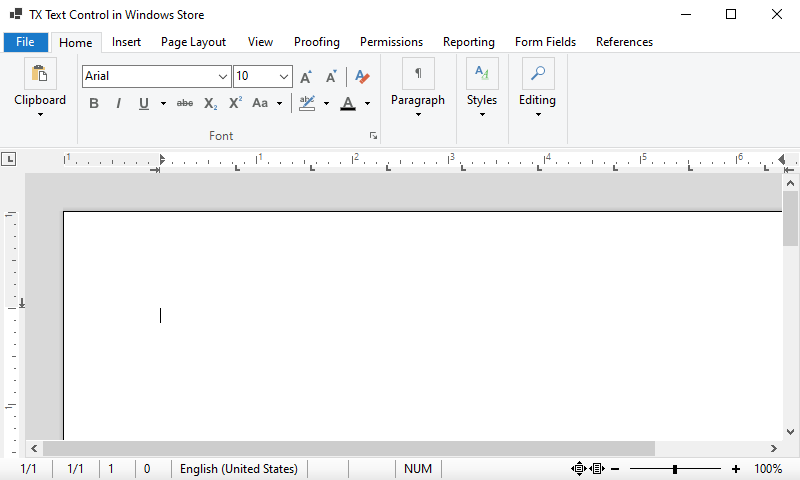
Both Microsoft Win32 technologies Windows Forms and WPF received a tremendous update motivated by the transition from the old .NET Framework to .NET (Core). In parallel, Microsoft provided support for the packaging technology MSIX that makes it possible for developers to package and deploy applications to Microsoft Store.
This tutorial shows how to create a simple Windows Forms application that can be packages and sideloaded using MSIX.
Prerequisites
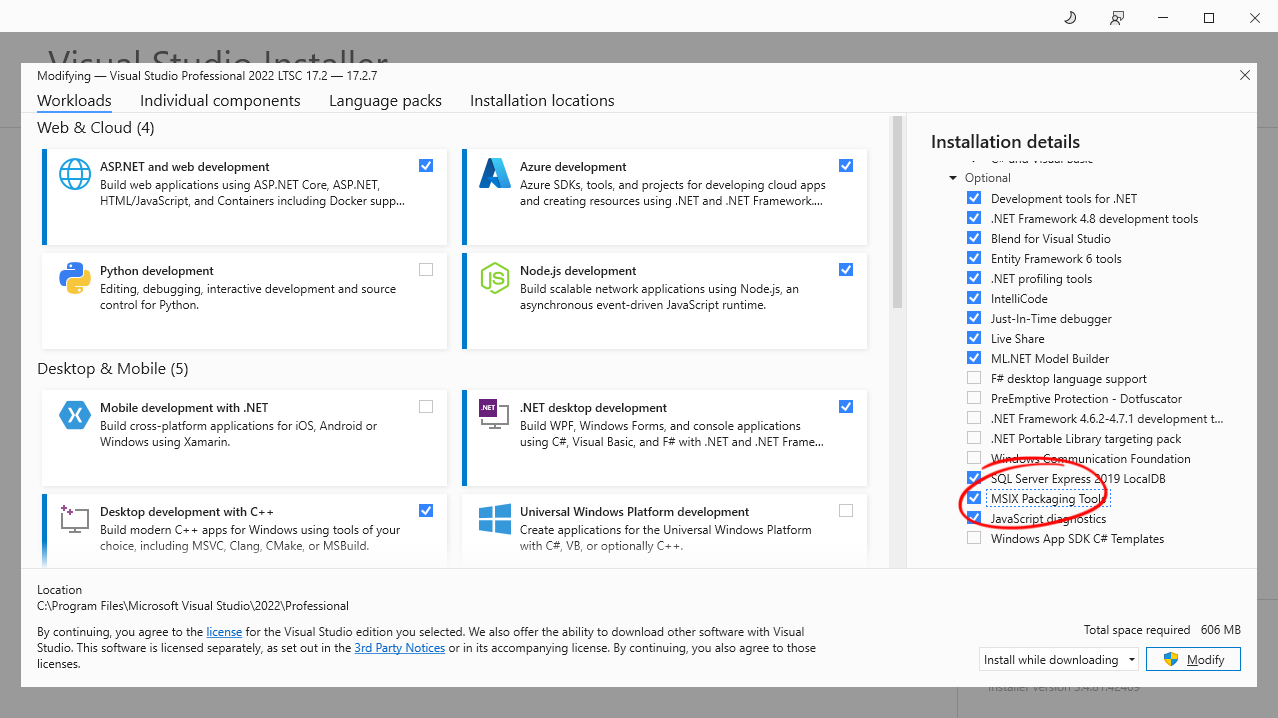
The MSIX Packaging Tools component is required and must be installed.
- Open the Visual Studio Installer.
- Select .NET desktop development and find the optional package MSIX Packaging Tools.Check the item and continue by clicking Modify.
Creating the Project
-
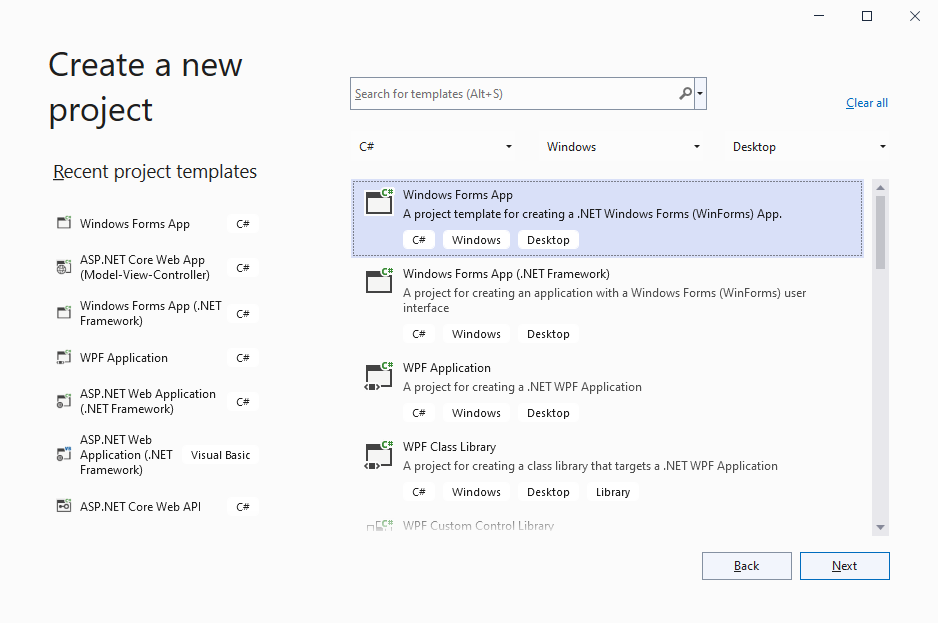
Open Visual Studio 2022 and create a new project. Select C# or Visual Basic from the Languages drop-down list, Windows from the Platform list and Desktop as the Project Type. Find the project template Windows Forms App and confirm with Next.
-
Specify a project name confirm with Next.
-
Select your preferred Framework version such as .NET 6 (Long-term support) and confirm with Create.
Adding the Control
-
Select the project in the Solution Explorer and click Project -> Manage NuGet Packages... from the main menu.
-
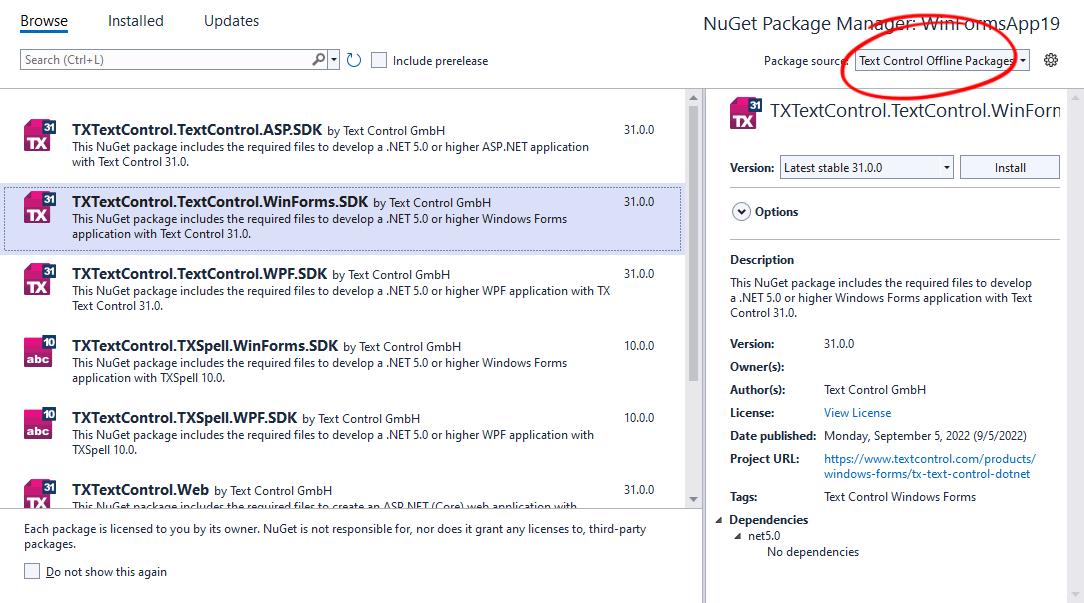
Select Text Control Offline Packages as the Package source and click Browse.
-
Select TXTextControl.TextControl.WinForms.SDK and click Install.
-
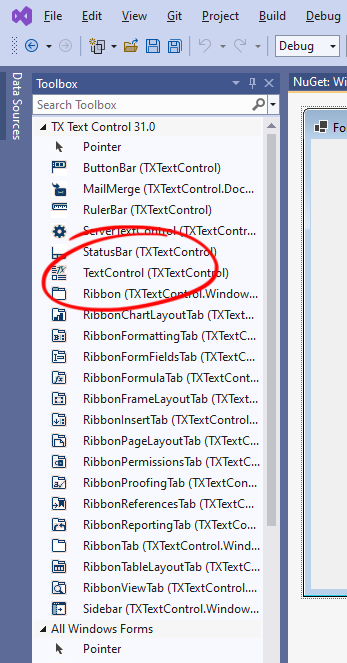
In the Solution Explorer, open the form Form1 and find the TX Text Control 31.0 tab in the Toolbox.
-
Select the icon TextControl and draw it onto the opened form.
-
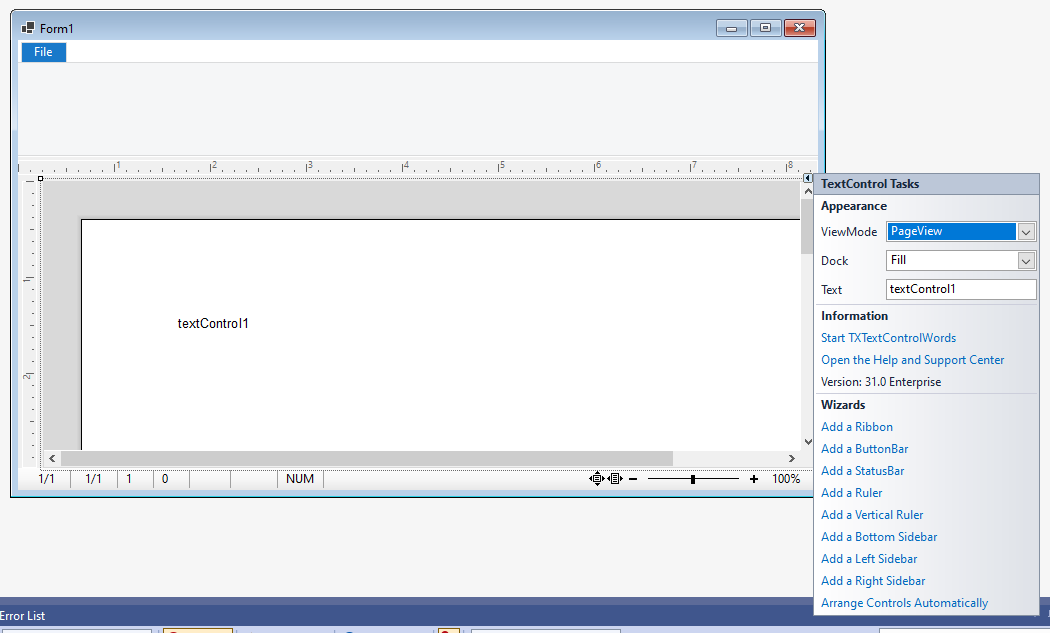
Click on the "Smart Tag" in the upper right corner of TextControl. In the Wizards group, click on Add a Ribbon, Add a Status Bar, Add a Ruler and Add a Vertical Ruler. Finally, click on Arrange Controls Automatically. The controls are now connected and docked to fill the container:
-
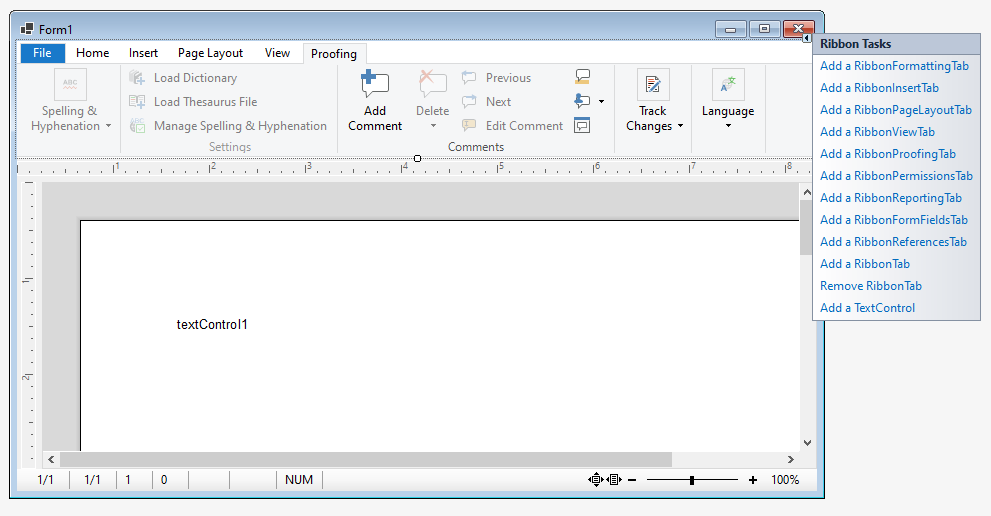
On the form, select the ribbon control by clicking the blue File tab title in order to click on the "Smart Tag" in the upper right corner of the ribbon control. Click on Add a RibbonFormattingTab, Add a RibbonInsertTab, Add a RibbonPageLayoutTab, Add a RibbonViewTab and Add a RibbonProofingTab.
Adding the Packaging Project
-
Select the solution in the Solution Explorer and choose Add -> New Project... from the File main menu.
-
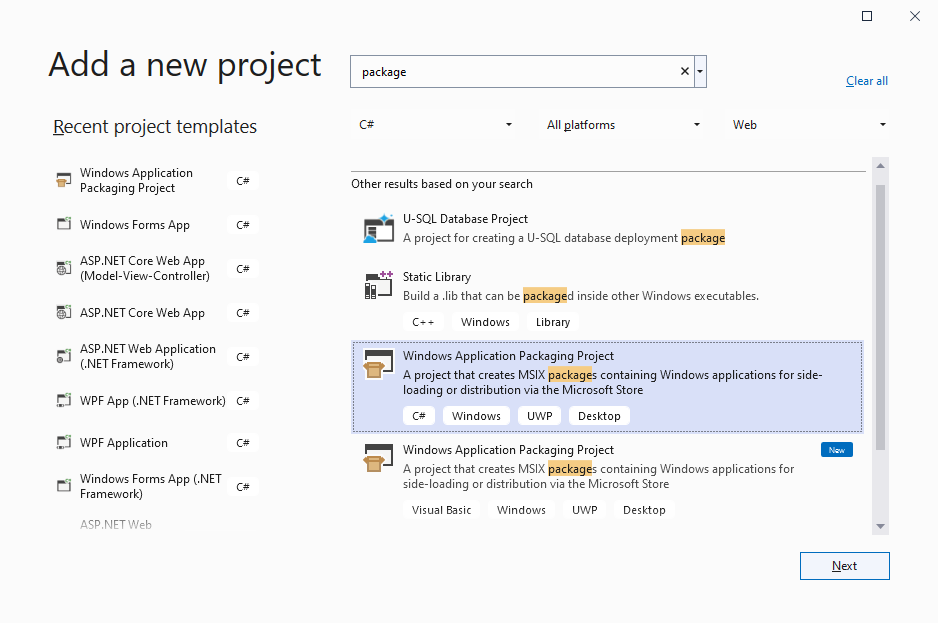
Find the Windows Application Packaging Project template, select it and confirm with Next.
-
Set a project name and continue by clicking the button Create.
-
In the following dialog, choose the target and minimum Window version for the deployed project. In case you are not sure, confirm the default values with OK.
-
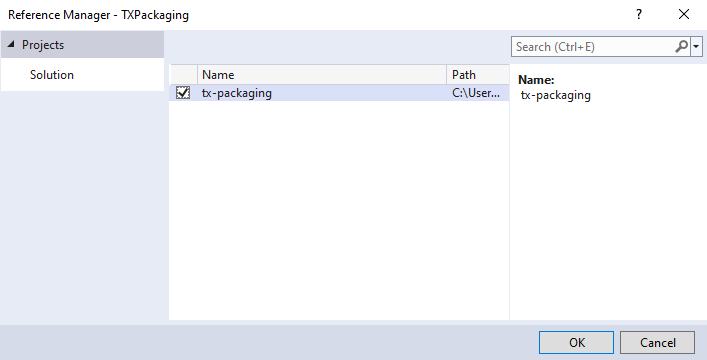
Select the newly created project in the Solution Explorer and choose Add Project Reference... from the Project main menu. Select the project created in the first step that uses TX Text Control and confirm with OK.
-
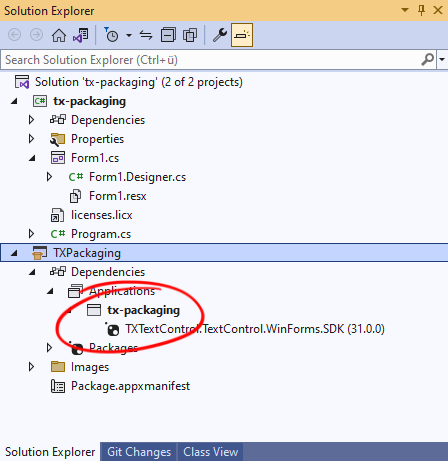
In the Solution Explorer, the dependency and including the references TX Text Control NuGet package is shown.
Creating the App Packages
-
In the Solution Explorer, select the packaging project and choose Publish -> Create App Packages... from the Project main menu.
-
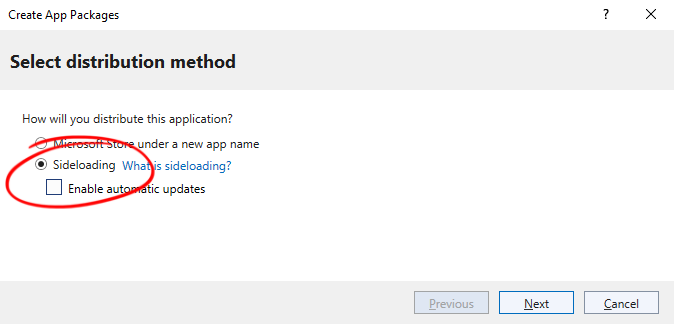
In the opened dialog, select Sideloading, uncheck Enable automatic updates and continue with Next.
Pro Tip
For demo purposes, we sideload the application. For an actual deployment, you can choose to deploy to the Microsoft Store.
-
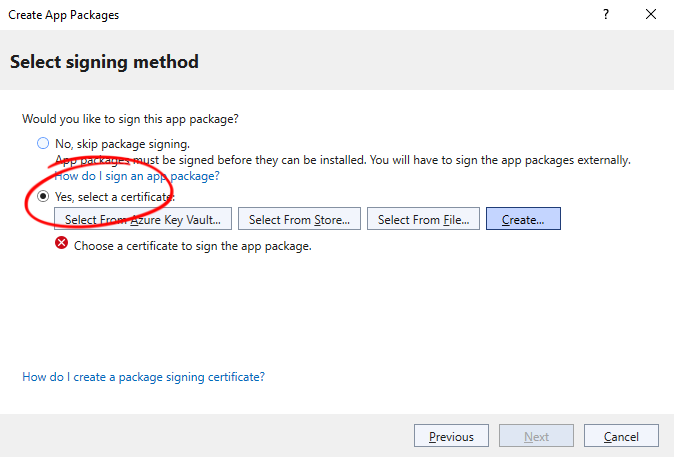
In the next step, select Yes, select a certificate: and choose a certificate.
Self-Signing Certificate
In case, you don't have a certificate, select Create and follow the instructions in the opened dialog.
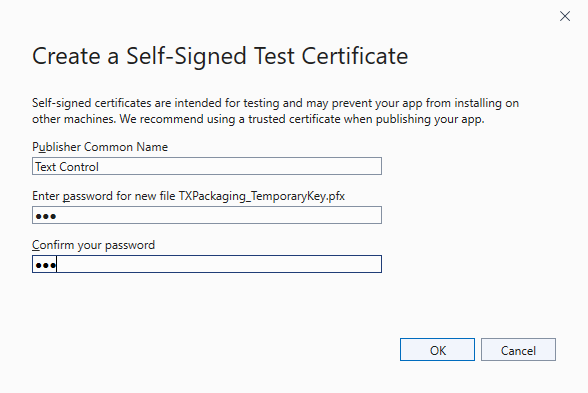
After a certificate has been selected, confirm with Next.
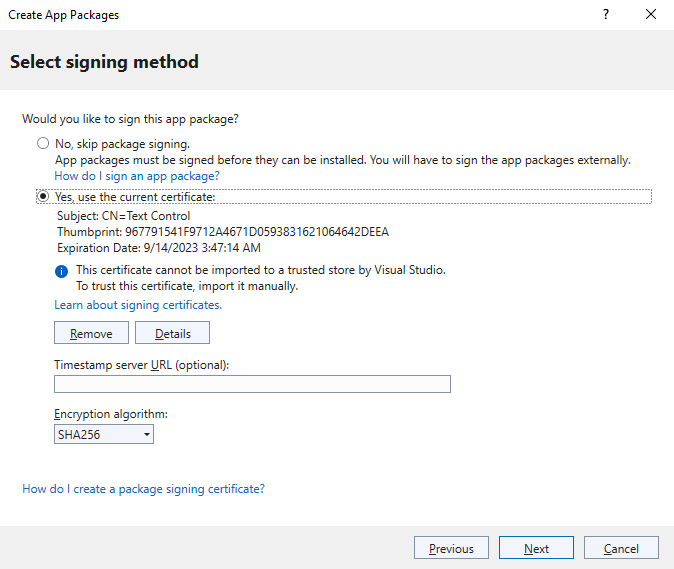
-
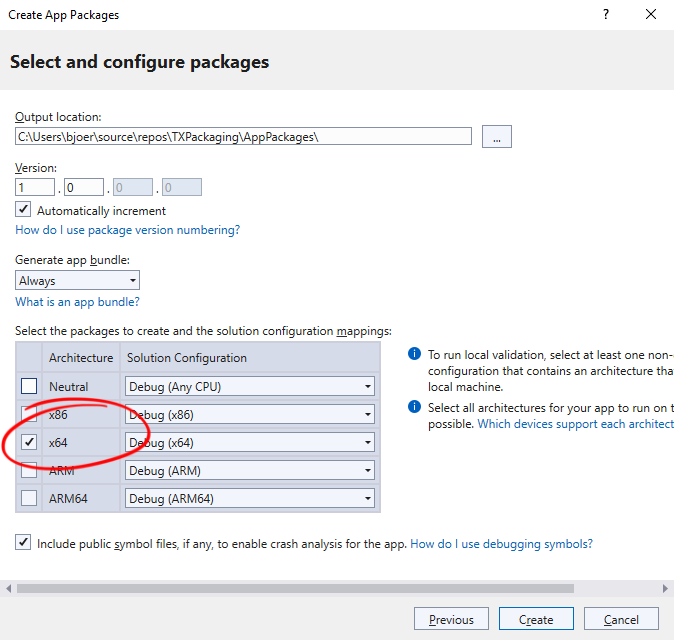
In the next step, select the configuration. For demo purposes, select x64 and confirm with Create.
Testing the Packages
-
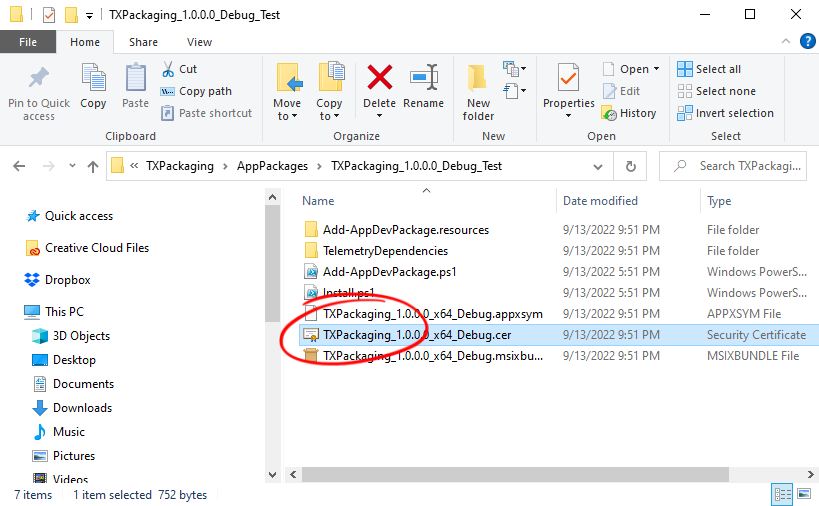
Open the file location of the created package in the File Explorer. Find the certificate file with the extension *.cer. Right-click the certificate and choose Install Certificate from the context menu.
-
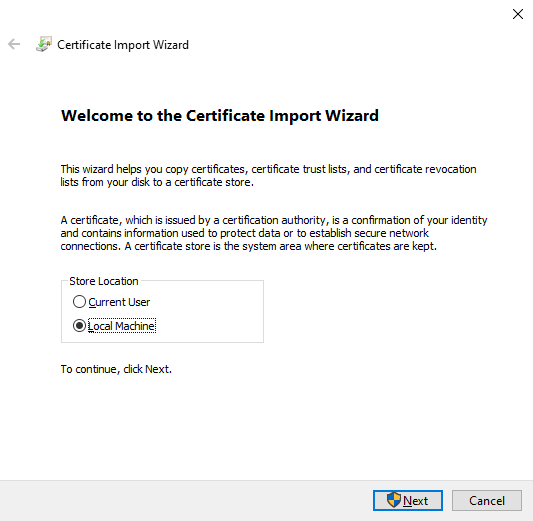
In the opened dialog, choose Local Machine and confirm with Next.
-
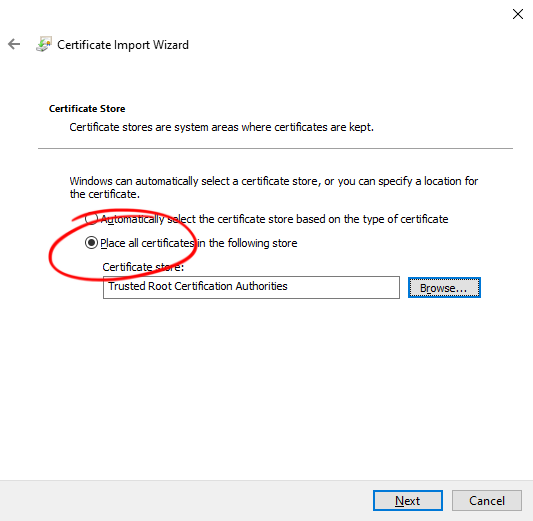
Select Place all certificates in the following store and Browse... for the Trusted Root Certification Store. Click Next and Finish to confirm.
-
Back in the File Explorer, double-click the *.msixbundle file to install the package.
-
In the opened dialog, click the button Install.
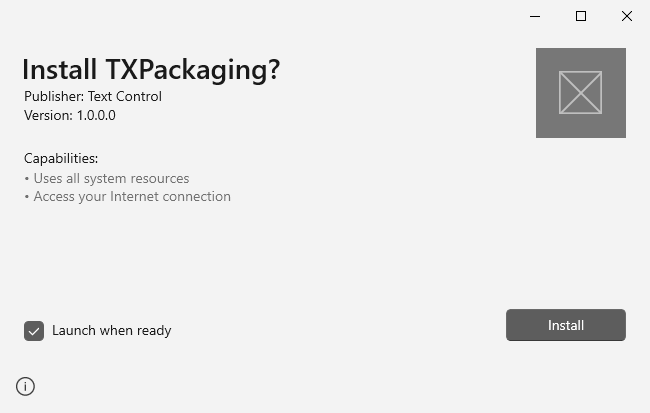
After the installation, the project will be started automatically:
