While the backend service of the HTML5-based editor, that synchronizes the document, requires a full Azure VM, the front-end ASP.NET MVC application can be deployed to Azure App Services. This concept allows a central server (cluster) to host the backend which is used by several applications deployed to various App Service instances.
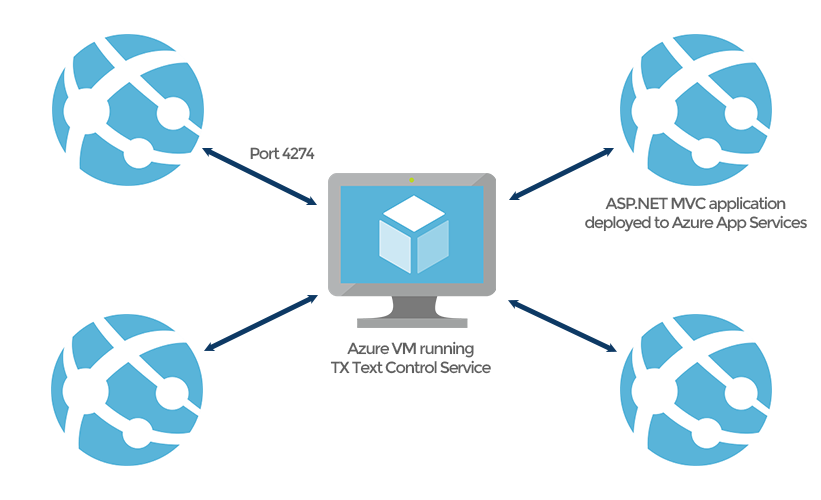
The following best practice explains how to deploy applications using this architecture.
Azure VM for the TX Text Control Backend Service
In order to build such a setup, a full Azure VM is required.
-
Create a new VM by choosing Compute from the Azure Marketplace and select Windows Server 2016 Datacenter as the template. Choose a size depending on your computing requirements. The number of CPUs is not really an important factor for this VM, but memory and a fast SSD helps.
-
When this VM has been created, connect to the VM and deploy the TX Text Control service as described in the documentation:
Redistribution and Deployment (scroll down to second part Deploying the TX Text Control Web Server). -
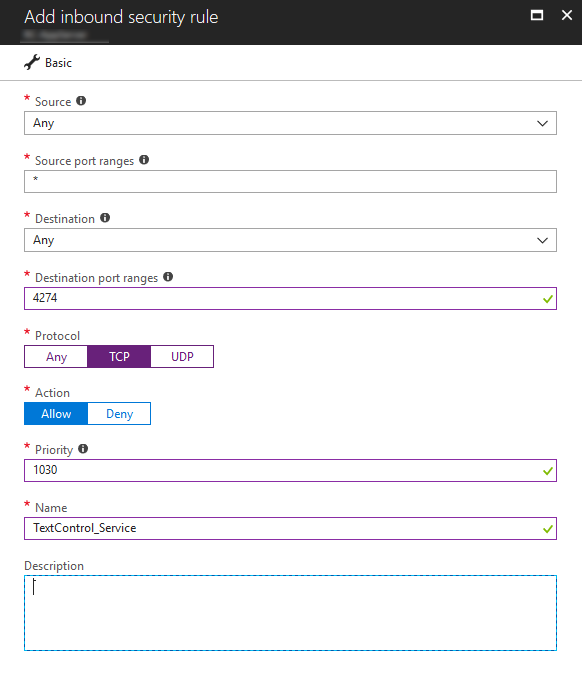
The ASP.NET MVC applications deployed to App Services will communicate with this VM directly using TCP on port 4275 (for version X16 - increments by 1 for each major release) and therefore, this port needs to be opened in the Network security group by adding an Inbound security rule. In the Azure portal, open the Inbound security rules for the Network security group of the created Azure VM.
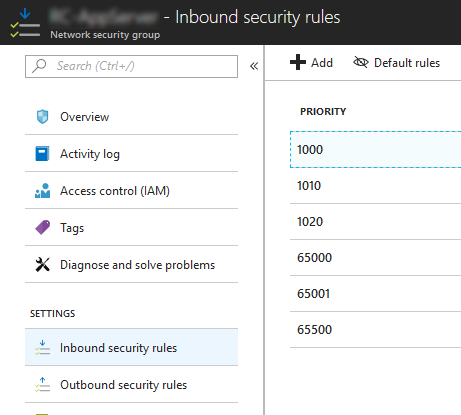
Click Add to create a new rule:
The ASP.NET MVC Application
In Visual Studio, create your ASP.NET MVC application using the HTML5-based editor according to the documentation.
-
In the view, where TX Text Control is used, set the ServiceAddress property to the IP of your created Azure VM.
This file contains bidirectional Unicode text that may be interpreted or compiled differently than what appears below. To review, open the file in an editor that reveals hidden Unicode characters. Learn more about bidirectional Unicode characters@using TXTextControl.Web.MVC @using TXTextControl.Web @Html.TXTextControl().TextControl(settings => { settings.Dock = DockStyle.Window; settings.ServiceAddress = IPAddress.Parse("192.168.0.1"); // change IP here }).Render() -
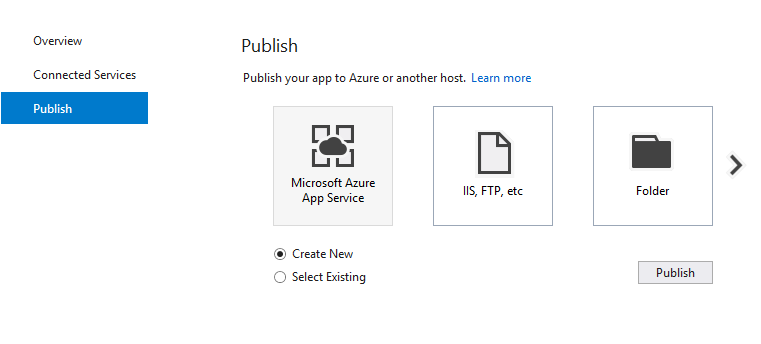
Select Publish from the Build main menu. In the opened dialog, select Microsoft Azure App Service, check Create New and confirm with Publish.
-
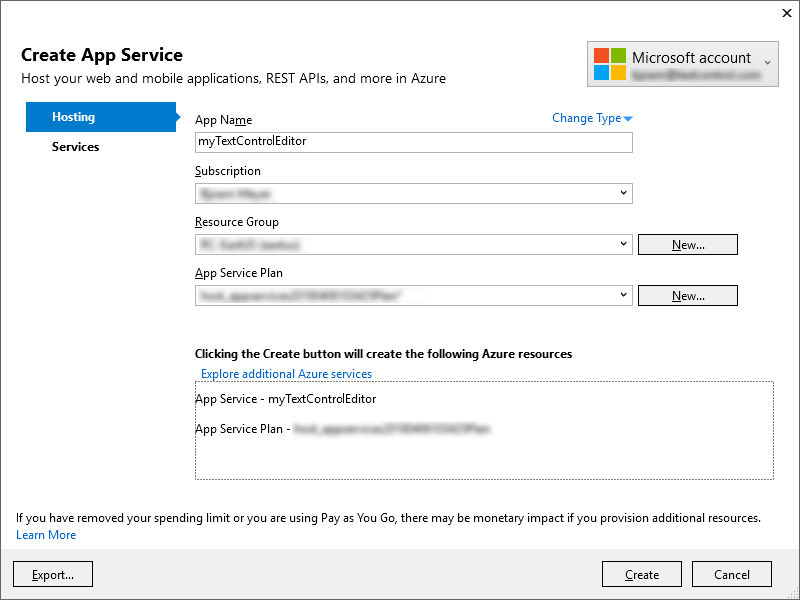
In the opened dialog, login with your Microsoft account, add an App Name, select your Azure Subscription, your Resource Group and App Service Plan (or create new ones) and confirm with Create.
-
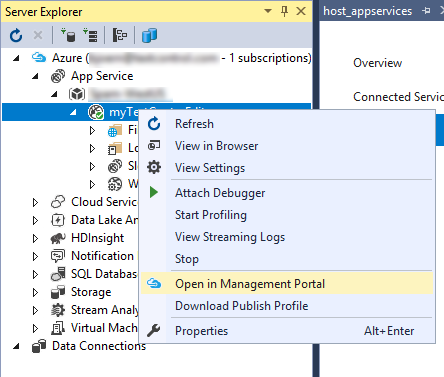
In the Solution Explorer, open the Server Explorer and expand the Azure node. Find your published App Service and choose Open in Management Portal from the right-click context menu.
-
In the Azure Portal, open the Application Settings, enable Web sockets and Save these changes.

Now, the ASP.NET MVC application is deployed to Azure App Services and ready to be accessed. The MVC application is synchronizing the document with the backend server hosted in the Azure VM.


