Important
This article applies to TX Text Control 32.0 SP2 and later. This functionality is not available in older versions of TX Text Control.
Wrapping third-party components is a common standard for reusing functionality in different places in a project or across projects. By encapsulating the library into a separate class, you can write unit tests for the specific functionality you need. Changes to the library can be made with confidence, knowing that the remaining codebase will be affected as little as possible.
Since TX Text Control 32.0 SP2, wrappers can include the required license and these class libraries can be used in unlicensed projects.
This article describes how to encapsulate TX Text Control in class libraries. This is useful if you want to use TX Text Control in multiple projects and you want to avoid code duplication.
Creating a Class Library
In the first step, we are going to create a new project for the class library in Visual Studio.
-
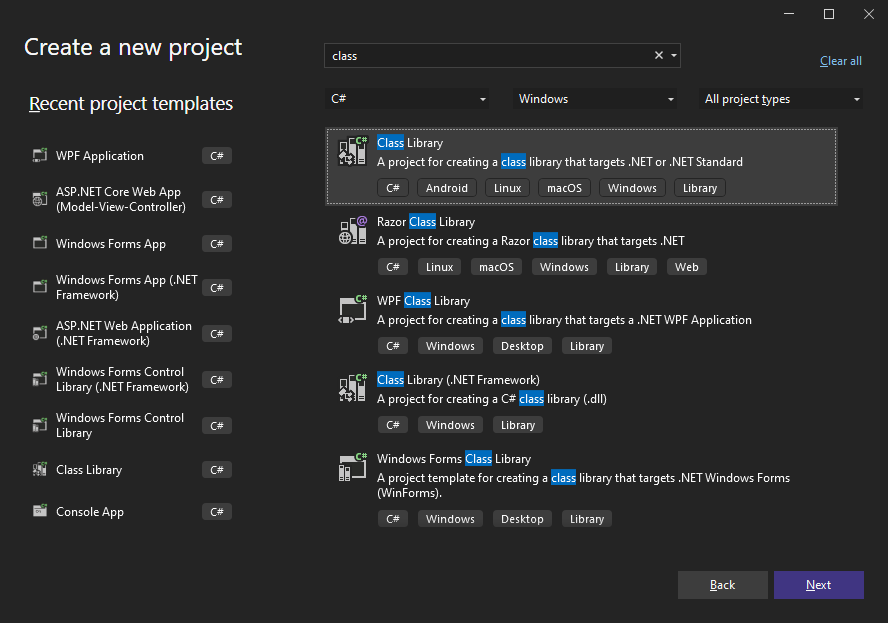
Open Visual Studio and create a new project. Select Class Library as the project template.

-
Enter a name for the project and click Next.
-
On the next page, select .NET 8 (Long Term Support) as the Framework and click Create.
Adding the NuGet Packages
After creating the project, we need to add the TX Text Control NuGet packages to the project.
-
In the Solution Explorer, select your created project and choose Manage NuGet Packages... from the Project main menu..
-
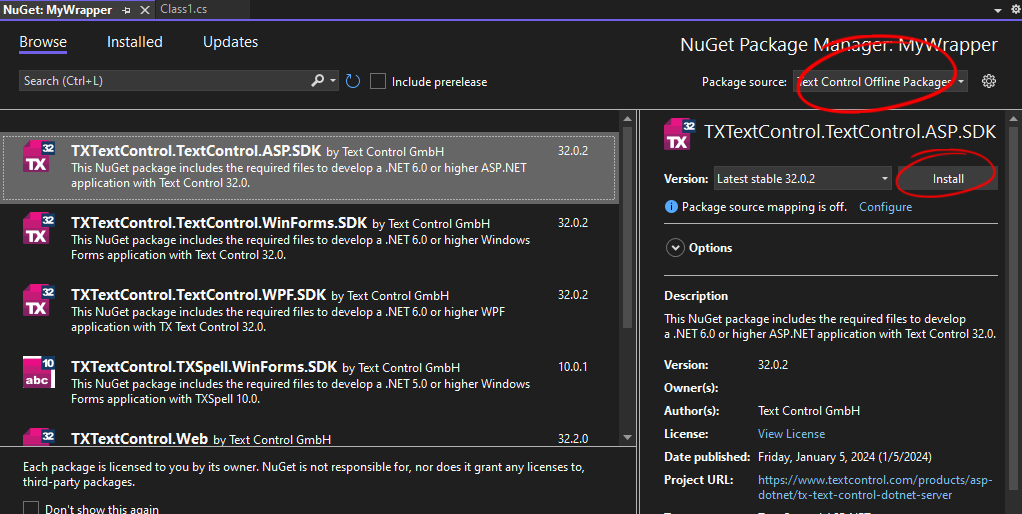
Select Text Control Offline Packages from the Package source drop-down.
Install the latest versions of the following package:
- TXTextControl.TextControl.ASP.SDK

Use any Text Control Component
This tutorial uses the ServerTextControl package that is available for TX Text Control .NET Server for ASP.NET. However, the concept is not limited to this component, but can be applied to any component that uses any platform, including Windows Forms, ASP.NET, and WPF.
-
Click on the Install button to add the packages to the project.
Specifying the Entry Assembly
As of 32.0 SP2, TX Text Control can be used in class libraries and called from other unlicensed assemblies. In previous versions of TX Text Control, the license must have been compiled into the main calling assembly. The new static property EntryAssembly has been introduced to allow you to specify where TX Text Control should look for the license.
-
Open Class1.cs and add the following constructor code to make the whole file look like this::
This file contains bidirectional Unicode text that may be interpreted or compiled differently than what appears below. To review, open the file in an editor that reveals hidden Unicode characters. Learn more about bidirectional Unicode charactersnamespace MyWrapper { public class Class1 { public Class1() { TXTextControl.ServerTextControl.EntryAssembly = typeof(Class1).Assembly; } } }
The assembly setting defines where TX Text Control looks for the license. In the above example, the class library itself contains the license, and TX Text Control will look for the license in the class library.
This allows another assembly to call members that use TX Text Control without a reference or license to TX Text Control.
Adding a Method
Now, we are going to add a method that uses the ServerTextControl class to return an HTML string.
-
Open Class1.cs and add the following method code to make the whole file look like this::
This file contains bidirectional Unicode text that may be interpreted or compiled differently than what appears below. To review, open the file in an editor that reveals hidden Unicode characters. Learn more about bidirectional Unicode charactersnamespace MyWrapper { public class Class1 { public Class1() { TXTextControl.ServerTextControl.EntryAssembly = typeof(Class1).Assembly; } public string GetHtml() { using (TXTextControl.ServerTextControl tx = new TXTextControl.ServerTextControl()) { tx.Create(); tx.Text = "Hello World!"; var html = ""; tx.Save(out html, TXTextControl.StringStreamType.HTMLFormat); return html; } } } }
Creating the Consuming Project
Now, we are going to create a new project that consumes the class library. This project can be a Windows Forms, WPF, or ASP.NET project. In this tutorial, we will use a .NET Console App.
-
Select your Solution in the Solution Explorer and click File -> Add -> New Project....
-
Select Console App as the project template and confirm with Next.
-
Enter a name for the project and click Next.
-
On the next page, select .NET 8 (Long Term Support) as the Framework and click Create.
Adding Project References
After creating the project, we need to add a reference to the class library project.
-
In the Solution Explorer, select your created project and choose Add -> Project Reference... from the Project main menu.
-
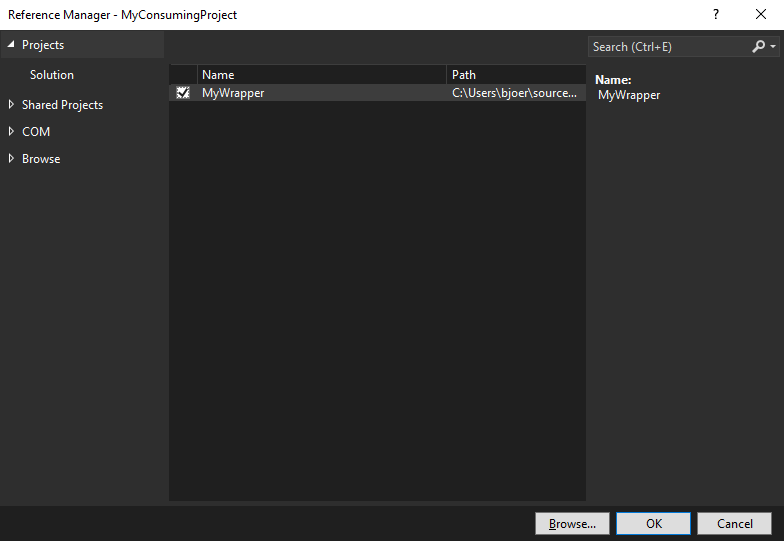
Click on the Projects tab and select the class library project.

-
Click on the OK button to add the reference to the project.
Calling the Wrapper
Now, we can call the wrapper class from the consuming project. In this example, we are going to create a new instance of the wrapper class and call the Load method to load a document from a file.
-
Open Program.cs and add the following code to make the whole file look like this::
This file contains bidirectional Unicode text that may be interpreted or compiled differently than what appears below. To review, open the file in an editor that reveals hidden Unicode characters. Learn more about bidirectional Unicode charactersusing MyWrapper; Class1 class1 = new Class1(); Console.WriteLine(class1.GetHtml());
Conclusion
TX Text Control can be easily encapsulated into class libraries. This allows you to reuse the functionality in multiple projects and to write unit tests for the specific functionality you need. TX Text Control does not require a direct reference or license from the calling project.

