Important Notice
This article explains how to use build servers for the following versions and requirements:
- TX Text Control .NET Server for ASP.NET 32.0 SP2 (or better)
- TX Text Control .NET Server for for Windows Forms 32.0 SP2 (or better)
- TX Text Control .NET Server for for WPF 32.0 SP2 (or better)
- .NET Framework 4.5, .NET 6 or better
Due to changes in the licensing mechanism, TX Text Control 32.0 SP2 now fully supports unit testing. This tutorial shows how to create a simple class library that uses TX Text Control and how to test it using NUnit.
Creating the Application
Make sure that you downloaded the latest version of Visual Studio 2022 that comes with the .NET 6 SDK.
Prerequisites
The following tutorial requires a trial version of TX Text Control .NET Server for ASP.NET.
-
In Visual Studio 2022, create a new project by choosing Create a new project.
-
Select Console App as the project template and confirm with Next.
-
Choose a name for your project and confirm with Next.
-
In the next dialog, choose .NET 6 (Long-term support) as the Framework and confirm with Create.
Adding the NuGet Package
-
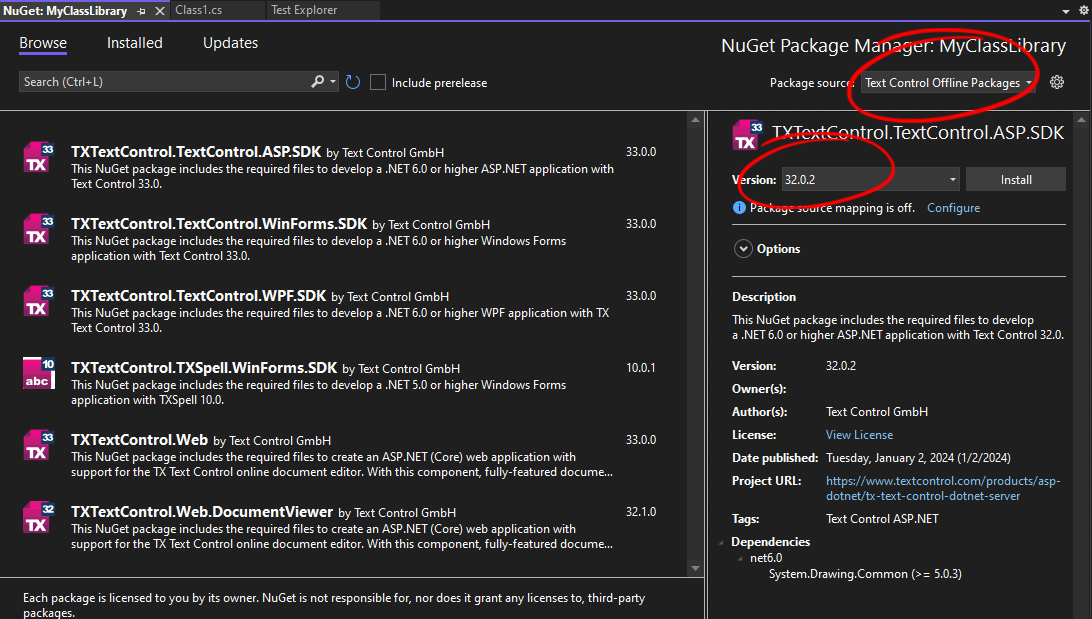
In the Solution Explorer, select your created project and choose Manage NuGet Packages... from the Project main menu.
Select Text Control Offline Packages from the Package source drop-down.
Install the latest versions of the following package:
- TXTextControl.TextControl.ASP.SDK

Adding Code
A sample method using the ServerTextControl class is implemented in this step.
-
Open the code view of the Class1 file you created and replace the code with the following code.
This file contains bidirectional Unicode text that may be interpreted or compiled differently than what appears below. To review, open the file in an editor that reveals hidden Unicode characters. Learn more about bidirectional Unicode charactersnamespace MyClassLibrary { public static class Class1 { static Class1() { TXTextControl.ServerTextControl.EntryAssembly = typeof(Class1).Assembly; } public static string GetHtml() { using (TXTextControl.ServerTextControl tx = new TXTextControl.ServerTextControl()) { tx.Create(); TXTextControl.Selection selection = new TXTextControl.Selection(); selection.Text = "Hello, World!"; selection.Start = 0; selection.Length = 5; selection.Bold = true; tx.Selection = selection; var html = ""; tx.Save(out html, TXTextControl.StringStreamType.HTMLFormat); return html; } } } } Note the static constructor that sets the EntryAssembly property to the class library itself, so that the calling assembly of the unit test doesn't require a license.
Using Windows Forms or WPF?
The above code uses the ServerTextControl class. The entry assembly must be defined for each Text Control type used:
- ServerTextControl
This file contains bidirectional Unicode text that may be interpreted or compiled differently than what appears below. To review, open the file in an editor that reveals hidden Unicode characters. Learn more about bidirectional Unicode characters
TXTextControl.ServerTextControl.EntryAssembly = typeof(Class1).Assembly; - TextControl
This file contains bidirectional Unicode text that may be interpreted or compiled differently than what appears below. To review, open the file in an editor that reveals hidden Unicode characters. Learn more about bidirectional Unicode characters
TXTextControl.TextControl.EntryAssembly = typeof(Class1).Assembly; - WPF.TextControl
This file contains bidirectional Unicode text that may be interpreted or compiled differently than what appears below. To review, open the file in an editor that reveals hidden Unicode characters. Learn more about bidirectional Unicode characters
TXTextControl.WPF.TextControl.EntryAssembly = typeof(Class1).Assembly;
Adding Test Project
Now, we are going to add a new project to the solution that contains the unit tests.
-
In the Solution Explorer, select your created solution and choose Add -> Project... from the File main menu.
-
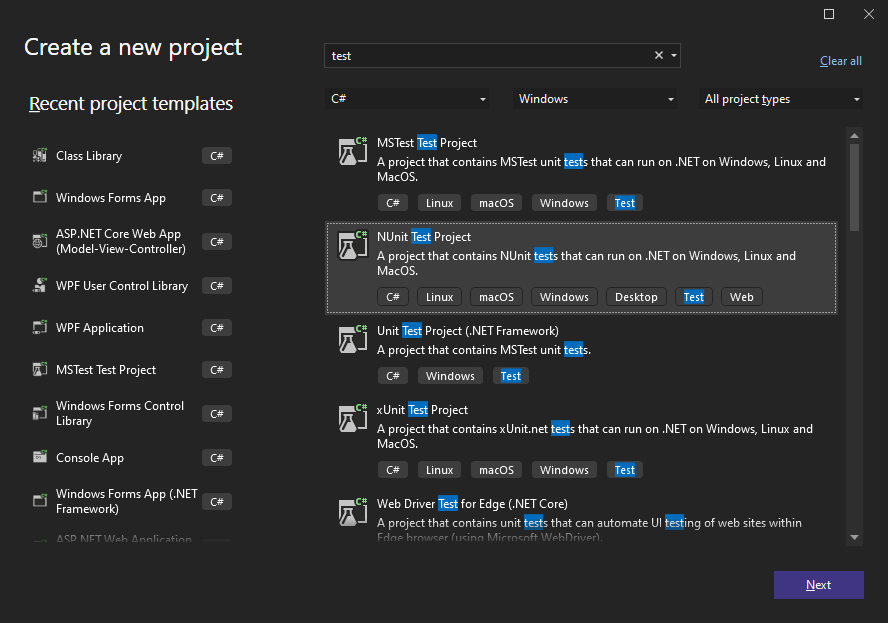
In the project templates, search for Test and choose NUnit Test Project.

-
Choose a name for your project and confirm with Next.
-
In the next dialog, choose .NET 6 (Long-term support) as the Framework and confirm with Create.
Adding the Project Reference
Now, we are adding a reference to the project that contains the code to test.
-
In the Solution Explorer, select your created test project and choose Add Project Reference... from the Project main menu.
-
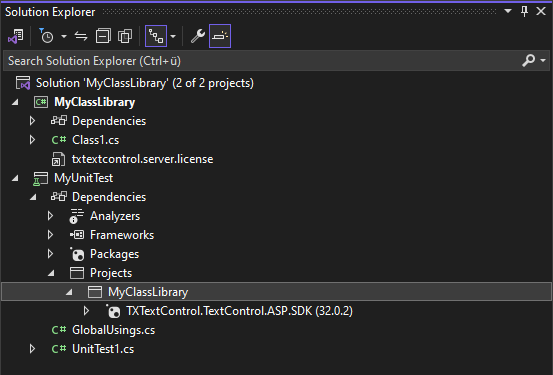
In the Projects tab, check the project that contains the code to test and confirm with OK. Your Solution Explorer will look similar to the one shown in the next screenshot.

Adding the Tests
-
Open the code view of the UnitTest1 file you created and replace the code with the following code.
This file contains bidirectional Unicode text that may be interpreted or compiled differently than what appears below. To review, open the file in an editor that reveals hidden Unicode characters. Learn more about bidirectional Unicode charactersnamespace MyUnitTest { public class Tests { [SetUp] public void Setup() { } [Test] public void Test1() { var html = MyClassLibrary.Class1.GetHtml(); // if html contains "Hello, World!" the test passes Assert.IsTrue(html.Contains("Hello, World!")); } } }
Running the Tests
Now, we are ready to run the tests.
-
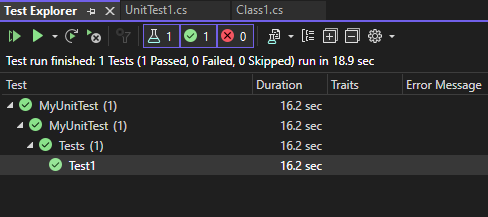
Choose Run All Tests from the Test main menu.
-
The test results are shown in the Test Explorer.


